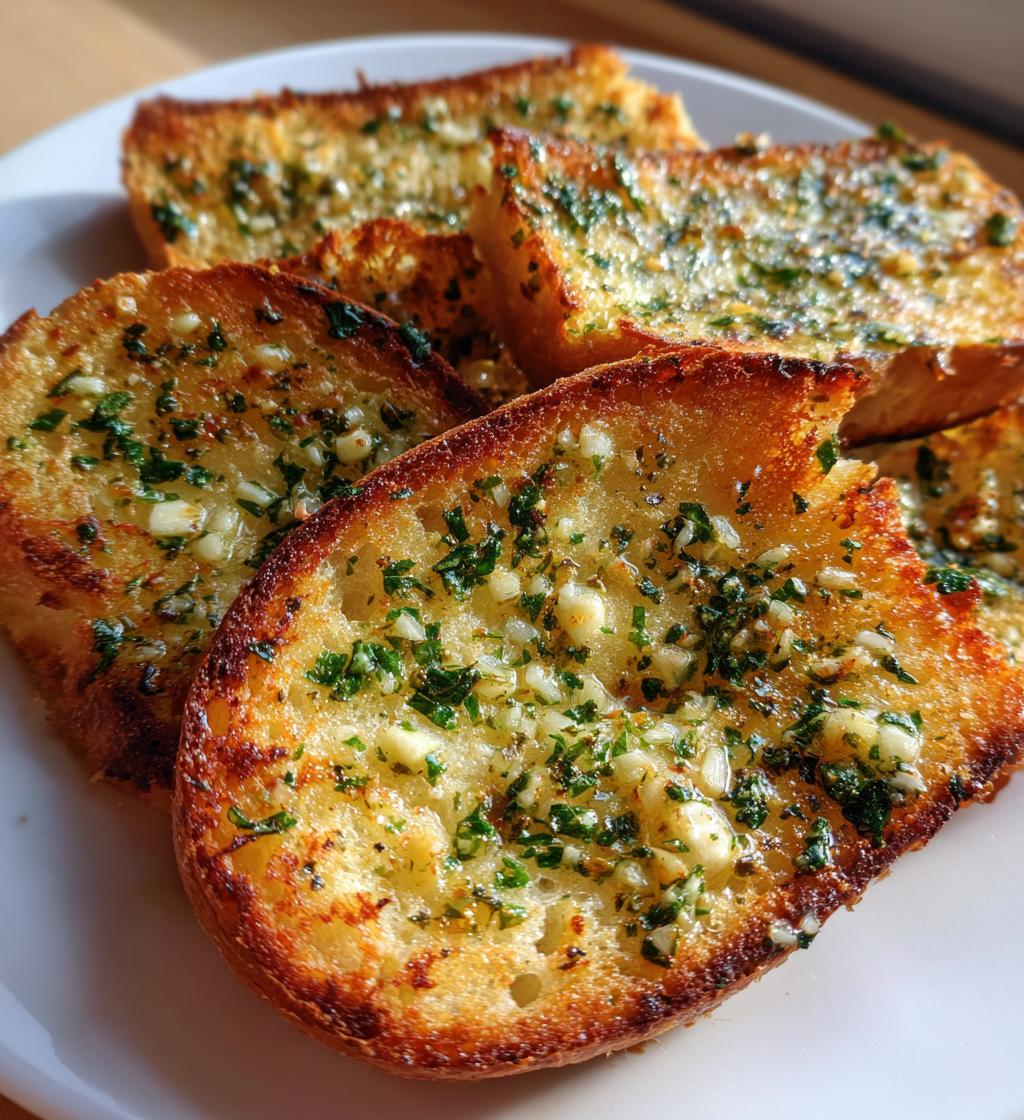
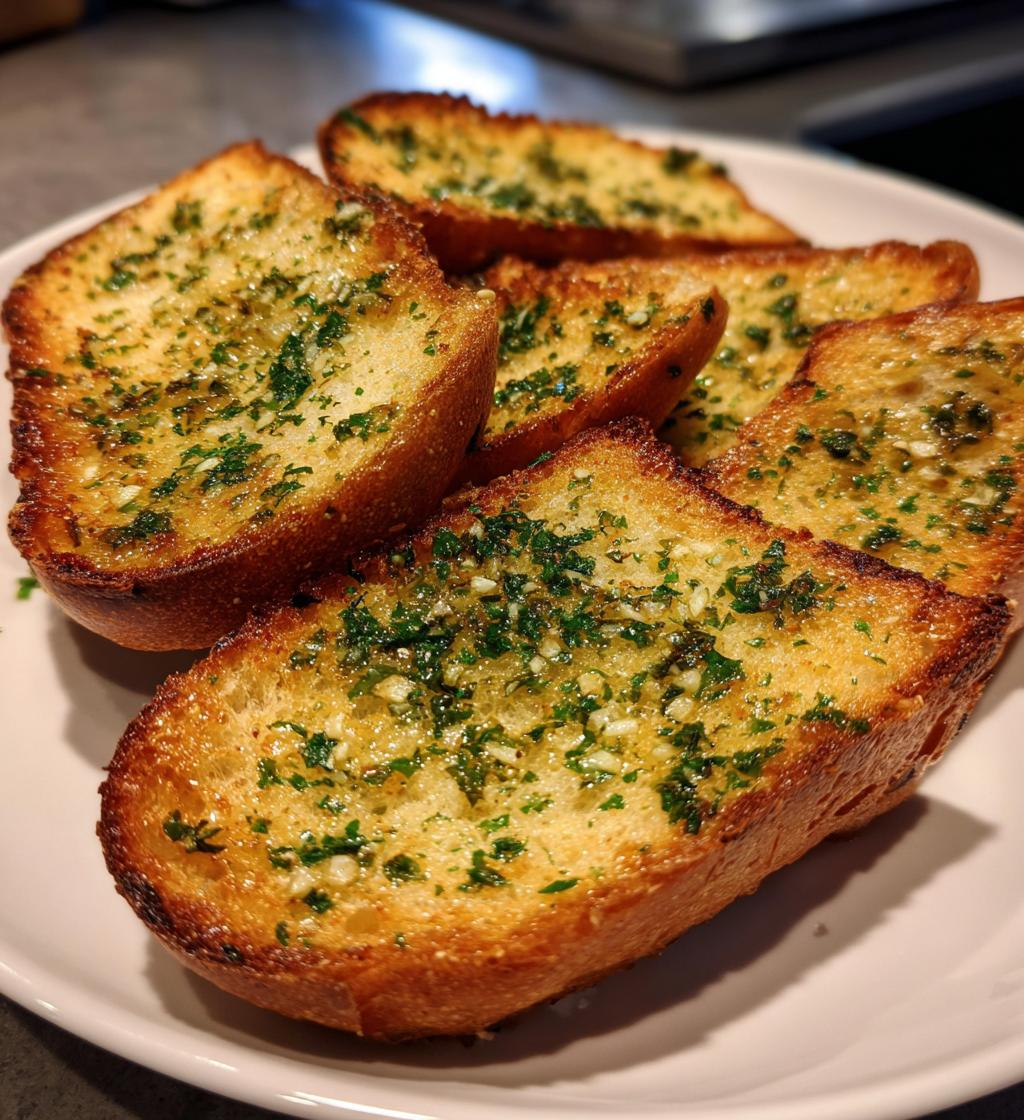
Oh my gosh, let me tell you about my latest obsession – Air Fryer Garlic Bread that’ll make you forget all about that oven-baked stuff! I stumbled onto this method last winter when my oven decided to quit on spaghetti night (of all nights!). What came out of that little crisis was the crispiest, most flavorful garlic bread my family’s ever devoured. The air fryer works magic on French bread – giving you that perfect golden crunch on the outside while keeping the inside beautifully soft. And the best part? It’s ready in less time than it takes to boil pasta water. Trust me, once you try garlic bread this way, you’ll never go back!
Why You’ll Love This Air Fryer Garlic Bread
Let me count the ways this recipe will become your new go-to:
- Crazy fast – Ready in under 15 minutes (oven garlic bread who?)
- Perfect crunch – That golden, crispy exterior with a soft center you dream about
- No soggy middles – The air fryer circulation gives even browning every time
- Easy cleanup – Just one little basket to wash instead of a sheet pan
- Garlic heaven – Fresh minced garlic makes all the difference, trust me
Seriously, it’s the kind of side dish that steals the show at dinner. My kids actually cheer when I make it!
Ingredients for Air Fryer Garlic Bread
Here’s everything you’ll need to make the most irresistible garlic bread of your life – measured exactly how Grandma would want it (she was very particular about her garlic bread, let me tell you!):
- 1 loaf French bread or baguette – Day-old works great if you like extra crunch!
- 1/2 cup butter, softened – Not melted! Leave it out for 30 minutes first
- 4 cloves garlic, minced – Fresh only, please – none of that jarred stuff
- 2 tbsp fresh parsley, chopped – The bright green color makes it pretty
- 1/4 tsp salt – Just enough to make the flavors pop
- 1/4 tsp black pepper – Freshly cracked if you’re feeling fancy
- 1/4 cup grated Parmesan cheese (optional) – Because cheese makes everything better
See? Simple stuff you probably already have. Now let’s make some magic!
Equipment You’ll Need
Don’t worry – you won’t need any fancy gadgets for this! Just grab:
- Your trusty air fryer (any size works – we’ll cook in batches if needed)
- A small mixing bowl for that glorious garlic butter
- A sharp knife for slicing bread
- A butter knife or small spatula for spreading
That’s it! Now let’s get cooking.
How to Make Air Fryer Garlic Bread
Okay, let’s get down to business! Making this garlic bread is so easy you’ll wonder why you ever used the oven. Just follow these simple steps, and you’ll have golden, crispy perfection in no time.
Step 1: Prepare the Garlic Butter Mixture
First things first – that glorious garlic butter! Grab your softened butter (remember, not melted – that makes a mess) and plop it into your mixing bowl. Now add your freshly minced garlic – I like to press mine through a garlic press for extra fine pieces that distribute evenly. Toss in the chopped parsley, salt, and pepper, then mix it all together until it’s beautifully combined. Oh, the smell already! Pro tip: Let this sit for 5 minutes before spreading to let the flavors really mingle.
Step 2: Assemble and Cook
While your air fryer preheats to 350°F (yes, preheating matters for even cooking!), slice your bread into 1-inch thick pieces. Thinner slices will get too crispy, thicker ones won’t crisp enough – trust me, I’ve tested them all! Spread that fragrant garlic butter generously on both sides of each slice. Don’t be shy – this is where the magic happens!
Now, arrange the slices in a single layer in your air fryer basket. No overlapping! They need their personal space to get perfectly crispy. Cook for 4-5 minutes, flipping halfway through. Keep an eye on them after 3 minutes – all air fryers run a little different. You want them golden brown with those beautiful little crispy edges. If you’re adding Parmesan, sprinkle it on right when they come out so it melts slightly from the heat. Then try not to eat them all before they make it to the table!
Tips for Perfect Air Fryer Garlic Bread
After making this recipe more times than I can count (my family demands it weekly!), I’ve learned a few tricks for absolute garlic bread perfection:
- Fresh is best – That jarred minced garlic just doesn’t give the same punch as fresh cloves. Trust me on this!
- Don’t crowd the basket – Give each slice some breathing room or they’ll steam instead of crisp up
- Watch closely – All air fryers are different! Start checking at 3 minutes to prevent burning
- Day-old bread works wonders – Slightly stale bread gets extra crispy without drying out
- Butter temperature matters – Softened butter spreads easily without tearing the bread
Follow these simple tips, and you’ll have restaurant-quality garlic bread every single time!
Serving Suggestions for Air Fryer Garlic Bread
Oh, the possibilities! This garlic bread isn’t just a sidekick – it’s the star that makes every meal better. We love it piled high next to steaming bowls of tomato soup (childhood nostalgia at its finest!) or served alongside spaghetti for that classic Italian combo. For fancy nights, I’ll sprinkle extra Parmesan and a pinch of red pepper flakes on top right before serving – it makes the table look like a restaurant! And don’t even get me started on how perfect these crispy slices are for mopping up the last bits of alfredo sauce or chili. Honestly, I’ve caught my husband eating it plain as a snack more times than I can count!
Storage and Reheating Instructions
Okay, confession time – leftovers rarely happen in my house because we gobble this up! But if you somehow have some left, here’s how to keep that crispy magic alive. Store cooled slices in an airtight container at room temperature for up to 2 days. When you’re ready for round two, pop them back in the air fryer at 350°F for just 1-2 minutes – they’ll come out nearly as crispy as fresh! Microwaving? Don’t even think about it unless you like sad, soggy bread. Learned that lesson the hard way!
Air Fryer Garlic Bread Variations
Once you’ve mastered the basic recipe (and trust me, you will!), it’s time to play! My family loves when I mix things up – here are our favorite twists:
- Cheese explosion – Add shredded mozzarella during the last minute of cooking for melty goodness
- Herb garden – Swap parsley for fresh basil or oregano when Italian night calls
- Spicy kick – Mix in 1/4 tsp crushed red pepper flakes with the garlic butter
- Everything bagel – Sprinkle with everything seasoning before air frying
- Garlic parmesan – Double the Parmesan and add a pinch of garlic powder
The best part? You can customize each batch to match whatever you’re serving. Happy experimenting!
Nutritional Information
Here’s the skinny on each delicious slice (based on using all the ingredients listed): about 180 calories with that perfect balance of crispy carbs and garlicky goodness. But heads up – these numbers can change depending on your exact bread and butter brands. My nutritionist friend always reminds me that homemade means variables, but hey, that’s what makes cooking fun!
Frequently Asked Questions
I’ve gotten so many questions about this air fryer garlic bread since I started making it – here are the answers to the ones that pop up most often!
Can I use dried herbs instead of fresh?
You can, but fresh really does make all the difference! If you must use dried, cut the amount in half (so 1 tablespoon dried parsley instead of 2 tablespoons fresh). The flavor won’t be as bright, but it’ll still taste delicious. Just promise me you’ll try it with fresh herbs at least once!
How do I keep the bread from getting soggy?
The key is spreading the garlic butter evenly but not too thick, and never overlapping slices in the air fryer. That air circulation is what gives you that perfect crunch! Also, day-old bread works better than super fresh for avoiding sogginess.
Can I make this with gluten-free bread?
Absolutely! Just look for a sturdy gluten-free French bread or baguette. You might need to adjust cooking time by 1-2 minutes since GF breads often brown faster. The results are still wonderfully crispy!
Why is my garlic burning before the bread crisps up?
Ah, the dreaded burnt garlic! Two fixes: either mince your garlic super fine (almost paste-like) so it cooks evenly, or cook at 325°F for slightly longer. Some air fryers run hotter than others – mine definitely does!
Can I prepare the garlic butter ahead of time?
You sure can! Mix it up and store in the fridge for 2-3 days (the flavors actually get better!). Just let it soften again before spreading. I often make a double batch to have ready for last-minute garlic bread cravings!
Rate This Recipe
Did this air fryer garlic bread make your taste buds dance? I’d love to hear how it turned out – leave a comment and rating below to share your crispy success!
Print
Irresistible Air Fryer Garlic Bread in 15 Minutes Flat
- Total Time: 15 minutes
- Yield: 8 servings 1x
- Diet: Vegetarian
Description
Crispy, golden garlic bread made easily in the air fryer.
Ingredients
- 1 loaf French bread or baguette
- 1/2 cup butter, softened
- 4 cloves garlic, minced
- 2 tbsp fresh parsley, chopped
- 1/4 tsp salt
- 1/4 tsp black pepper
- 1/4 cup grated Parmesan cheese (optional)
Instructions
- Preheat air fryer to 350°F (180°C).
- Cut the bread into 1-inch slices.
- In a bowl, mix butter, garlic, parsley, salt, and pepper.
- Spread the garlic butter mixture on both sides of each bread slice.
- Place slices in the air fryer basket in a single layer.
- Cook for 4-5 minutes, flipping halfway, until golden and crispy.
- Sprinkle with Parmesan cheese if desired.
- Serve warm.
Notes
- Use fresh garlic for the best flavor.
- Adjust cooking time based on your air fryer model.
- Store leftovers in an airtight container for up to 2 days.
- Prep Time: 10 minutes
- Cook Time: 5 minutes
- Category: Appetizer
- Method: Air Fryer
- Cuisine: Italian
Nutrition
- Serving Size: 1 slice
- Calories: 180
- Sugar: 1g
- Sodium: 280mg
- Fat: 10g
- Saturated Fat: 6g
- Unsaturated Fat: 3g
- Trans Fat: 0g
- Carbohydrates: 19g
- Fiber: 1g
- Protein: 4g
- Cholesterol: 25mg
Keywords: air fryer garlic bread, easy garlic bread, crispy bread
")
")
")
")