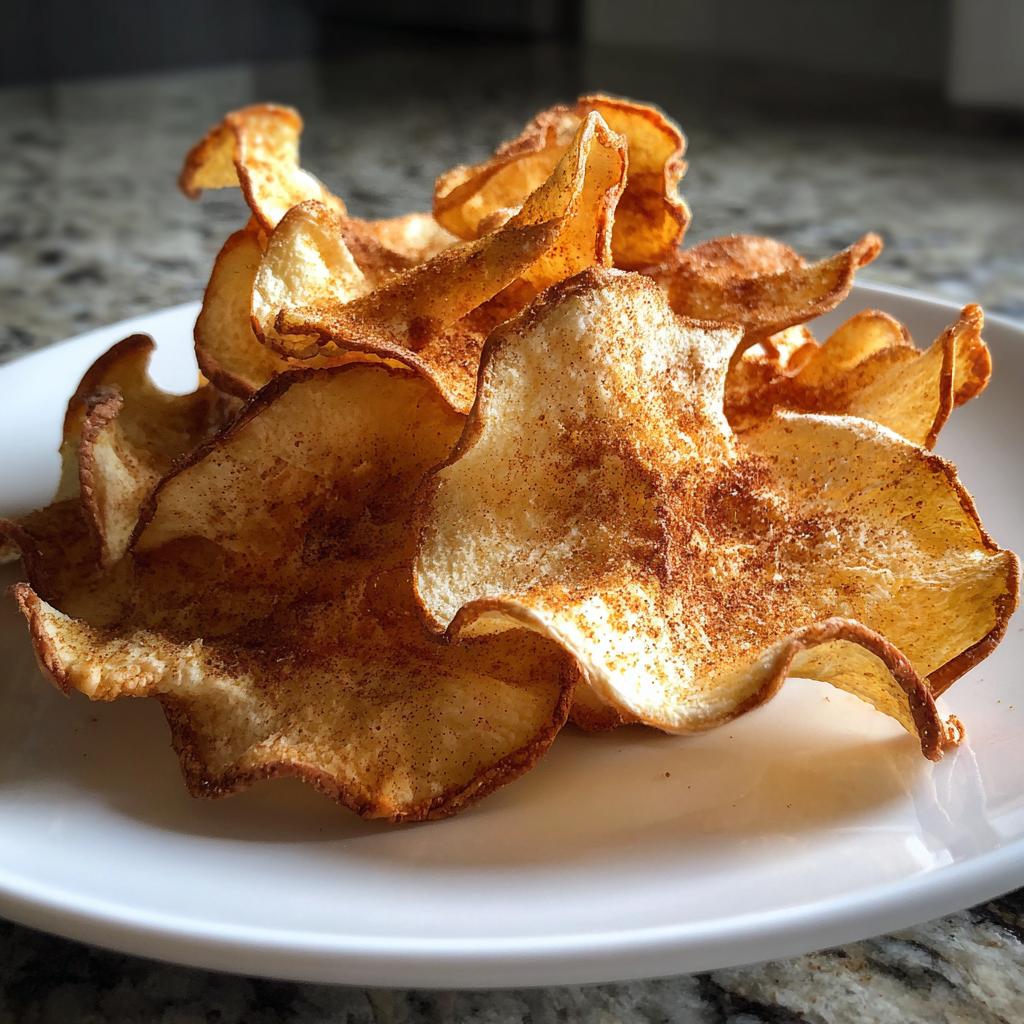
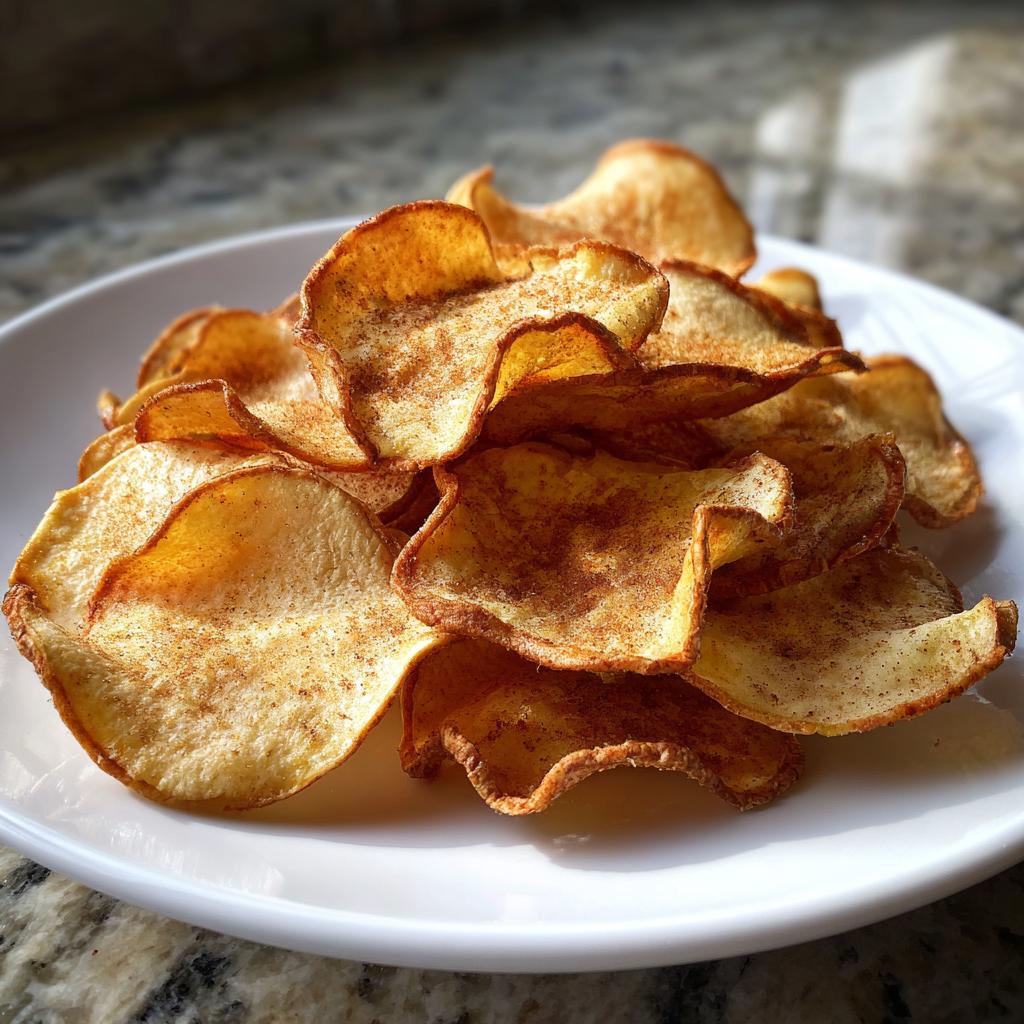
No heading needs to be written for the introduction. Oh, let me tell you about my apple chips obsession! I stumbled upon this recipe years ago when I needed a healthier snack that wouldn’t disappear in two bites (looking at you, store-bought chips). These crispy little wonders are shockingly simple—just apples, a whisper of cinnamon if you’re feeling fancy, and patience while they bake low and slow. The magic? Thin slices turn into delicate, caramelized crisps with zero oil or fuss. Plus, my kids gobble them up like candy—total mom win. Once you taste homemade apple chips, those packaged ones just… won’t cut it anymore. Trust me on this.
Why You’ll Love These Apple Chips
Let me count the ways these apple chips will become your new snack obsession. First off, they’re:
- Crazy easy – just slice, bake, and wait (okay, the waiting’s the hard part)
- Healthier than chips – no oil, no weird additives, just fruit doing its thing
- Naturally sweet with that perfect crisp-crunch you crave
- Pantry-friendly – I’ve made these with just apples when I forgot the cinnamon
- Kid-approved (my picky eater calls them “apple candy”)
The best part? Your house smells like apple pie for hours while they bake. Total bonus.
Ingredients for Apple Chips
You won’t believe how little you need for these addictive crisps! Here’s what I always have ready:
- 2 medium apples (I love Honeycrisp or Fuji, but any variety works)
- 1 teaspoon cinnamon (optional, but oh-so-cozy)
- 1 tablespoon lemon juice (optional—keeps them from browning)
That’s it—three ingredients hiding in your kitchen right now! The apples do all the heavy lifting here.
Equipment You’ll Need
No fancy gadgets required here—just a few basics:
- Baking sheet (your trusty old half-sheet pan works perfectly)
- Parchment paper (say no to sticky disasters)
- Sharp knife or mandoline for those paper-thin slices
- Citrus juicer (only if you’re using lemon—I often just squeeze it with my hands!)
See? Your kitchen’s already stocked with everything you need.
How to Make Apple Chips
Okay, let’s get down to business—turning those apples into crispy, irresistible chips is easier than you think. The secret? Slow and steady wins the race here. I learned this the hard way after burning my first batch (RIP, those poor Gala slices). But follow these steps, and you’ll have perfect apple chips every time!
Step 1: Preheat and Prep
First things first—crank that oven to 225°F (110°C). While it warms up, give your apples a good scrub (nobody wants wax in their snacks). Here’s where I get a little obsessive: slice them paper-thin, about 1/8 inch thick. A sharp knife works, but if you’ve got a mandoline, this is its time to shine! Remove any seeds as you go—they don’t crisp up nicely.
Step 2: Season and Arrange
Toss those beautiful slices with lemon juice if you’re using it—just a quick dip keeps them from turning brown (though honestly? A little browning adds rustic charm). Sprinkle cinnamon like you’re dusting fairy magic over them—just a pinch per slice. Now lay them out in a single layer on parchment-lined baking sheets. No overlapping! They’ll steam instead of crisp if they’re piled up.
Step 3: Bake to Crispness
Pop them in the oven and let the slow magic happen. After 1 hour, flip each slice—yes, every single one (I use kitchen tongs and pretend I’m conducting an orchestra). Then bake for another 1 to 1.5 hours until they’re golden and crisp. Check frequently toward the end—the difference between perfect and burnt is about 5 minutes in my oven. They’ll crisp up more as they cool, so don’t panic if they seem slightly soft when warm!
Tips for Perfect Apple Chips
After burning more batches than I’d like to admit (who knew apples could turn black so fast?), here are my hard-won secrets for flawless chips every time:
- Slice thickness is everything – Too thick? Chewy. Too thin? Burnt. Aim for that sweet spot of 1/8 inch—about the thickness of two credit cards stacked.
- Patience beats high heat – Cranking up the oven seems tempting, but low and slow is the only way to avoid those dreaded burnt edges.
- Cool completely – They’ll keep crisping as they cool, so resist taste-testing right away (I know, it’s torture).
- Rotate your pans – If baking multiple sheets, swap their positions halfway through for even browning.
Oh, and pro tip: set a timer for the last 30 minutes—those last few minutes can make or break your batch!
Variations for Apple Chips
Oh, the fun part—playing with flavors! Here’s where I get creative while keeping things simple. Try these twists:
- Spiced warmth – Add a pinch of nutmeg or cardamom to your cinnamon mix
- Sweet heat – A tiny sprinkle of cayenne makes these surprisingly addictive
- Honey drizzle – Brush slices lightly before baking for extra caramelization
Apple varieties matter too—Granny Smiths give tangy crispness, while Fujis bake up extra sweet. Mix and match for your perfect chip!
Storing and Serving Apple Chips
Here’s the deal—if these last more than a day in your house (they never do in mine), stash them in an airtight container at room temp. They’ll stay crisp for about 3 days—if you hide them well! Beyond snacks, I love crumbling these over yogurt or tossing them into salads for a sweet crunch. Morning oatmeal never looked so fancy!
Apple Chips Nutritional Information
Now, let’s talk numbers – but keep in mind, these can vary based on your apple’s size and sweetness! For a half-recipe serving (about one medium apple’s worth), you’re looking at roughly 95 calories, 25g carbs (with 4g fiber!), and absolutely zero fat. Not bad for something that tastes this indulgent, right? Just pure, simple apple goodness with no surprises.
FAQs About Apple Chips
Got questions? I’ve got answers from my many (many) apple chip experiments!
What are the best apples for chips?
Honestly, most work great! I’m partial to Honeycrisp for sweetness, but Granny Smith holds its shape beautifully. Just avoid super-juicy varieties like Red Delicious—they take forever to crisp up.
Can I make these without an oven?
Absolutely! A dehydrator at 135°F for 6-8 hours works wonders. Or try the “car dashboard method” on a hot summer day—I kid you not, it works (just cover with cheesecloth!).
Why did my apple chips get soft?
Steam’s the enemy here! Always store them in an airtight container with a silica packet or uncooked rice to absorb moisture. If they soften, a quick 5-minute oven refresh crisps them right back up.
Do I really need to flip them?
I know it’s a pain, but yes—unless you want one side leathery and the other burnt. Think of it as meditation time with your oven!

Addictive Apple Chips Recipe – 3-Ingredient Crispy Snack
- Total Time: 2 hours 10 minutes - 2 hours 40 minutes
- Yield: 2 servings 1x
- Diet: Vegan
Description
Crispy, homemade apple chips made with simple ingredients. A healthy snack option that’s easy to prepare.
Ingredients
- 2 medium apples (any variety)
- 1 teaspoon cinnamon (optional)
- 1 tablespoon lemon juice (optional, to prevent browning)
Instructions
- Preheat your oven to 225°F (110°C).
- Wash and thinly slice the apples (about 1/8 inch thick). Remove seeds if desired.
- Toss the apple slices in lemon juice to prevent browning (optional).
- Arrange the slices in a single layer on a baking sheet lined with parchment paper.
- Sprinkle lightly with cinnamon if desired.
- Bake for 1 hour, then flip the slices and bake for another 1-1.5 hours until crisp.
- Let cool completely before storing in an airtight container.
Notes
- Thinner slices crisp up better.
- Check frequently toward the end to avoid burning.
- Store in an airtight container for up to 3 days.
- Prep Time: 10 minutes
- Cook Time: 2-2.5 hours
- Category: Snack
- Method: Baking
- Cuisine: American
Nutrition
- Serving Size: 1/2 recipe
- Calories: 95
- Sugar: 19g
- Sodium: 2mg
- Fat: 0g
- Saturated Fat: 0g
- Unsaturated Fat: 0g
- Trans Fat: 0g
- Carbohydrates: 25g
- Fiber: 4g
- Protein: 0g
- Cholesterol: 0mg
Keywords: apple chips, healthy snack, baked apples, homemade chips

")
")
")
")