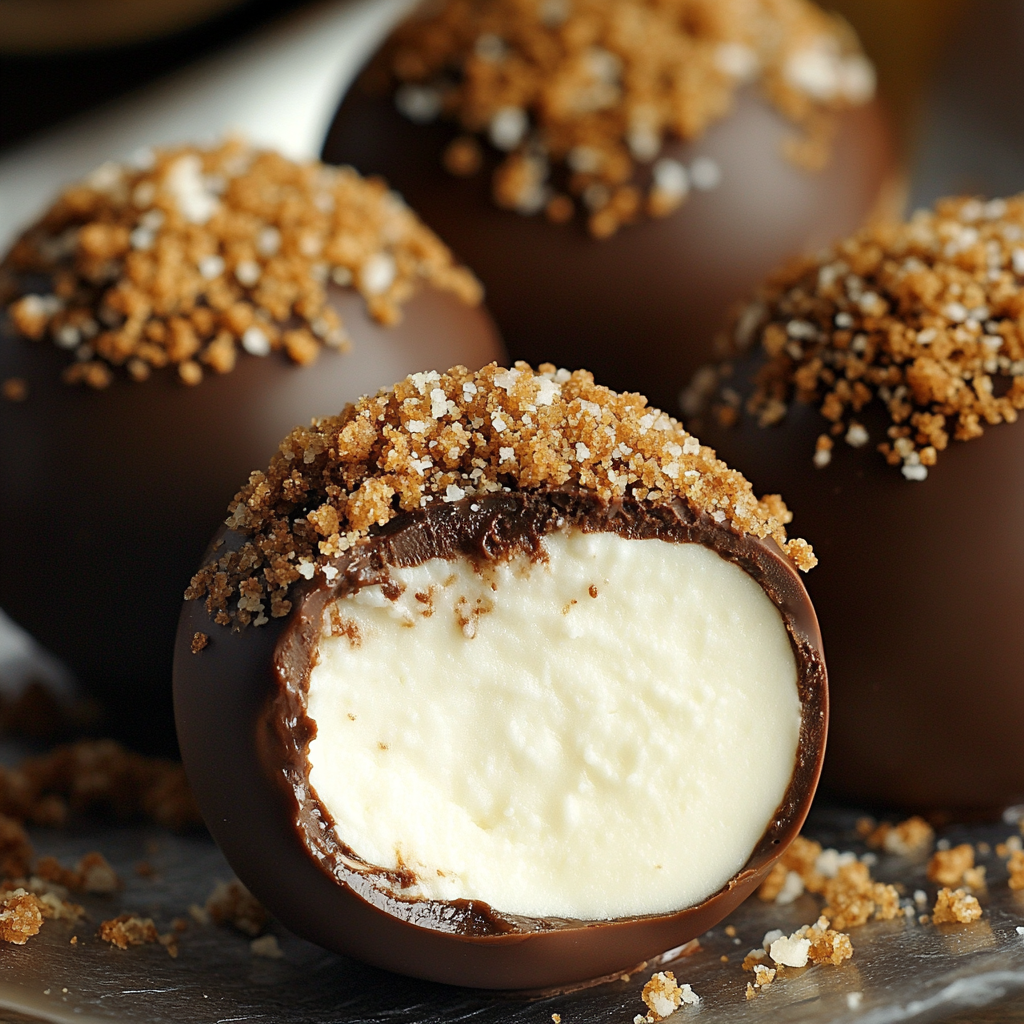
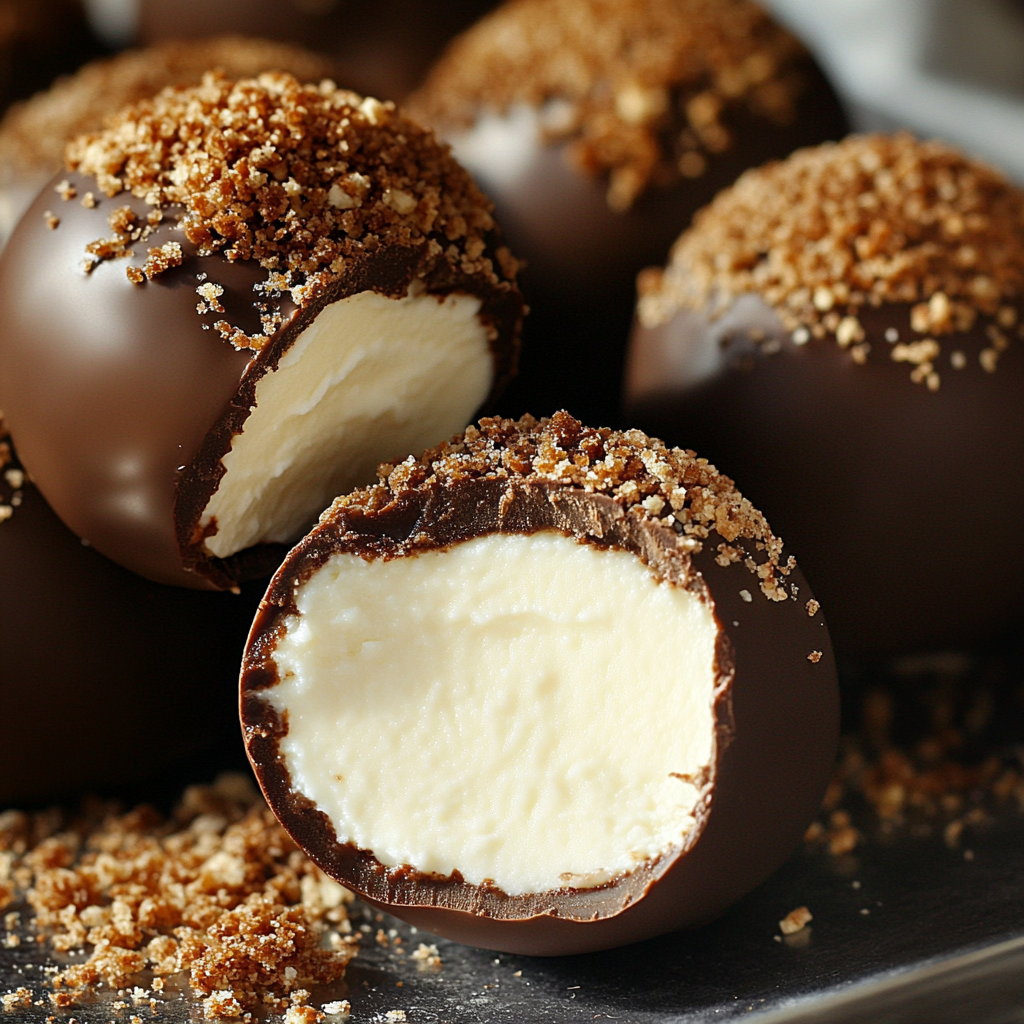
Let me take you on a delightful journey into the world of Baileys cheesecake balls! These little bites of heaven are a fusion of creamy cheesecake and the rich, velvety flavor of Baileys Irish Cream. Imagine a soft, sweet center made from cream cheese, powdered sugar, and that iconic Irish liqueur, all rolled into a perfect ball and coated in luscious chocolate. They’re like tiny, indulgent desserts that fit right in the palm of your hand!
Ingredients for Baileys Cheesecake Balls
Before diving into the delightful world of Baileys cheesecake balls, let’s gather our ingredients. I always find that having everything prepped and ready makes the cooking process smoother and more enjoyable. Here’s what you’ll need to create these scrumptious treats:
- 🧀 Cream Cheese: 8 oz (softened) – This is the star of the show! Softened cream cheese gives the cheesecake balls their creamy texture.
- 🍬 Powdered Sugar: 1 cup – This sweet ingredient adds just the right amount of sweetness to balance the flavors.
- 🍀 Baileys Irish Cream: 1/4 cup – The secret ingredient that brings a rich, velvety flavor to the mix. It’s like a hug in a ball!
- 🌿 Vanilla Extract: 1 teaspoon – A splash of vanilla enhances the overall flavor, making it even more delightful.
- 🍪 Crushed Graham Crackers: 1 cup (plus extra for coating) – These add a lovely crunch and a hint of nostalgia, reminiscent of classic cheesecake crusts.
- 🍫 Chocolate Coating: 12 oz (dark or milk chocolate, melted) – The final touch that wraps these cheesecake balls in a delicious chocolatey embrace.
As I gather these ingredients, I can’t help but feel excited. Each one plays a crucial role in creating the perfect balance of flavors and textures. The creamy filling, the crunchy graham cracker, and the smooth chocolate coating come together to create a symphony of taste that’s simply irresistible. So, let’s get ready to roll up our sleeves and create some magic in the kitchen!
Tools Needed for Baileys Cheesecake Balls
Before we embark on our culinary adventure, let’s make sure we have all the right tools at our fingertips. Having the right equipment not only makes the process smoother but also adds to the fun of creating these delightful Baileys cheesecake balls. Here’s a list of the essential tools you’ll need:
- Mixing Bowl: A large mixing bowl is a must-have for combining all those creamy ingredients. I love using a glass bowl because I can see the mixture come together beautifully!
- Electric Mixer: While you can mix by hand, an electric mixer makes it so much easier to achieve that smooth, creamy texture. It’s like having a little helper in the kitchen!
- Cookie Scoop: This handy tool is perfect for portioning out the cheesecake mixture. It helps create uniform balls, making your treats look professional and polished.
- Parchment Paper: Line your baking sheet with parchment paper to prevent the cheesecake balls from sticking. It’s a simple step that saves you from a sticky situation!
- Microwave-Safe Bowl: You’ll need this for melting the chocolate coating. I always use a glass bowl, as it heats evenly and allows me to keep an eye on the chocolate as it melts.
- Fork: A fork is essential for dipping the cheesecake balls into the melted chocolate. It helps you lift them out without making a mess, allowing the excess chocolate to drip off.
- Refrigerator and Freezer: These are your best friends during the chilling and setting process. They help firm up the cheesecake balls and ensure that the chocolate coating sets perfectly.
As I gather these tools, I can already imagine the sweet aroma of chocolate and cream wafting through my kitchen. Each tool plays a vital role in crafting these delightful treats, and I can’t wait to see how they all come together. So, let’s roll up our sleeves and get ready to create some magic with our Baileys cheesecake balls!
Step-by-Step Preparation of Baileys Cheesecake Balls
Step 1: Prepare the Cheesecake Mixture
Let’s kick off our culinary adventure by preparing the cheesecake mixture! In a large mixing bowl, I start by combining the softened cream cheese and powdered sugar. Using my trusty electric mixer, I blend them together on medium speed. The sound of the mixer whirring is music to my ears, and soon enough, the mixture transforms into a smooth and creamy delight. It’s like watching a beautiful transformation unfold right before my eyes!
Next, I pour in the Baileys Irish Cream and a splash of vanilla extract. As I mix these in, the aroma fills the air, and I can’t help but smile. The rich, velvety scent of Baileys combined with the sweet vanilla is simply irresistible. I continue mixing until everything is fully incorporated, and the mixture is as smooth as silk. This is the moment when I know I’m on the right track!
Step 2: Form the Cheesecake Balls
Now comes the fun part—forming the cheesecake balls! After the mixture is ready, I gently fold in the crushed graham crackers. This adds a delightful crunch and a hint of nostalgia, reminiscent of classic cheesecake crusts. Once everything is evenly distributed, I grab my small cookie scoop. It’s the perfect tool for portioning out the mixture!
With a scoop in hand, I take a generous portion of the mixture and roll it into a ball, about 1 inch in diameter. As I place each ball on a baking sheet lined with parchment paper, I can’t help but admire how cute they look! It’s like creating little edible treasures, each one waiting to be coated in chocolate.
Step 3: Chill the Cheesecake Balls
Once all the balls are formed, it’s time for a little chill time! I cover the baking sheet with plastic wrap and pop it into the freezer for about 30 minutes. This step is crucial because it helps the balls firm up, making them easier to coat later. While I wait, I take a moment to clean up my workspace and maybe sneak a taste of the leftover mixture. It’s a little indulgence that makes the wait worthwhile!
Step 4: Coat the Cheesecake Balls
After the cheesecake balls have chilled and firmed up, it’s time to melt the chocolate coating. I grab my microwave-safe bowl and break the chocolate into pieces. Melting it in 30-second intervals, I stir in between until it’s smooth and glossy. The rich aroma of melted chocolate fills my kitchen, and I can hardly contain my excitement!
Now, I take the cheesecake balls out of the freezer. Using a fork, I dip each ball into the melted chocolate, ensuring it’s fully coated. As I lift it out, I let the excess chocolate drip off, creating a beautiful, shiny finish. I place the coated balls back on the parchment-lined baking sheet, feeling like a true chocolatier!
Step 5: Final Chill and Serve
While the chocolate is still wet, I sprinkle a little extra crushed graham cracker on top of each ball for that added texture and decoration. It’s like giving each ball a little hat! Once I’ve finished coating them all, I place the baking sheet back in the refrigerator for about 15-20 minutes. This final chill allows the chocolate coating to set perfectly.
As I wait, I can hardly contain my excitement. The anticipation builds as I imagine the first bite of these delightful Baileys cheesecake balls. Once the chocolate is fully set, I transfer them to a serving platter, ready to share my delicious creation with family and friends. Trust me, these little bites of heaven are worth every moment spent in the kitchen!
Serving Suggestions for Baileys Cheesecake Balls
Creative Ways to Serve Baileys Cheesecake Balls
Now that we’ve crafted these delightful Baileys cheesecake balls, it’s time to think about how to present them! Presentation can elevate your treats from simple snacks to show-stopping desserts. Here are a few creative ideas that I love:
- On a Dessert Platter: Arrange the cheesecake balls on a beautiful platter, garnished with fresh mint leaves or edible flowers. This adds a pop of color and makes the dessert look extra special!
- In Mini Cups: Place each cheesecake ball in a mini cupcake liner or small dessert cup. This not only looks adorable but also makes it easy for guests to grab and enjoy.
- Drizzled with Chocolate: For an extra touch of elegance, drizzle some melted chocolate over the cheesecake balls before serving. It adds a beautiful finish and a little extra chocolatey goodness!
- With a Side of Fruit: Serve the cheesecake balls alongside fresh berries or sliced fruit. The tartness of the fruit complements the sweetness of the cheesecake, creating a delightful balance.
As I set up my serving station, I can’t help but feel excited to share these treats with my loved ones. Each presentation idea adds a unique flair, making the experience even more enjoyable. Plus, it’s a great way to showcase the effort that went into making these delicious bites!
Pairing Drinks with Baileys Cheesecake Balls
What’s a sweet treat without the perfect drink to accompany it? Pairing drinks with Baileys cheesecake balls can enhance the overall experience and make your dessert table even more inviting. Here are some of my favorite drink pairings:
- Baileys Irish Cream: For a classic pairing, serve a glass of Baileys on the rocks. The creamy liqueur complements the flavors of the cheesecake balls beautifully!
- Coffee: A rich cup of coffee, whether hot or iced, pairs wonderfully with these treats. The bitterness of the coffee balances the sweetness of the cheesecake, creating a delightful contrast.
- Milk: For a nostalgic touch, serve the cheesecake balls with a glass of cold milk. It’s a simple yet satisfying combination that brings back childhood memories!
- Chocolate Martini: If you’re feeling adventurous, whip up a chocolate martini. The chocolatey flavors will harmonize perfectly with the cheesecake balls, making for a decadent dessert experience.
As I sip on my drink while enjoying these delightful Baileys cheesecake balls, I can’t help but feel a sense of joy. The right drink can elevate the experience, making it even more memorable. So, whether you’re hosting a gathering or enjoying a quiet night in, don’t forget to pair your treats with a delicious beverage!
Tips for Perfect Baileys Cheesecake Balls
Common Mistakes to Avoid
As I’ve experimented with making Baileys cheesecake balls, I’ve learned a few things along the way. Avoiding common mistakes can make a world of difference in your final product. Here are some tips I’ve gathered to help you achieve perfection:
- Using Cold Cream Cheese: One of the biggest mistakes is using cold cream cheese. Make sure it’s softened to room temperature. This ensures a smooth and creamy mixture, making it easier to blend with the other ingredients.
- Overmixing the Mixture: While it’s tempting to keep mixing until everything is perfectly smooth, overmixing can lead to a dense texture. Mix just until combined for that light and fluffy consistency.
- Not Chilling Long Enough: Don’t rush the chilling process! If the cheesecake balls aren’t firm enough, they can lose their shape when coated in chocolate. Be patient and let them chill for the full 30 minutes.
- Skipping the Graham Cracker Coating: The extra crushed graham cracker on top adds a delightful crunch and visual appeal. Don’t skip this step; it’s the cherry on top of your delicious creation!
- Using Too Much Chocolate: While chocolate is delicious, using too much can overwhelm the cheesecake flavor. Aim for a thin, even coating to let the creamy filling shine through.
By keeping these tips in mind, you’ll be well on your way to creating Baileys cheesecake balls that are not only beautiful but also bursting with flavor. I’ve made my fair share of mistakes, but each one has taught me something valuable. So, embrace the process and enjoy every moment in the kitchen!
Variations of Baileys Cheesecake Balls
One of the best things about Baileys cheesecake balls is their versatility. You can easily customize them to suit your taste or the occasion. Here are some fun variations I’ve tried and loved:
- Chocolate Mint: Add a few drops of peppermint extract to the mixture for a refreshing twist. The combination of chocolate and mint is always a crowd-pleaser!
- Espresso Delight: For coffee lovers, mix in a tablespoon of instant espresso powder. It adds a rich coffee flavor that pairs beautifully with the Baileys.
- Nutty Crunch: Fold in some finely chopped nuts, like pecans or walnuts, for added texture and flavor. It gives the cheesecake balls a delightful crunch!
- Fruit Infusion: Incorporate some finely chopped dried fruits, like cranberries or apricots, into the mixture. It adds a sweet and chewy element that complements the creamy filling.
- White Chocolate Coating: Instead of dark or milk chocolate, try coating the balls in melted white chocolate. It creates a beautiful contrast and adds a different flavor profile.
These variations allow you to get creative and make the recipe your own. I love experimenting with different flavors and textures, and each batch brings something new to the table. So, don’t be afraid to play around and find your perfect combination!
FAQs About Baileys Cheesecake Balls
Can I make Baileys cheesecake balls without alcohol?
Absolutely! If you want to enjoy the deliciousness of Baileys cheesecake balls without the alcohol, you can easily substitute the Baileys Irish Cream with a non-alcoholic alternative. I often use a combination of heavy cream and a splash of vanilla extract to mimic that creamy, rich flavor. You can also try using coffee creamer or a flavored syrup that suits your taste. The key is to maintain the creamy texture while adding a hint of sweetness. Trust me, they’ll still be just as delightful!
How long do Baileys cheesecake balls last in the fridge?
Once you’ve made your scrumptious Baileys cheesecake balls, you’ll want to store them properly to keep them fresh. In the fridge, they can last for about 5 to 7 days. Just make sure to keep them in an airtight container to prevent them from drying out or absorbing any odors from the fridge. I love to enjoy them as a sweet treat throughout the week, and they’re perfect for satisfying those late-night cravings!
Can I freeze Baileys cheesecake balls?
Yes, you can definitely freeze Baileys cheesecake balls! In fact, freezing them is a great way to make them ahead of time. To freeze, simply place the coated cheesecake balls in a single layer on a baking sheet and pop them in the freezer until they’re firm. Once frozen, transfer them to an airtight container or a freezer bag. They can last for up to 3 months in the freezer. When you’re ready to enjoy them, just let them thaw in the fridge for a few hours. It’s like having a little stash of sweet surprises waiting for you!
Conclusion on Baileys Cheesecake Balls
As I reflect on my journey of creating Baileys cheesecake balls, I can’t help but feel a sense of joy and accomplishment. These little bites of bliss are not just desserts; they’re a celebration of flavors and memories. From the moment I mixed the creamy filling to the final touch of chocolate coating, every step was filled with excitement and anticipation.
Print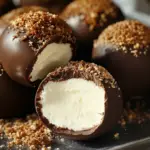
Baileys cheesecake balls are the ultimate indulgent treat!
- Total Time: 1 hour
- Yield: 24 balls
- Diet: Vegetarian
Description
Baileys cheesecake balls are a fusion of creamy cheesecake and the rich flavor of Baileys Irish Cream, rolled into bite-sized treats and coated in chocolate.
Ingredients
- 🧀 Cream Cheese: 8 oz (softened)
- 🍬 Powdered Sugar: 1 cup
- 🍀 Baileys Irish Cream: 1/4 cup
- 🌿 Vanilla Extract: 1 teaspoon
- 🍪 Crushed Graham Crackers: 1 cup (plus extra for coating)
- 🍫 Chocolate Coating: 12 oz (dark or milk chocolate, melted)
Instructions
- Prepare the cheesecake mixture by combining softened cream cheese and powdered sugar in a mixing bowl and blend until smooth.
- Add Baileys Irish Cream and vanilla extract, mixing until fully incorporated.
- Fold in crushed graham crackers to the mixture.
- Using a cookie scoop, portion out the mixture and roll into balls, placing them on a parchment-lined baking sheet.
- Chill the balls in the freezer for about 30 minutes to firm up.
- Melt the chocolate coating in a microwave-safe bowl.
- Dip each cheesecake ball into the melted chocolate, letting excess drip off, and place back on the parchment paper.
- Sprinkle extra crushed graham cracker on top of each ball before the chocolate sets.
- Chill again for 15-20 minutes until the chocolate is set.
- Serve and enjoy your Baileys cheesecake balls!
Notes
- Ensure cream cheese is softened for a smooth mixture.
- Do not rush the chilling process to maintain shape.
- Experiment with different chocolate coatings or flavors.
- Prep Time: 20 minutes
- Cook Time: 0 minutes
- Category: Dessert
- Method: No-bake
- Cuisine: Irish
Nutrition
- Serving Size: 1 ball
- Calories: 150
- Sugar: 10g
- Sodium: 50mg
- Fat: 8g
- Saturated Fat: 4g
- Unsaturated Fat: 3g
- Trans Fat: 0g
- Carbohydrates: 18g
- Fiber: 1g
- Protein: 2g
- Cholesterol: 20mg
Keywords: Baileys, cheesecake, dessert, no-bake, chocolate
")
")
")
")