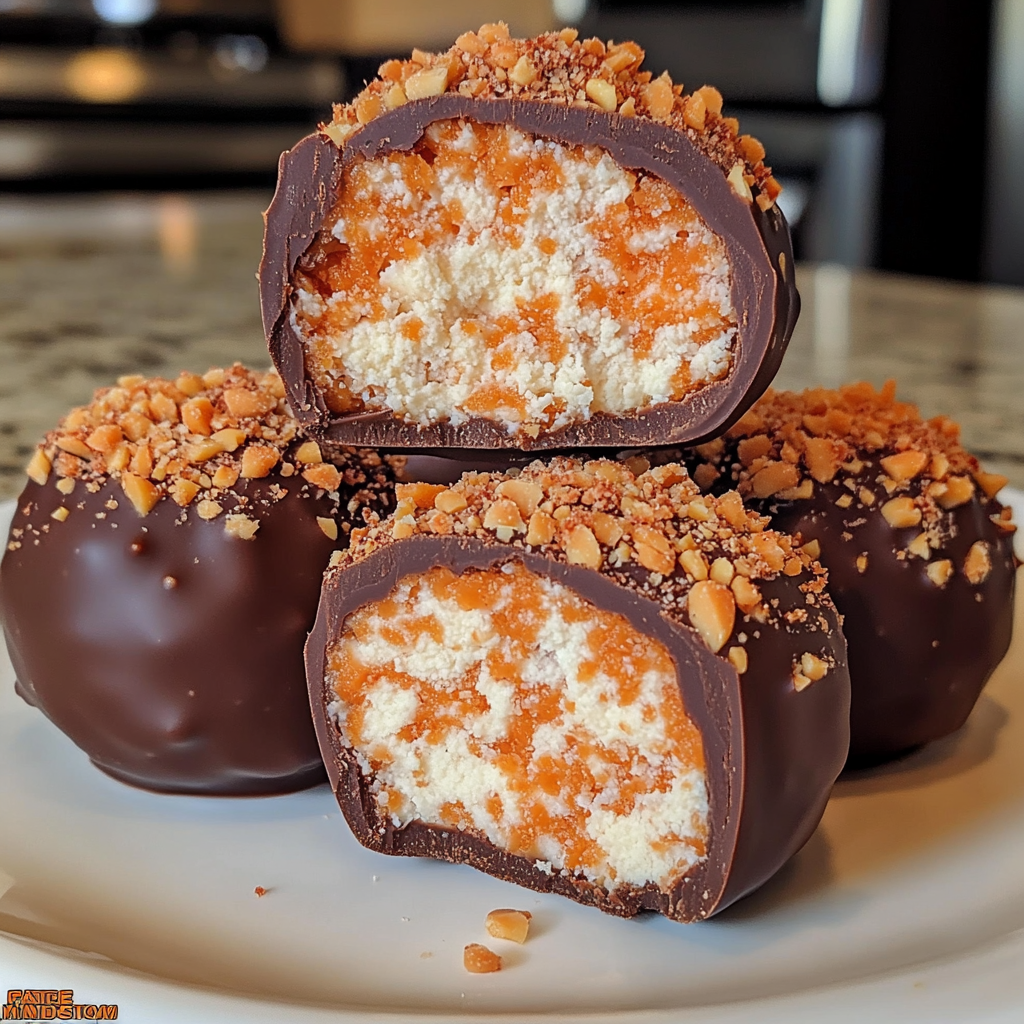
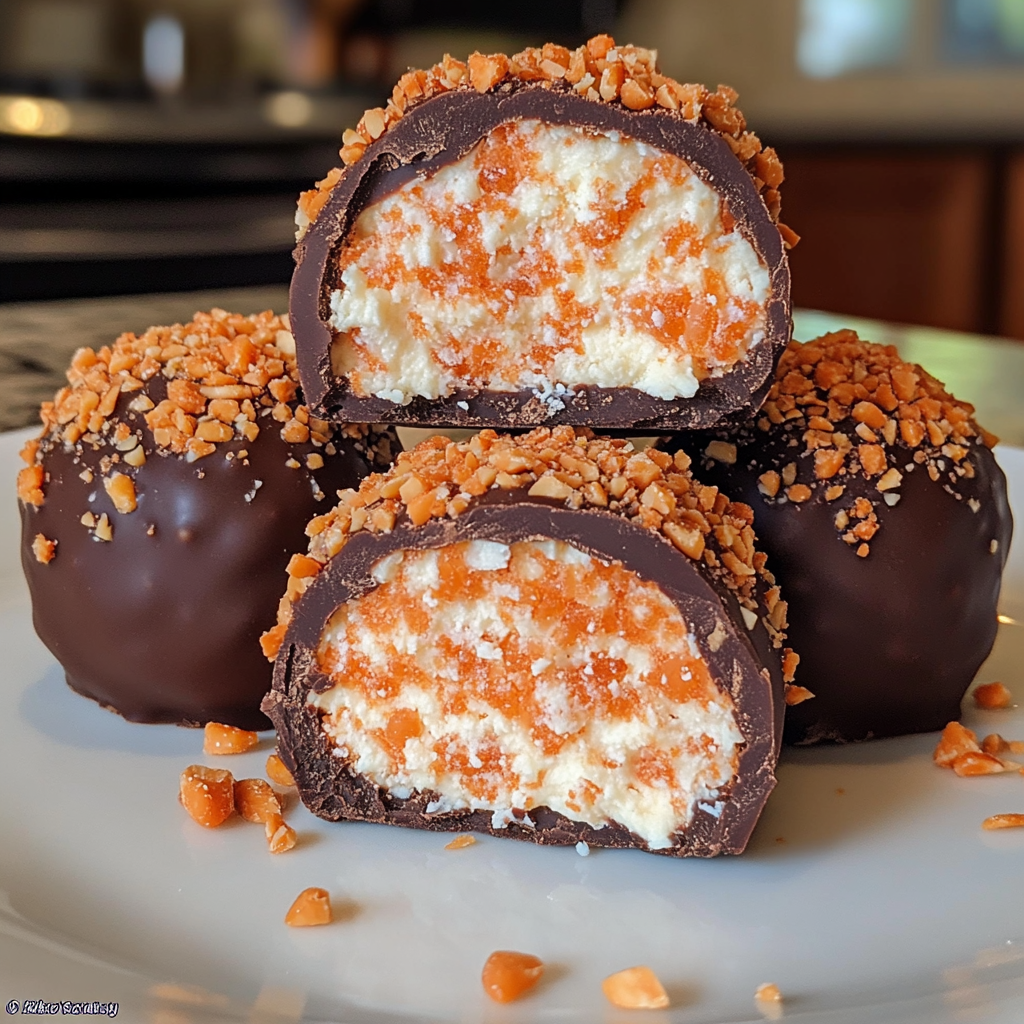
Ah, Butterfinger Balls! Just saying the name makes my mouth water. These delightful treats are like little bites of heaven, combining the rich, crunchy goodness of Butterfinger candy bars with the creamy texture of peanut butter. Imagine a sweet, melt-in-your-mouth experience that brings back childhood memories of sneaking candy from the pantry. That’s exactly what these Butterfinger Balls deliver!
Ingredients for Butterfinger Balls Recipe
Before we embark on this delightful culinary journey, let’s gather our ingredients. The beauty of this Butterfinger Balls recipe lies in its simplicity. You won’t need a long grocery list, just a few key items that you might already have in your kitchen. Here’s what you’ll need:
- 2 cups crushed Butterfinger candy bars
- 1 cup creamy peanut butter
- 1/2 cup unsalted butter, softened
- 2 cups powdered sugar
- 2 cups semi-sweet chocolate chips
- 1 tbsp vegetable oil or coconut oil (for melting chocolate)
Now, let me share a little story. The first time I made these, I was so excited that I accidentally bought crunchy peanut butter instead of creamy. While it added a fun texture, I realized that creamy peanut butter gives that smooth, luscious consistency that makes these balls truly irresistible. So, trust me on this one—stick with creamy peanut butter!
As for the Butterfinger candy bars, I love to crush them myself. There’s something satisfying about smashing those bars into tiny pieces. It’s like a mini workout, and the sweet aroma that fills the air is just a bonus! You can use a rolling pin or even a food processor if you want to save time. Just be careful not to pulverize them into dust; we want some crunchy bits for that signature Butterfinger texture.
Once you have all your ingredients ready, you’ll be just a few steps away from creating these mouthwatering treats. So, let’s keep the momentum going and move on to the tools you’ll need for this delicious adventure!
Tools Needed for Butterfinger Balls Recipe
Now that we have our ingredients lined up like eager little soldiers, it’s time to gather the tools that will help us create these delightful Butterfinger Balls. Trust me, having the right tools makes the process smoother and more enjoyable. Here’s what you’ll need:
- Large Mixing Bowl: A sturdy bowl is essential for mixing all those delicious ingredients together. I love using a glass bowl because I can see the beautiful colors and textures as they come together.
- Measuring Cups and Spoons: Precision is key in baking, even for no-bake recipes! Make sure you have a set of measuring cups and spoons to get the right amounts of each ingredient.
- Cookie Scoop or Hands: You can use a small cookie scoop to form the balls, or just roll them by hand. I often find myself using my hands because it feels more personal and fun!
- Parchment Paper: This is a must-have for lining your baking sheet. It prevents the balls from sticking and makes cleanup a breeze. Plus, it gives your treats a nice, professional look.
- Microwave-Safe Bowl: You’ll need this for melting the chocolate. I recommend using a glass bowl, as it heats evenly and allows you to keep an eye on the melting process.
- Fork or Dipping Tool: This is what you’ll use to dip the chilled balls into the melted chocolate. A fork works perfectly, but if you have a dipping tool, it can make the process even easier.
- Refrigerator: While not a tool in the traditional sense, your fridge is crucial for chilling the balls and setting the chocolate coating. It’s like a cozy little home for your treats while they firm up!
When I first started making these Butterfinger Balls, I didn’t have a cookie scoop, and let me tell you, my hands were a sticky mess! But I learned to embrace the chaos. Now, I enjoy the process of rolling each ball, feeling the mixture come together. It’s all part of the fun!
So, gather these tools, and let’s get ready to dive into the step-by-step preparation of our Butterfinger Balls. The sweet aroma of chocolate and peanut butter is just around the corner!
Step-by-Step Preparation of Butterfinger Balls Recipe
Step 1: Prepare the Base Mixture
Alright, my fellow home cooks, it’s time to roll up our sleeves and get mixing! The first step in our Butterfinger Balls recipe is to prepare that delicious base mixture. In your large mixing bowl, combine the crushed Butterfinger candy bars, creamy peanut butter, softened unsalted butter, and powdered sugar. I like to start with the Butterfinger and peanut butter first, as they blend together beautifully.
As I mix, I can’t help but smile at the sweet aroma wafting through the air. It’s like a candy shop in my kitchen! Use a sturdy spatula or a wooden spoon to combine everything until it forms a smooth, cohesive dough. If you find it a bit tough to mix, don’t worry! Just give it a little extra elbow grease. Trust me, the end result will be worth it!
Step 2: Form the Balls
Now comes the fun part—forming the balls! Using your hands or a small cookie scoop, take a portion of the mixture and roll it into a 1-inch ball. I love using my hands for this step; it feels so satisfying to shape each ball. Plus, it gives me a chance to sneak a little taste of the dough (shh, don’t tell anyone!).
As you roll, place each ball on a parchment-lined baking sheet. Make sure to leave a little space between them, as they’ll need room to breathe. I usually end up with a little dance party in my kitchen at this point, as I hum along to my favorite tunes while shaping these sweet treats!
Step 3: Chill the Balls
Once all your balls are formed, it’s time to chill! Pop the baking sheet into the refrigerator for at least 30 minutes. This step is crucial because it helps the balls firm up, making them easier to coat in chocolate later. While they chill, I often take a moment to clean up my workspace and maybe even enjoy a little snack. After all, we need our energy for the next steps!
Step 4: Coat the Balls
Now that our Butterfinger Balls are nice and chilled, it’s time to coat them in chocolate! Grab your microwave-safe bowl and add the semi-sweet chocolate chips along with the vegetable or coconut oil. Microwave the mixture in 30-second intervals, stirring in between, until it’s smooth and glossy. I love watching the chocolate transform as it melts; it’s like magic!
Once the chocolate is ready, take each chilled ball and dip it into the melted chocolate using a fork or dipping tool. Make sure to coat it completely, allowing any excess chocolate to drip off before placing it back on the parchment-lined sheet. I like to give each ball a little shake to remove the extra chocolate, creating a beautiful, even coating.
Step 5: Let the Coating Set
Finally, it’s time to let the chocolate coating set! You can either leave the balls at room temperature or pop them back into the refrigerator for a quicker firming process. I usually opt for the fridge, as I’m always eager to taste my creations. Once the chocolate is set, you’ll have these gorgeous Butterfinger Balls ready to be devoured!
And there you have it! The step-by-step preparation of our delightful Butterfinger Balls. I can already feel the excitement building as I think about serving these sweet treats to my family and friends. Let’s move on to some serving suggestions that will make these treats even more special!
Serving Suggestions for Butterfinger Balls Recipe
Now that we’ve crafted these delightful Butterfinger Balls, it’s time to think about how to serve them up! Presentation can elevate any dish, and these sweet treats are no exception. I love to get a little creative when it comes to serving, and I can’t wait to share some of my favorite ideas with you!
First off, let’s talk about garnishing. A sprinkle of crushed Butterfinger pieces on top of each ball adds a lovely crunch and a pop of color. It’s like giving each treat a little crown! You can also drizzle some melted peanut butter over the top for an extra touch of decadence. Just melt a bit of peanut butter in the microwave and use a fork to create a beautiful drizzle. It not only looks fantastic but also enhances that rich peanut butter flavor.
If you’re hosting a gathering, consider arranging the Butterfinger Balls on a decorative platter. You can create a fun dessert table with other treats, like brownies or cookies, to complement the flavors. I often like to add a few fresh fruits, like strawberries or bananas, to balance the sweetness. The vibrant colors make the table look inviting and festive!
For a more casual setting, I love to serve these balls in small cupcake liners. It gives them a cute, individual touch, and it’s easy for guests to grab one (or two!). You can even place them in a mason jar tied with a ribbon for a charming gift idea. Imagine giving a jar of these homemade delights to a friend or neighbor—it’s a sweet gesture that’s sure to bring a smile!
Lastly, don’t forget about the temperature! While Butterfinger Balls are delicious at room temperature, I find that they taste even better when chilled. The chocolate coating becomes firm, and the flavors meld beautifully. So, if you have the time, pop them back in the fridge for a bit before serving. Trust me, your taste buds will thank you!
With these serving suggestions, you’ll be ready to impress your family and friends with your homemade Butterfinger Balls. Whether it’s a cozy family night or a festive gathering, these treats are sure to be a hit. Now, let’s move on to some tips for perfecting your Butterfinger Balls recipe!
Tips for Perfecting Your Butterfinger Balls Recipe
As a passionate home cook, I believe that every recipe can be improved with a few handy tips. Making Butterfinger Balls is no exception! Over the years, I’ve learned some tricks that can elevate these treats from delicious to absolutely divine. So, let’s dive into my favorite tips for perfecting your Butterfinger Balls recipe!
First and foremost, let’s talk about the temperature of your ingredients. It’s essential to use softened butter for the base mixture. If your butter is too cold, it won’t blend well with the peanut butter and sugar, resulting in a lumpy texture. To soften butter quickly, you can cut it into small cubes and let it sit at room temperature for about 15 minutes. Alternatively, you can microwave it for just 10 seconds—just be careful not to melt it!
Another tip is to be mindful of the chocolate coating. If you find that your chocolate is too thick for dipping, you can add a little more oil to achieve a smoother consistency. This will help the chocolate glide over the balls effortlessly, creating a beautiful finish. I often use coconut oil for this, as it adds a subtle flavor that complements the chocolate perfectly.
Now, let’s talk about chilling time. While 30 minutes is the minimum, I recommend chilling the balls for a bit longer if you have the time. This extra chill helps them firm up even more, making them easier to coat and ensuring they hold their shape. I usually pop them in the fridge for an hour while I clean up the kitchen and enjoy a cup of tea. It’s a win-win!
When it comes to rolling the balls, don’t be afraid to get a little creative! You can experiment with different sizes. If you prefer bite-sized treats, roll them smaller. If you want a more indulgent experience, go for larger balls. Just remember that the size will affect the chilling and coating times, so adjust accordingly.
Lastly, don’t forget about storage! To keep your Butterfinger Balls fresh, store them in an airtight container in the refrigerator. They can last up to a week, but I promise they won’t last that long once your family gets a taste! If you want to keep them for longer, you can freeze them. Just make sure to separate layers with parchment paper to prevent sticking.
With these tips in your back pocket, you’ll be well on your way to creating the most scrumptious Butterfinger Balls. I can’t wait for you to experience the joy of sharing these treats with your loved ones. Now, let’s move on to some frequently asked questions about this delightful recipe!
FAQs about Butterfinger Balls Recipe
How long do Butterfinger Balls last?
Ah, the age-old question of how long these delightful treats will last! When stored in an airtight container in the refrigerator, your Butterfinger Balls can stay fresh for up to a week. However, I can tell you from experience that they rarely last that long in my house! The sweet aroma and irresistible taste make them disappear faster than I can say “Butterfinger.” If you want to keep them for a longer period, you can freeze them. Just make sure to separate layers with parchment paper to prevent sticking. They’ll be just as delicious when you pull them out for a special treat later on!
Can I use different types of chocolate for coating?
Absolutely! While I love the classic taste of semi-sweet chocolate, you can get creative with your chocolate choices. Dark chocolate adds a rich, bold flavor that pairs beautifully with the sweetness of the Butterfinger and peanut butter. If you prefer a sweeter treat, white chocolate is a fantastic option too! Just keep in mind that different chocolates may require slight adjustments in melting time and technique. No matter which chocolate you choose, your Butterfinger Balls will still be a hit!
Are Butterfinger Balls gluten-free?
Yes, they are! The ingredients in this Butterfinger Balls recipe are naturally gluten-free, making them a great treat for those with gluten sensitivities. Just be sure to check the labels on your Butterfinger candy bars and any other packaged ingredients to ensure they are certified gluten-free. It’s always better to be safe than sorry, right? Enjoy these sweet bites without worry!
Can I make Butterfinger Balls ahead of time?
Definitely! In fact, making Butterfinger Balls ahead of time is a great idea. You can prepare them a day or two in advance, allowing the flavors to meld beautifully. Just follow the recipe as usual, and store them in an airtight container in the refrigerator. This way, when it’s time to serve, you’ll have a delicious treat ready to impress your family and friends. It’s like having a secret stash of joy waiting for you!
Conclusion on Butterfinger Balls Recipe
As we wrap up this sweet adventure, I can’t help but feel a sense of joy and satisfaction. Making Butterfinger Balls is not just about creating a delicious treat; it’s about the memories we make in the kitchen and the smiles we share with loved ones. From the moment you mix the ingredients to the final bite of that chocolate-coated goodness, every step is filled with excitement and anticipation.
Print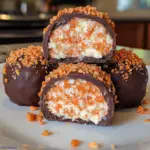
Butterfinger Balls Recipe: Discover the Sweet Secret!
- Total Time: 45 minutes
- Yield: 24 balls 1x
- Diet: Gluten Free
Description
Butterfinger Balls are delightful no-bake treats that combine the rich, crunchy goodness of Butterfinger candy bars with creamy peanut butter, creating a sweet, melt-in-your-mouth experience.
Ingredients
- 2 cups crushed Butterfinger candy bars
- 1 cup creamy peanut butter
- 1/2 cup unsalted butter, softened
- 2 cups powdered sugar
- 2 cups semi-sweet chocolate chips
- 1 tbsp vegetable oil or coconut oil (for melting chocolate)
Instructions
- Prepare the base mixture by combining crushed Butterfinger candy bars, creamy peanut butter, softened unsalted butter, and powdered sugar in a large mixing bowl.
- Form the mixture into 1-inch balls using your hands or a small cookie scoop, placing them on a parchment-lined baking sheet.
- Chill the balls in the refrigerator for at least 30 minutes to firm them up.
- Coat the chilled balls in melted chocolate by dipping them using a fork or dipping tool.
- Let the chocolate coating set at room temperature or in the refrigerator before serving.
Notes
- Use creamy peanut butter for the best texture.
- Chill the balls longer than 30 minutes for easier coating.
- Store in an airtight container in the refrigerator for up to a week.
- Experiment with different types of chocolate for coating.
- Prep Time: 15 minutes
- Cook Time: 0 minutes
- Category: Dessert
- Method: No-Bake
- Cuisine: American
Nutrition
- Serving Size: 1 ball
- Calories: 150
- Sugar: 10g
- Sodium: 50mg
- Fat: 8g
- Saturated Fat: 4g
- Unsaturated Fat: 3g
- Trans Fat: 0g
- Carbohydrates: 18g
- Fiber: 1g
- Protein: 3g
- Cholesterol: 10mg
Keywords: Butterfinger Balls, no-bake dessert, chocolate, peanut butter, treats
")
")
")
")