As a passionate home cook, I can’t help but get excited when I think about my favorite buttermilk chicken recipe. This dish is not just a meal; it’s a celebration of flavors and textures that come together to create something truly special. The moment you take a bite, you’ll experience the crispy, golden exterior giving way to juicy, tender meat. It’s like a warm hug on a plate!
Ingredients for Buttermilk Chicken Recipe
Before diving into the cooking process, let’s gather all the ingredients for this mouthwatering buttermilk chicken recipe. Having everything ready makes the cooking experience smoother and more enjoyable. Plus, it’s a great way to get your kitchen buzzing with excitement!
- Chicken pieces: 1.5 lbs (I love using thighs, drumsticks, or breasts, but feel free to choose your favorite cut!)
- Buttermilk: 2 cups (This is the star of the show! It’s what makes the chicken so tender and flavorful.)
- Garlic: 4 cloves, minced (Garlic adds a wonderful aroma and depth of flavor. I can’t imagine cooking without it!)
- Paprika: 2 teaspoons (This spice gives the chicken a beautiful color and a hint of smokiness.)
- Salt: 1 teaspoon (or to taste; it’s essential for bringing out all the flavors.)
- Black pepper: 1 teaspoon (or to taste; it adds a nice kick to the dish.)
- All-purpose flour: 1 cup (This is what gives the chicken that crispy coating we all love.)
- Oil: for frying (about 1 cup, depending on your frying method; I usually go for vegetable or canola oil.)
As I gather these ingredients, I can already imagine the delicious aroma wafting through my kitchen. Each item plays a crucial role in creating that perfect balance of flavors. And the best part? You can easily find these ingredients at your local grocery store. So, let’s get ready to whip up some magic!
Tools Needed for Buttermilk Chicken Recipe
Now that we have our ingredients lined up, it’s time to talk about the tools we’ll need to bring this buttermilk chicken recipe to life. Having the right equipment makes the cooking process smoother and more enjoyable. Trust me, I’ve learned this the hard way! Here’s what you’ll need:
- Large Bowl: A big bowl is essential for marinating the chicken. It allows the buttermilk and spices to coat the chicken evenly. I always choose a bowl that’s big enough to hold all the chicken pieces comfortably.
- Shallow Dish: This is where the magic happens when it comes to dredging the chicken in flour. A shallow dish makes it easy to coat each piece without making a mess. I often use a pie dish or a large plate for this step.
- Skillet or Deep Fryer: For frying, you’ll need a sturdy skillet or a deep fryer. I prefer using a cast-iron skillet because it retains heat well and gives the chicken that perfect crispy texture. If you have a deep fryer, it can make the process even easier!
- Cooking Thermometer: This handy tool is a must-have to ensure your chicken is cooked to perfection. I can’t stress enough how important it is to check the internal temperature. You want it to reach 165°F (75°C) for safe eating.
- Slotted Spoon or Tongs: These tools are perfect for carefully placing the chicken in the hot oil and flipping it without splashing. I always keep a pair of tongs handy; they make handling the chicken a breeze!
- Paper Towels: After frying, you’ll want to drain the excess oil from the chicken. Lining a plate with paper towels helps absorb that oil, keeping your chicken crispy and not greasy.
As I gather these tools, I can’t help but feel a sense of excitement. Each piece of equipment plays a vital role in creating that delicious buttermilk chicken recipe I love so much. So, let’s get ready to dive into the cooking process and create something truly special!
Step-by-Step Preparation of Buttermilk Chicken Recipe
Now that we have our ingredients and tools ready, it’s time to roll up our sleeves and dive into the step-by-step preparation of this delightful buttermilk chicken recipe. I promise you, the process is just as enjoyable as the final dish! Let’s get started!
Step 1: Marinating the Chicken
The first step in creating mouthwatering buttermilk chicken is marinating the chicken. This is where the magic truly begins! In a large bowl, I combine the buttermilk, minced garlic, paprika, salt, and black pepper. The aroma of garlic mixed with the tangy buttermilk is simply irresistible. It’s like a flavor party in a bowl!
Next, I add the chicken pieces, making sure they are fully submerged in the marinade. I like to use my hands to gently massage the marinade into the chicken, ensuring every nook and cranny is coated. Once that’s done, I cover the bowl and pop it in the refrigerator. I usually let it marinate for at least 4 hours, but if I can, I let it sit overnight. This allows the chicken to soak up all those delicious flavors and become incredibly tender. Trust me, the wait is worth it!
Step 2: Preparing the Coating
After the chicken has marinated, it’s time to prepare the coating. I take a shallow dish and fill it with all-purpose flour, adding a pinch of salt and pepper for extra flavor. I mix it all together, and the flour becomes my canvas for creating that crispy exterior we all crave.
Now, I remove each piece of chicken from the buttermilk marinade, letting any excess drip off. I dredge the chicken in the seasoned flour, making sure it’s evenly coated. I love the sound of the flour crunching as I shake off the excess. It’s like a little dance in the kitchen! Once coated, I set the chicken aside on a plate, ready for frying.
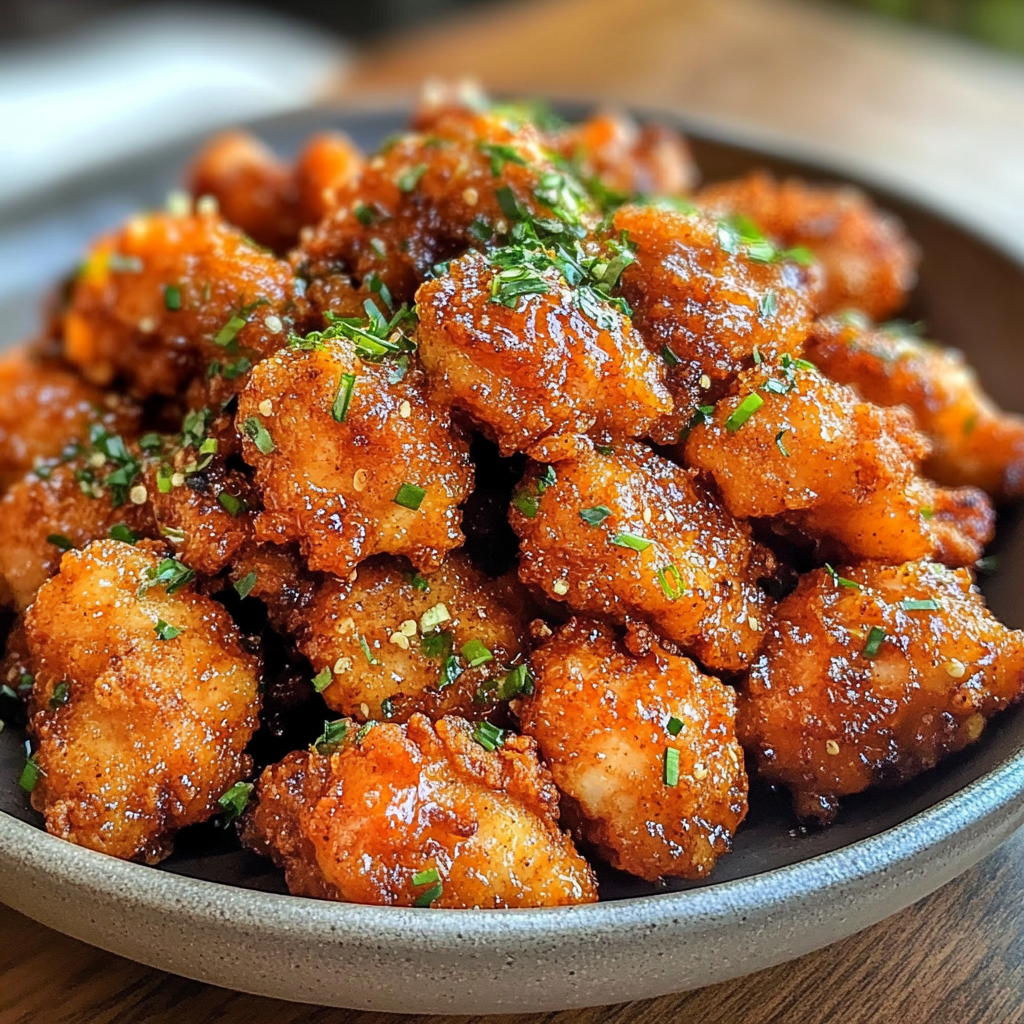
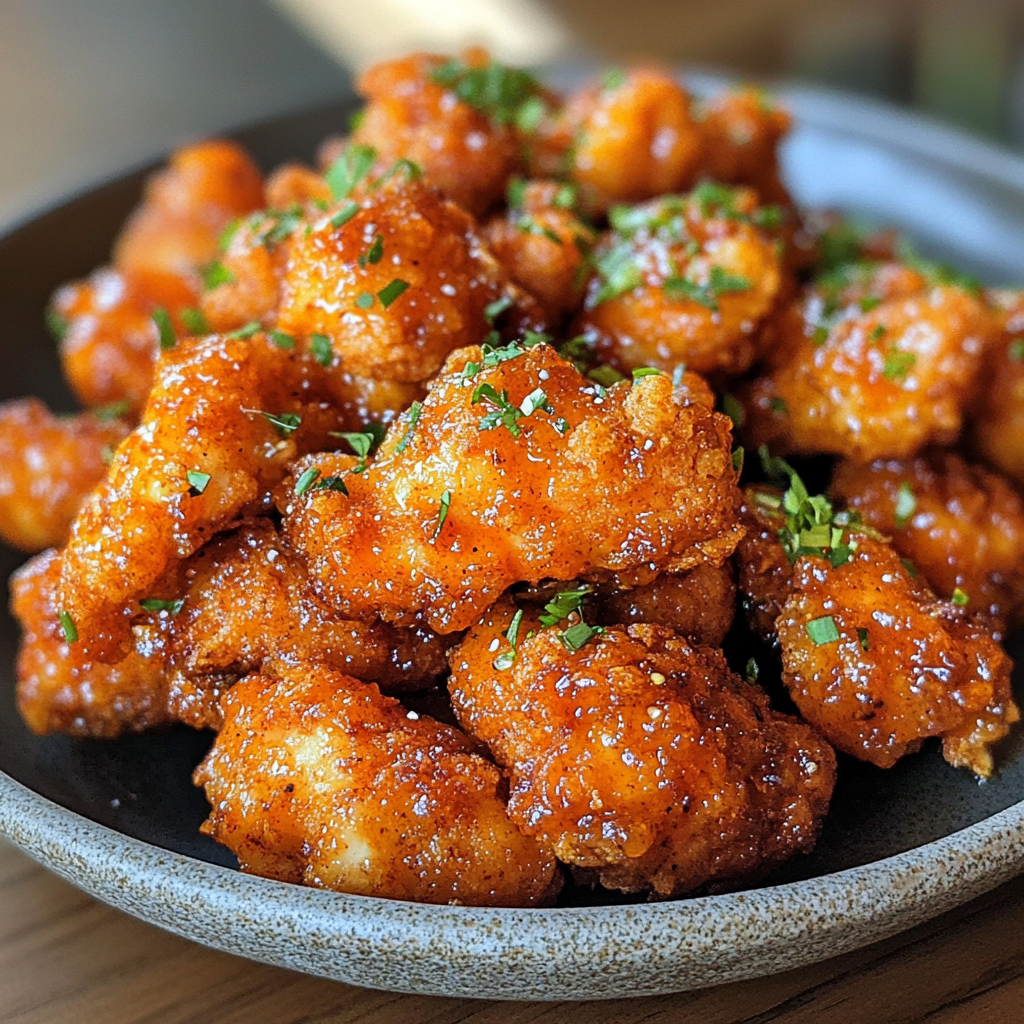
Step 3: Cooking the Chicken
With the chicken coated and the excitement building, it’s time to cook! I heat oil in my trusty skillet over medium-high heat. To check if the oil is ready, I drop a small piece of flour into it. If it sizzles, I know it’s go time! Carefully, I add the coated chicken pieces to the hot oil, making sure not to overcrowd the pan. I usually fry in batches to ensure each piece gets the attention it deserves.
I cook the chicken for about 6-8 minutes on each side, watching as it transforms into a beautiful golden brown. The aroma fills my kitchen, and I can hardly contain my excitement. I always keep my cooking thermometer handy to check the internal temperature, aiming for that perfect 165°F (75°C). Once cooked, I remove the chicken from the oil and place it on a plate lined with paper towels to drain any excess oil. The anticipation is almost unbearable!
Step 4: Resting the Chicken
After frying, I let the chicken rest for a few minutes. This step is crucial! Resting allows the juices to redistribute, ensuring each bite is juicy and tender. I can hardly wait to dig in, but I know that a little patience goes a long way. The crispy exterior and succulent meat are worth the wait!
And there you have it! The step-by-step preparation of my beloved buttermilk chicken recipe. Each step is filled with love and care, and I can’t wait for you to experience the joy of making this dish in your own kitchen!
Serving Suggestions for Buttermilk Chicken Recipe
Now that we’ve created this mouthwatering buttermilk chicken recipe, it’s time to think about how to serve it. The right sides and sauces can elevate your meal to a whole new level. I love to get creative with my serving suggestions, and I can’t wait to share some of my favorites with you!
Side Dishes to Pair with Buttermilk Chicken
When it comes to side dishes, the options are endless! I often find myself gravitating towards classic comfort foods that complement the crispy chicken perfectly. Here are a few of my go-to sides:
- Coleslaw: A crunchy, tangy coleslaw is a fantastic pairing. The freshness of the cabbage and the creamy dressing balance the richness of the chicken. I love adding a hint of apple cider vinegar for an extra zing!
- Mashed Potatoes: Creamy mashed potatoes are like a warm hug on a plate. I whip them up with butter and a splash of buttermilk for a delightful twist. They soak up the juices from the chicken beautifully!
- Cornbread: Sweet, fluffy cornbread is a must-have! It adds a touch of sweetness that contrasts wonderfully with the savory chicken. I often serve it warm with a pat of butter melting on top.
- Green Beans: For a pop of color and nutrition, I love sautéing fresh green beans with garlic and a sprinkle of salt. They add a nice crunch and a vibrant touch to the plate.
These sides not only taste amazing but also create a beautiful presentation on the table. I always enjoy mixing and matching to find the perfect combination that suits my mood and the occasion!
Sauces and Dips for Buttermilk Chicken
No meal is complete without a delicious sauce or dip to enhance the flavors! I’ve experimented with various sauces, and here are a few that I absolutely adore:
- Honey Mustard Sauce: This sweet and tangy sauce is a crowd-pleaser! I mix equal parts honey and Dijon mustard, adding a splash of lemon juice for brightness. It’s perfect for drizzling over the chicken or using as a dip.
- Ranch Dressing: A classic choice! I love making my own ranch dressing with buttermilk, herbs, and spices. It’s creamy, flavorful, and pairs perfectly with the crispy chicken.
- Spicy Aioli: For those who enjoy a kick, I whip up a spicy aioli by mixing mayonnaise with sriracha and a squeeze of lime. It adds a delightful heat that complements the chicken beautifully.
- BBQ Sauce: A smoky BBQ sauce is another fantastic option. I love the way it caramelizes on the chicken, adding a sweet and tangy layer of flavor. It’s perfect for summer cookouts!
These sauces and dips not only enhance the flavor of the buttermilk chicken recipe but also add a fun element to the meal. I always encourage my friends and family to get creative and mix their own combinations!
With these serving suggestions, your buttermilk chicken will shine on the table. Whether you’re hosting a dinner party or enjoying a cozy meal at home, these sides and sauces will surely impress your guests and make your taste buds dance!
Tips for Perfecting Your Buttermilk Chicken Recipe
As I’ve spent countless hours perfecting my buttermilk chicken recipe, I’ve learned a few tips and tricks along the way. These insights can help you avoid common pitfalls and elevate your dish to new heights. Let’s dive into some of the most important tips for making your buttermilk chicken truly unforgettable!
Common Mistakes to Avoid
Even the most seasoned cooks can make mistakes, and I’m no exception! Here are some common missteps I’ve encountered and how to steer clear of them:
- Skipping the Marinade: One of the biggest mistakes is not allowing enough time for the chicken to marinate. The buttermilk needs time to work its magic. I recommend marinating for at least 4 hours, but overnight is even better. Trust me, the flavor and tenderness are worth the wait!
- Overcrowding the Pan: When frying, it’s tempting to add all the chicken at once. However, overcrowding can lead to uneven cooking and soggy chicken. I always fry in batches, giving each piece enough space to crisp up beautifully.
- Not Checking the Temperature: Cooking chicken to the right temperature is crucial. I can’t stress enough how important it is to use a cooking thermometer. Aim for an internal temperature of 165°F (75°C) to ensure your chicken is safe and juicy.
- Using Cold Oil: If the oil isn’t hot enough, the chicken can absorb too much oil and become greasy. I always test the oil with a small piece of flour. If it sizzles, it’s ready! This little trick has saved me from many oily disasters.
By avoiding these common mistakes, you’ll be well on your way to creating a perfect buttermilk chicken recipe that will impress everyone at the table!
Variations of Buttermilk Chicken Recipe
One of the things I love most about this buttermilk chicken recipe is its versatility. You can easily switch things up to suit your taste or dietary preferences. Here are a few variations I’ve tried and loved:
- Spicy Buttermilk Chicken: If you’re a fan of heat, add some cayenne pepper or hot sauce to the marinade. It gives the chicken a delightful kick that pairs perfectly with the creamy buttermilk.
- Herb-Infused Buttermilk: For a fresh twist, try adding fresh herbs like thyme, rosemary, or dill to the marinade. The herbs infuse the chicken with a lovely aroma and flavor that’s simply irresistible.
- Buttermilk Chicken Tenders: Instead of using whole pieces, cut the chicken into strips for tenders. They cook faster and are perfect for dipping! Kids and adults alike love these crispy bites.
- Baked Buttermilk Chicken: If you’re looking for a healthier option, you can bake the chicken instead of frying. Coat the marinated chicken in flour and place it on a baking sheet. Bake at 400°F (200°C) for about 25-30 minutes, turning halfway through. It’s a lighter version that still delivers on flavor!
These variations allow you to customize your buttermilk chicken recipe to fit any occasion or craving. I encourage you to experiment and find your favorite twist on this classic dish!
FAQs About Buttermilk Chicken Recipe
Can I use regular milk instead of buttermilk?
Ah, the age-old question! While you can use regular milk in a pinch, it won’t give you the same tenderizing effect as buttermilk. But don’t worry! If you find yourself without buttermilk, you can easily make a substitute. Just add a tablespoon of vinegar or lemon juice to a cup of regular milk and let it sit for about 5-10 minutes. Voila! You’ve got a quick and easy buttermilk alternative that will still work wonders in your buttermilk chicken recipe.
How long should I marinate the chicken?
Marinating is where the magic happens! I recommend marinating the chicken for at least 4 hours, but if you can, let it sit overnight. The longer it marinates, the more flavorful and tender it becomes. It’s like giving your chicken a mini vacation in a flavor paradise! Just remember to keep it covered in the fridge to keep it fresh and safe.
What is the best cooking method for buttermilk chicken?
While frying is the classic method that gives you that crispy, golden exterior, baking is a fantastic alternative if you’re looking for a healthier option. I love to bake my buttermilk chicken at 400°F (200°C) for about 25-30 minutes, turning it halfway through. This method still delivers juicy chicken with a delightful crunch, but with less oil. So, whether you choose to fry or bake, you can’t go wrong with this buttermilk chicken recipe!
Can I make buttermilk chicken in advance?
Absolutely! You can marinate the chicken a day ahead, which actually enhances the flavor. Just make sure to keep it in the fridge until you’re ready to cook. If you have leftovers, they can be stored in an airtight container in the fridge for up to 3 days. I love reheating my buttermilk chicken in the oven to keep it crispy. Just pop it in at 375°F (190°C) for about 10-15 minutes, and it’ll taste almost as good as fresh!
Conclusion on Buttermilk Chicken Recipe
As I wrap up this delightful journey through my beloved buttermilk chicken recipe, I can’t help but feel a sense of joy and satisfaction. Cooking is not just about following a recipe; it’s about creating memories, sharing love, and bringing people together around the table. This dish has a special place in my heart, and I hope it finds a cozy spot in your kitchen too!
Print
Buttermilk chicken recipe: Discover the secret to juicy flavor!
- Total Time: 4 hours 35 minutes
- Yield: 4 servings
- Diet: Gluten Free
Description
A delicious buttermilk chicken recipe that results in juicy, tender meat with a crispy, golden exterior.
Ingredients
- Chicken pieces: 1.5 lbs (thighs, drumsticks, or breasts)
- Buttermilk: 2 cups
- Garlic: 4 cloves, minced
- Paprika: 2 teaspoons
- Salt: 1 teaspoon (or to taste)
- Black pepper: 1 teaspoon (or to taste)
- All-purpose flour: 1 cup
- Oil: for frying (about 1 cup)
Instructions
- Marinate the chicken in a mixture of buttermilk, minced garlic, paprika, salt, and black pepper for at least 4 hours or overnight.
- Prepare the coating by mixing all-purpose flour with a pinch of salt and pepper in a shallow dish.
- Remove the chicken from the marinade, dredge in the seasoned flour, and set aside.
- Heat oil in a skillet over medium-high heat and fry the chicken in batches for 6-8 minutes on each side until golden brown and cooked through.
- Let the chicken rest for a few minutes before serving.
Notes
- Marinating overnight enhances flavor and tenderness.
- Fry in batches to avoid overcrowding the pan.
- Check the internal temperature to ensure it reaches 165°F (75°C).
- Use a cooking thermometer for best results.
- Prep Time: 15 minutes
- Cook Time: 20 minutes
- Category: Main Course
- Method: Frying
- Cuisine: American
Nutrition
- Serving Size: 1 piece
- Calories: 400
- Sugar: 1g
- Sodium: 600mg
- Fat: 20g
- Saturated Fat: 3g
- Unsaturated Fat: 15g
- Trans Fat: 0g
- Carbohydrates: 30g
- Fiber: 1g
- Protein: 25g
- Cholesterol: 80mg
Keywords: buttermilk chicken, fried chicken, comfort food, easy recipe
")
")
")
")