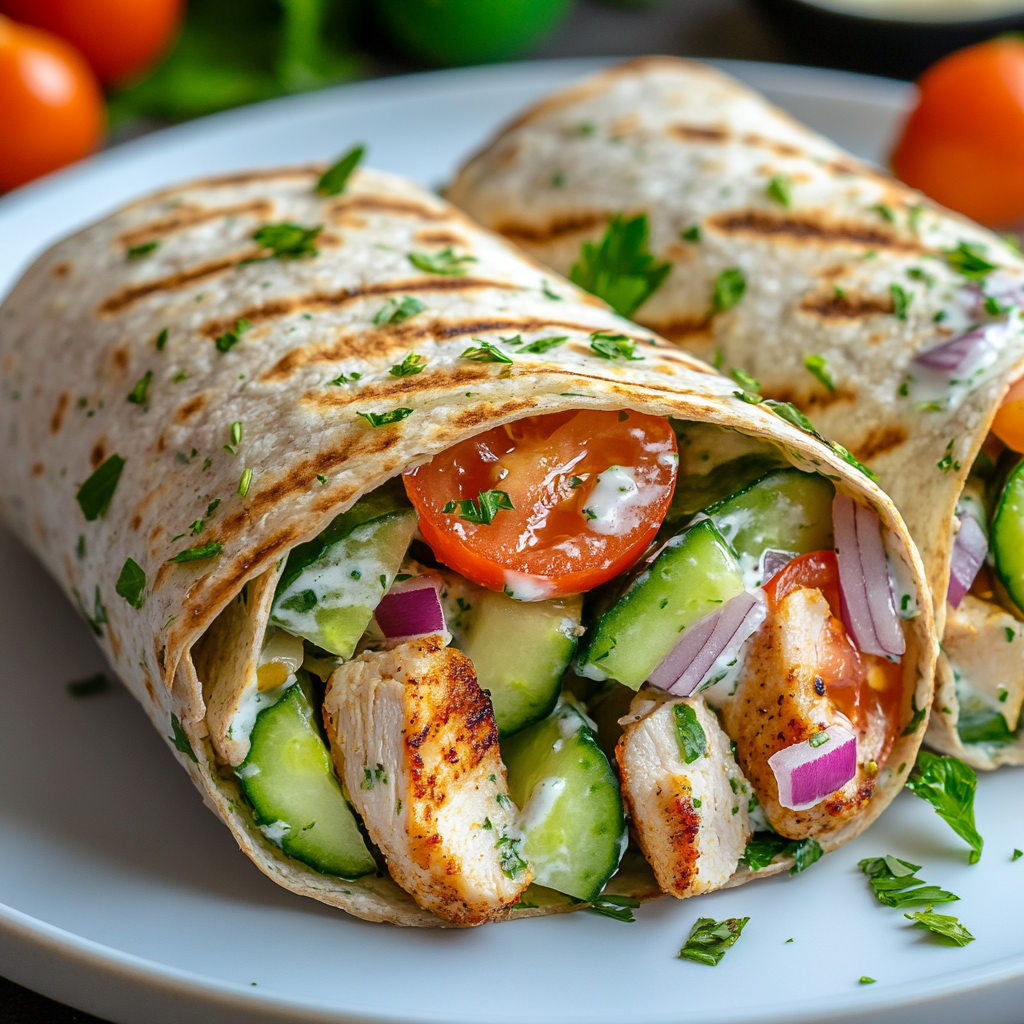
As a passionate home cook, I can’t help but get excited about Cheesy Chicken Roll Ups! These delightful bites are a scrumptious combination of tender chicken, creamy cheese, and fresh spinach, all wrapped up in a warm tortilla. Imagine biting into a crispy exterior, only to discover a gooey, cheesy filling that melts in your mouth. It’s like a warm hug for your taste buds! Perfect for a cozy family dinner or a fun gathering with friends, these roll-ups are sure to impress.
Ingredients for Cheesy Chicken Roll Ups
Before diving into the cooking process, let’s gather all the ingredients for these delightful Cheesy Chicken Roll Ups. I always find that having everything prepped and ready makes the cooking experience so much smoother. Plus, it’s a great way to get the kids involved! Here’s what you’ll need:
- 🍗 Chicken Breasts: 2 large (about 500g), cooked and shredded. I love using leftover rotisserie chicken for this; it saves time and adds a wonderful flavor!
- 🧀 Cream Cheese: 1 cup (about 240g), softened. This is the secret ingredient that makes the filling creamy and dreamy.
- 🧀 Shredded Cheddar Cheese: 1 cup (about 100g). The sharpness of cheddar adds a delightful kick to the roll-ups.
- 🧄 Garlic Powder: 1 teaspoon. A little garlic goes a long way in enhancing the flavors.
- 🌮 Tortillas: 4 large (flour or whole wheat). I prefer flour tortillas for their softness, but whole wheat adds a nice nutty flavor.
- 🥬 Fresh Spinach: 2 cups, chopped. This not only adds color but also packs in some nutrients!
- 🛢️ Olive Oil: 2 tablespoons (for cooking). This helps achieve that golden, crispy exterior.
- 🧂 Salt and Pepper: to taste. Always season to your liking!
As I gather these ingredients, I can already imagine the delicious aroma wafting through my kitchen. The combination of creamy cheese, tender chicken, and fresh spinach is simply irresistible. Plus, the best part is that you can easily adjust the ingredients based on what you have on hand. If you’re feeling adventurous, toss in some diced bell peppers or even a sprinkle of your favorite herbs!

Tools Needed for Cheesy Chicken Roll Ups
Now that we have our ingredients ready, let’s talk about the tools you’ll need to whip up these delightful Cheesy Chicken Roll Ups. Having the right kitchen tools can make all the difference in your cooking experience. Trust me, I’ve learned this the hard way! Here’s a list of essentials that will help you create these tasty treats:
- 🔪 Sharp Knife: A good knife is crucial for shredding the chicken and chopping the spinach. It makes the prep work quick and easy!
- 🥣 Mixing Bowl: You’ll need a large mixing bowl to combine all the filling ingredients. I love using a glass bowl so I can see the colorful mixture come together.
- 🌮 Spatula or Spoon: A spatula or a sturdy spoon will help you mix the filling thoroughly and scoop it onto the tortillas.
- 🍳 Large Skillet: This is where the magic happens! A non-stick skillet is ideal for cooking the roll-ups to a perfect golden brown.
- 🍽️ Serving Platter: Once your roll-ups are cooked, you’ll want a beautiful platter to showcase your delicious creation. Presentation is key!
- 🧊 Cutting Board: A cutting board is essential for slicing the roll-ups into bite-sized pieces. It also protects your countertops!
As I gather these tools, I can’t help but feel a sense of excitement. Each item plays a role in bringing my Cheesy Chicken Roll Ups to life. Plus, it’s always fun to have everything organized and ready to go. It makes the cooking process feel like a delightful adventure!
Preparation of Cheesy Chicken Roll Ups
Step 1: Preparing the Chicken
First things first, let’s get that chicken ready! If you’re like me, you might have some leftover chicken from last night’s dinner. It’s a fantastic way to save time and reduce waste. I usually grab my trusty rotisserie chicken, which is packed with flavor and makes the process a breeze. Just shred the chicken into bite-sized pieces, and you’re good to go! If you’re starting from scratch, simply boil or grill the chicken breasts until they’re cooked through, then shred them. The aroma of the chicken cooking fills my kitchen with warmth, making me feel right at home.
Step 2: Making the Cheese Mixture
Now, let’s dive into the cheesy goodness! In a large mixing bowl, I combine the shredded chicken with softened cream cheese and shredded cheddar cheese. The cream cheese is like a velvety blanket, wrapping around the chicken and making it oh-so-creamy. I sprinkle in some garlic powder for that extra kick, and don’t forget the chopped spinach! It adds a pop of color and a nutritious boost. As I mix everything together, I can’t help but taste a little bit of the filling. It’s like a sneak peek into the deliciousness that awaits!
Step 3: Assembling the Cheesy Chicken Roll Ups
With the filling ready, it’s time to assemble these delightful roll-ups! I lay a tortilla flat on my clean countertop, feeling the soft texture beneath my fingers. Spoon a generous amount of the chicken and cheese mixture onto the center of the tortilla, spreading it out evenly. I always leave about an inch of space at the edges to make rolling easier. Then, I carefully roll the tortilla from one end, tucking in the sides as I go. It’s like wrapping a present, and I love the anticipation of what’s inside! I repeat this process with the remaining tortillas, creating a little assembly line of cheesy goodness.
Step 4: Cooking the Cheesy Chicken Roll Ups
Now comes the exciting part—cooking the roll-ups! I heat some olive oil in a large skillet over medium heat. Once it’s hot and shimmering, I place the roll-ups seam side down in the skillet. The sizzle is music to my ears! I let them cook for about 3-4 minutes on each side until they turn golden brown and crispy. The smell wafting through my kitchen is simply irresistible. Once they’re done, I remove them from the skillet and let them cool for a minute. Then, I slice them into bite-sized pieces, ready to be devoured!

Serving Suggestions for Cheesy Chicken Roll Ups
Pairing Cheesy Chicken Roll Ups with Sides
When it comes to serving my Cheesy Chicken Roll Ups, I love to think of them as the star of the show, but every star needs a great supporting cast! Pairing these roll-ups with the right sides can elevate your meal to a whole new level. One of my favorite accompaniments is a fresh garden salad. The crispness of the greens and the tangy dressing provide a refreshing contrast to the warm, cheesy goodness of the roll-ups. I often toss in some cherry tomatoes, cucumbers, and a sprinkle of feta cheese for an extra burst of flavor.
Another delightful side is a bowl of homemade guacamole. The creamy avocado pairs perfectly with the cheesy filling, creating a flavor harmony that’s simply irresistible. I like to add a squeeze of lime and a pinch of salt to my guacamole for that zesty kick. And let’s not forget about chips! A side of crunchy tortilla chips adds a fun texture and is perfect for dipping into the guacamole or salsa.
If you’re looking for something heartier, consider serving the roll-ups with a side of Mexican rice or quinoa. The fluffy grains soak up any extra sauce and make for a filling meal. I often prepare my rice with a bit of lime juice and cilantro for a fresh twist. Trust me, these sides will complement your Cheesy Chicken Roll Ups beautifully!
Creative Serving Ideas for Cheesy Chicken Roll Ups
Now, let’s get a little creative! One of the things I love about Cheesy Chicken Roll Ups is their versatility. You can serve them in so many fun ways! For a casual gathering, I like to cut the roll-ups into bite-sized pieces and arrange them on a platter. This makes them perfect for sharing and encourages everyone to dig in. I often garnish the platter with fresh herbs or a sprinkle of paprika for a pop of color.
If you’re feeling adventurous, why not turn them into a fun taco bar? Set out the roll-ups alongside an array of toppings like diced tomatoes, shredded lettuce, jalapeños, and various sauces. Guests can customize their own creations, making it a lively and interactive dining experience. It’s a hit at parties!
For a cozy family dinner, I sometimes serve the roll-ups with a side of warm marinara sauce for dipping. The rich tomato flavor complements the cheesy filling perfectly, and it’s a great way to add a little Italian flair to the dish. You can even sprinkle some grated Parmesan cheese on top for an extra touch of indulgence.
With these serving suggestions, your Cheesy Chicken Roll Ups will not only be delicious but also a feast for the eyes. So, gather your loved ones, and enjoy a delightful meal together!
Tips for Perfect Cheesy Chicken Roll Ups
Common Mistakes to Avoid
As I’ve experimented with Cheesy Chicken Roll Ups over the years, I’ve learned a few tricks to ensure they turn out perfectly every time. One common mistake is overfilling the tortillas. I know it’s tempting to pile on the delicious filling, but trust me, less is more! If you overstuff them, they can burst open while cooking, leading to a cheesy mess in your skillet. Aim for a generous but manageable amount of filling, and you’ll have beautifully rolled-up treats.
Another pitfall is not letting the cream cheese soften enough. If it’s too cold, it won’t mix well with the other ingredients, resulting in clumps instead of a smooth filling. I always take my cream cheese out of the fridge ahead of time to let it come to room temperature. This little step makes a world of difference!
Lastly, don’t skip the seasoning! A pinch of salt and pepper can elevate the flavors of your roll-ups. I’ve made the mistake of forgetting to season my filling, and it turned out bland. So, taste as you go, and adjust the seasoning to your liking. Your taste buds will thank you!
Variations of Cheesy Chicken Roll Ups
One of the best things about Cheesy Chicken Roll Ups is their versatility. You can easily switch up the ingredients to create new flavor profiles! For a southwestern twist, I love adding black beans, corn, and diced bell peppers to the filling. The combination of flavors is like a fiesta in your mouth!
If you’re a fan of spicy food, consider mixing in some diced jalapeños or a splash of hot sauce. The heat pairs wonderfully with the creamy cheese and tender chicken. I often find myself reaching for a little extra salsa on the side to kick things up a notch!
For a healthier option, you can substitute the chicken with shredded turkey or even roasted vegetables for a vegetarian version. I’ve made these roll-ups with zucchini, mushrooms, and bell peppers, and they were just as delicious! You can also swap out the cream cheese for Greek yogurt for a lighter filling that still packs a punch.
Lastly, don’t forget about the cheese! While cheddar is a classic choice, experimenting with different cheeses can lead to delightful surprises. Try using pepper jack for a spicy kick or mozzarella for a gooey, stretchy texture. The possibilities are endless, and that’s what makes cooking so much fun!
FAQs About Cheesy Chicken Roll Ups
Can I make Cheesy Chicken Roll Ups ahead of time?
Absolutely! One of the things I love about Cheesy Chicken Roll Ups is their make-ahead potential. You can prepare the roll-ups in advance and store them in the refrigerator for up to 24 hours before cooking. Just wrap them tightly in plastic wrap or place them in an airtight container to keep them fresh. When you’re ready to enjoy them, simply heat up your skillet and cook as directed. It’s a fantastic way to save time on busy weeknights or when hosting friends!
What can I substitute for chicken in Cheesy Chicken Roll Ups?
If you’re looking to switch things up, there are plenty of delicious alternatives to chicken! For a vegetarian option, I often use roasted vegetables like zucchini, bell peppers, and mushrooms. They add a wonderful depth of flavor and texture. You can also try shredded turkey if you have some leftover from a holiday feast. Another great option is to use black beans or chickpeas for a protein-packed filling. The beauty of these roll-ups is that you can customize them to fit your dietary preferences!
How do I store leftover Cheesy Chicken Roll Ups?
Storing leftover Cheesy Chicken Roll Ups is super easy! Once they’ve cooled down, place them in an airtight container and store them in the refrigerator. They’ll stay fresh for about 3-4 days. When you’re ready to enjoy them again, you can reheat them in the oven at 350°F (175°C) for about 10-15 minutes, or until heated through. You can also pop them in the microwave for a quick snack, but I find that reheating in the oven keeps them crispy!
Can I freeze Cheesy Chicken Roll Ups?
Yes, you can definitely freeze Cheesy Chicken Roll Ups! This is a great option if you want to prepare a batch for later. Just make sure to wrap each roll-up tightly in plastic wrap and then place them in a freezer-safe bag or container. They can be frozen for up to 2-3 months. When you’re ready to enjoy them, simply thaw them in the refrigerator overnight and then cook them in the skillet as usual. It’s like having a delicious meal ready to go whenever you need it!
Conclusion on Cheesy Chicken Roll Ups
As I wrap up my culinary journey with Cheesy Chicken Roll Ups, I can’t help but feel a sense of joy and satisfaction. These delightful bites are not just a meal; they’re an experience filled with flavor, warmth, and creativity. Whether you’re cooking for a family dinner or hosting a gathering with friends, these roll-ups are sure to steal the spotlight.
Print
Cheesy Chicken Roll-Ups: A Must-Try Delight Today!
- Total Time: 25 minutes
- Yield: 4 servings
- Diet: Gluten Free
Description
Cheesy Chicken Roll Ups are a delightful combination of tender chicken, creamy cheese, and fresh spinach wrapped in a warm tortilla, perfect for family dinners or gatherings.
Ingredients
- 🍗 Chicken Breasts: 2 large (about 500g), cooked and shredded
- 🧀 Cream Cheese: 1 cup (about 240g), softened
- 🧀 Shredded Cheddar Cheese: 1 cup (about 100g)
- 🧄 Garlic Powder: 1 teaspoon
- 🌮 Tortillas: 4 large (flour or whole wheat)
- 🥬 Fresh Spinach: 2 cups, chopped
- 🛢️ Olive Oil: 2 tablespoons (for cooking)
- 🧂 Salt and Pepper: to taste
Instructions
- Prepare the chicken by shredding cooked chicken into bite-sized pieces.
- In a large mixing bowl, combine shredded chicken, softened cream cheese, shredded cheddar cheese, garlic powder, and chopped spinach.
- Lay a tortilla flat, spoon a generous amount of the chicken and cheese mixture onto the center, and roll it up tightly.
- Heat olive oil in a large skillet over medium heat and place the roll-ups seam side down. Cook for 3-4 minutes on each side until golden brown and crispy.
- Remove from skillet, let cool for a minute, and slice into bite-sized pieces.
Notes
- Use leftover rotisserie chicken for added flavor and convenience.
- Feel free to customize the filling with additional ingredients like jalapeños or bell peppers.
- Serve with dipping sauces like salsa or ranch dressing.
- Prep Time: 15 minutes
- Cook Time: 10 minutes
- Category: Appetizer/Main Dish
- Method: Skillet
- Cuisine: Mexican
Nutrition
- Serving Size: 2 roll-ups
- Calories: 350
- Sugar: 2g
- Sodium: 600mg
- Fat: 20g
- Saturated Fat: 8g
- Unsaturated Fat: 10g
- Trans Fat: 0g
- Carbohydrates: 30g
- Fiber: 2g
- Protein: 20g
- Cholesterol: 70mg
Keywords: Cheesy Chicken Roll Ups, Chicken Recipes, Easy Dinner, Appetizers

")
")
")
")