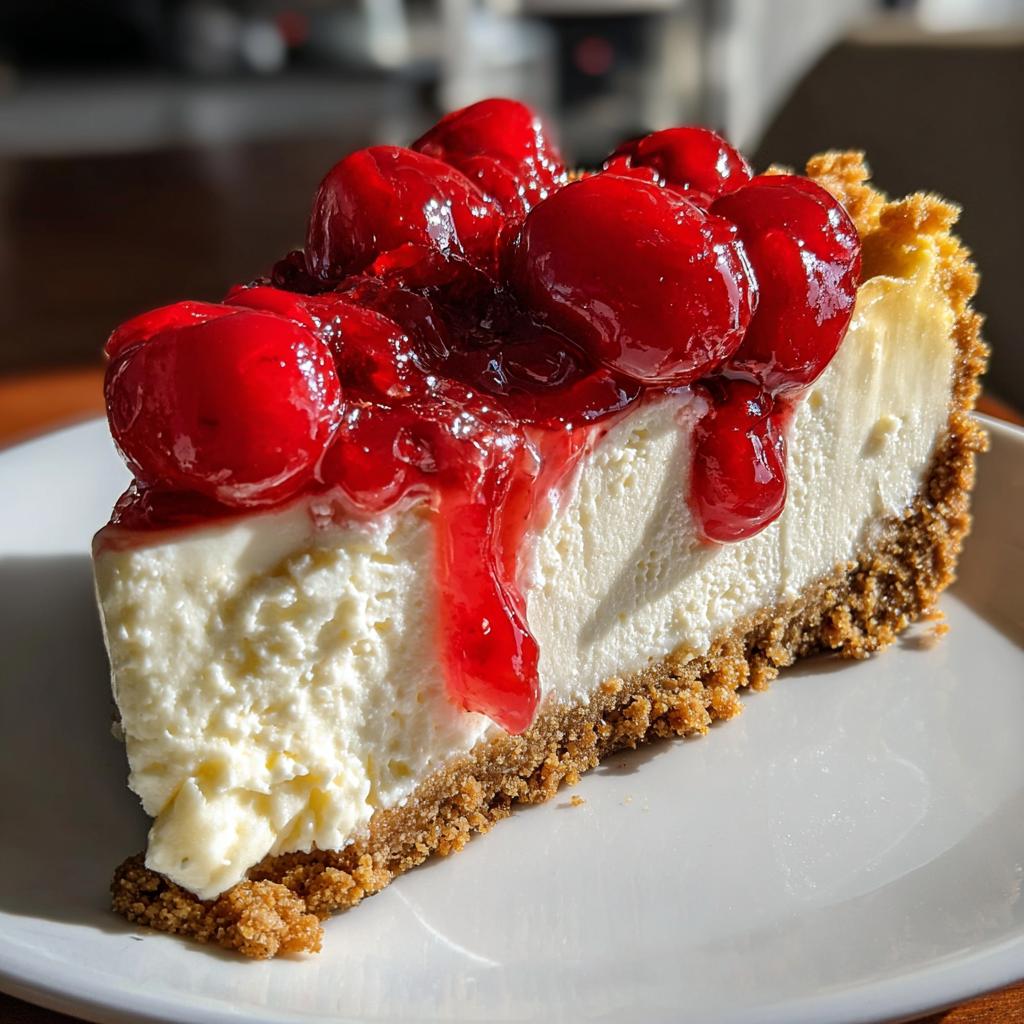
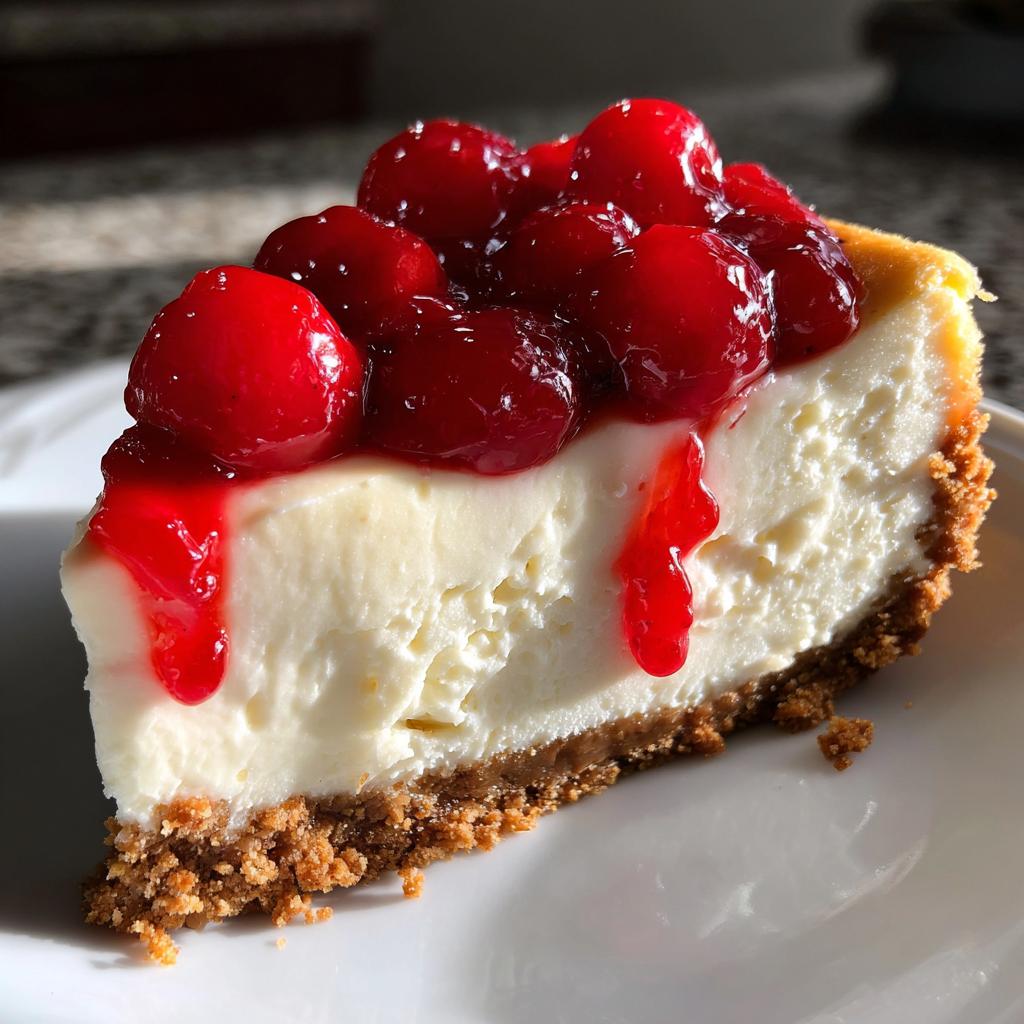
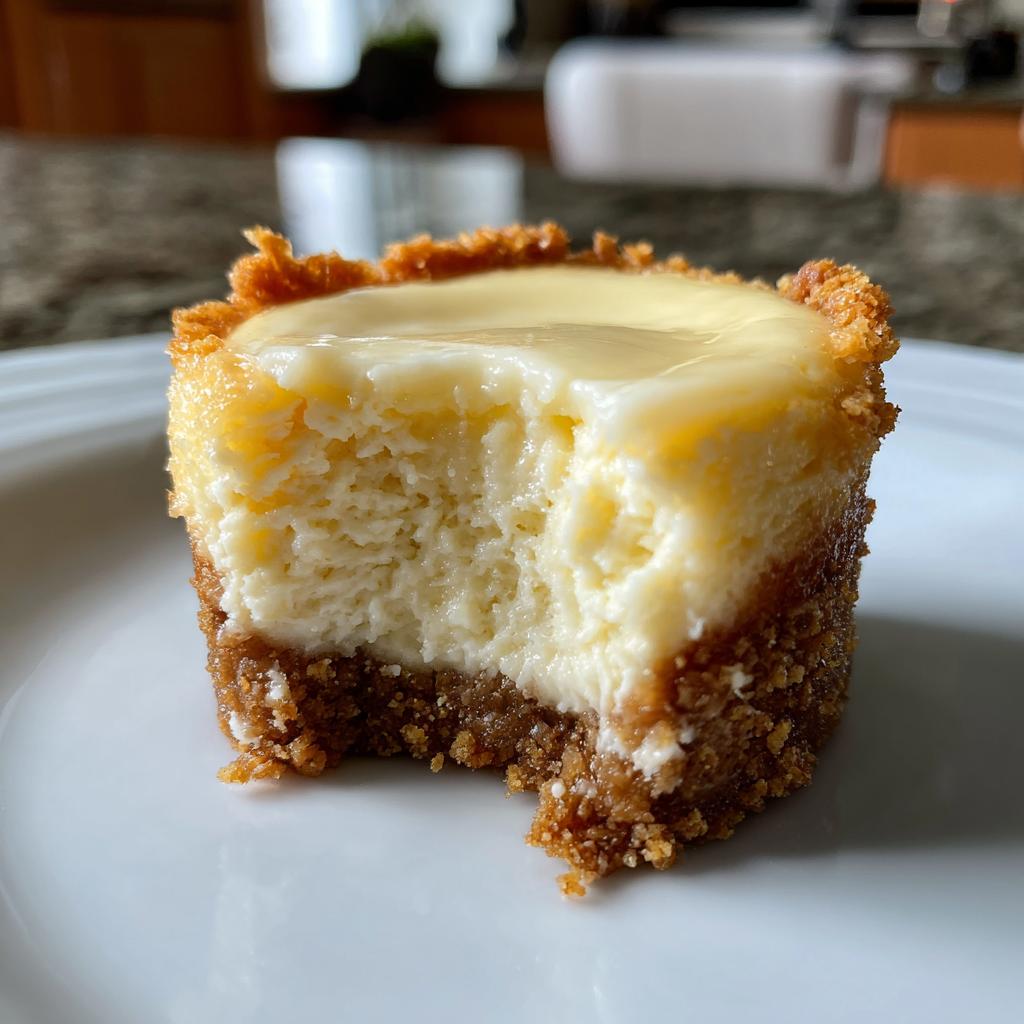
Oh, let me tell you about my absolute favorite dessert – Cherry Cheesecake! There’s something magical about that creamy, velvety filling nestled on top of a buttery graham cracker crust. I first fell in love with this dessert at my aunt’s 50th birthday party (I may have gone back for thirds, no shame). What makes this version special? It’s that perfect balance – the tangy cream cheese filling playing off the sweet cherry topping, all held together by that crisp, golden crust. Trust me, once you try this recipe, you’ll understand why it’s been my go-to for every special occasion (and, let’s be honest, some not-so-special Tuesday nights).
Why You’ll Love This Cherry Cheesecake
This cheesecake isn’t just delicious—it’s downright addictive. Here’s why it’s become my most-requested dessert:
- That dreamy texture – The filling is so creamy it practically melts in your mouth, thanks to perfectly whipped cream cheese and just the right amount of eggs.
- Foolproof crust – The graham cracker base comes together in minutes and gives that satisfying crunch with every bite.
- Total crowd-pleaser – Whether it’s a birthday or potluck, I’ve never brought home leftovers (much to my husband’s disappointment).
- Easier than it looks – No water bath needed! Just mix, bake, and let the oven work its magic.
Seriously, this recipe turns basic ingredients into something extraordinary – and your friends will think you spent hours on it!
Ingredients for Cherry Cheesecake
Okay, let’s gather the good stuff! I’ve made this cheesecake dozens of times, and I’ve learned that quality ingredients make all the difference. Here’s what you’ll need:
- 2 cups graham cracker crumbs – About 15 full crackers. I pulse mine in the food processor until they’re fine as sand.
- 1/2 cup melted butter – The good stuff! No substitutes here – it gives that perfect crispness to the crust.
- 1/4 cup sugar – Just enough to sweeten the crust without overpowering the filling.
- 24 oz cream cheese – Must be at room temperature (I leave mine out for 2 hours). Full-fat only – this is dessert, not diet food!
- 1 cup sugar – Granulated works best for that smooth texture we’re after.
- 1 tsp vanilla extract – Pure vanilla, please! The imitation stuff just won’t give you that depth of flavor.
- 3 large eggs – Room temp like the cream cheese – this prevents lumps in your batter.
- 1 can cherry pie filling – My secret? I always have an extra can for those who want to pile on more cherries!
Equipment You’ll Need
Don’t worry, you won’t need anything fancy for this cherry cheesecake! Here’s what I always grab from my kitchen:
- 9-inch springform pan – The hero of cheesecake baking! The removable sides make serving a breeze.
- Stand mixer or hand mixer – Trust me, you want electric help for that creamy filling.
- Measuring cups and spoons – Precision matters with cheesecake.
- Rubber spatula – For scraping every last bit of that delicious batter into the pan.
- Food processor – Makes crushing graham crackers a 10-second job.
That’s it! You probably have most of these already – now let’s get baking!
How to Make Cherry Cheesecake
Alright, let’s get baking! This cherry cheesecake comes together in simple steps, but there are a few tricks I’ve learned over the years to make sure it turns out perfect every single time. Follow along closely – we’ll take it one delicious step at a time.
Preparing the Graham Cracker Crust
First things first – preheat that oven to 325°F (not hotter – cheesecakes are delicate creatures!). Now let’s tackle that glorious crust. Mix your graham cracker crumbs with melted butter and sugar until it looks like wet sand. I always test it by squeezing a bit in my palm – if it holds together, you’re golden! Learn more about perfect graham cracker crusts.
Pour it into your springform pan and press firmly with the back of a measuring cup or your fingers. You want it compacted enough that it won’t crumble when you slice the cheesecake later. Bake it for 10 minutes alone – this helps set the crust so it doesn’t get soggy under all that creamy filling.
Making the Cream Cheese Filling
Here’s where the magic happens! Beat your room-temperature cream cheese (I can’t stress this enough – cold cream cheese = lumpy filling!) with sugar until it’s completely smooth. Scrape down the bowl – those sneaky lumps hide in the corners!
Add vanilla, then crack in those eggs one at a time, mixing just until combined after each. Overbeating incorporates too much air and can cause cracks later. The batter should be velvety smooth – no lumps allowed!
Baking and Cooling the Cheesecake
Pour your silky filling over the crust and gently tap the pan on the counter to release air bubbles. Bake for 50-55 minutes – you’ll know it’s done when the edges are set but the center still has a slight jiggle (like barely set Jell-O).
Now the most important part – cooling! Turn off the oven, crack the door, and let it cool gradually for about an hour. This prevents sudden temperature changes that cause cracks. Then transfer to a wire rack until completely room temperature before refrigerating for at least 4 hours (overnight is even better!). Patience is rewarded with that perfect creamy texture.
Tips for the Perfect Cherry Cheesecake
After making this cheesecake more times than I can count, I’ve picked up some game-changing tricks that’ll take yours from good to “Oh my god, can I have the recipe?” status:
- Chill out – I know it’s tempting, but don’t skip the refrigeration time! That 4-hour chill (or better yet, overnight) lets the flavors develop and gives you that signature creamy texture.
- Quality cherries matter – Splurge on the good cherry pie filling. The cheap stuff can be too syrupy and artificial tasting.
- Room temp is non-negotiable – Cold cream cheese won’t incorporate smoothly no matter how long you beat it. Plan ahead!
- Prevent cracks – That gradual cooling method I mentioned? It’s saved me from more cracked tops than I care to admit.
- Slice cleanly – Run your knife under hot water and wipe it between cuts for picture-perfect slices every time.
Follow these tips, and you’ll have a cheesecake that’ll make your friends think you trained under a pastry chef!
Cherry Cheesecake Variations
Oh, I love playing with this recipe! Here are some of my favorite twists when I’m feeling adventurous:
- Chocolate lover’s dream – Swap the graham crackers for Oreo crumbs in the crust (use the whole cookie, filling and all!). Sometimes I’ll even swirl melted chocolate into the batter.
- Fresh cherry topping – In summer, I simmer fresh cherries with a bit of sugar and cornstarch instead of using canned filling. The flavor is incredible!
- Nutty crunch – Add 1/2 cup finely chopped toasted almonds to the crust mixture for extra texture.
- Lemon twist – A tablespoon of lemon zest in the filling brightens up the whole dessert beautifully.
Don’t be afraid to make it your own – that’s half the fun of baking!
Serving and Storing Cherry Cheesecake
Here’s the best part – enjoying your masterpiece! For perfect slices, I always use a hot knife (just run it under hot water and wipe dry between cuts). Serve it straight from the fridge – that cool, creamy texture is everything. Leftovers? Ha! But if you somehow have any, cover it tightly and refrigerate for up to 5 days. Pro tip: The flavors actually get better on day two! Just don’t freeze it – the texture turns grainy, and we can’t have that.
Cherry Cheesecake Nutritional Information
Okay, let’s get real – we don’t eat cheesecake for the health benefits! But in case you’re curious, here’s the scoop on what’s in each slice (based on 12 servings): about 380 calories, 24g fat (14g saturated), and 35g carbs. The protein from all that cream cheese gives you 6g per slice. Keep in mind these numbers can vary slightly depending on your exact ingredients – especially if you go wild with extra cherries like I sometimes do!
Frequently Asked Questions
Oh, I get asked about this cherry cheesecake all the time! Here are the questions that pop up most often – and my tried-and-true answers:
Can I use frozen cherries instead of pie filling?
Absolutely! Just thaw and drain them well first. I like to simmer them with a bit of sugar and cornstarch to make my own topping – about 2 cups cherries with 1/4 cup sugar and 1 tbsp cornstarch works beautifully. The flavor will be brighter than canned filling!
Help! My cheesecake cracked. What went wrong?
First, don’t panic – it’ll still taste amazing! Cracks usually happen from temperature shock. Next time, try my gradual cooling method: turn off the oven, crack the door, and let it cool slowly for an hour before moving it. Also, avoid overmixing the batter after adding eggs – too much air causes cracks.
Can I make this ahead of time?
Oh honey, cheesecake loves advance prep! It actually tastes better after chilling overnight. Just wait to add the cherry topping until you’re ready to serve so it stays pretty. Cover tightly and it’ll keep beautifully for 2-3 days in the fridge.
Why does my filling have lumps?
Nine times out of ten, it’s cold cream cheese! Those little lumps are cream cheese that wasn’t soft enough. Always let it sit out for at least 2 hours – poke it with your finger to check. If you’re in a hurry, microwave it at 10% power in 15-second bursts.
Share Your Cherry Cheesecake Experience
Okay, now I need to hear from you! Did your cheesecake turn out as dreamy as mine? Did you try any fun twists? Drop a comment below—I read every single one and love seeing your photos! Tag me if you share on social too. Happy baking, my fellow cheesecake lovers!
Print
Irresistible 2-Layer Cherry Cheesecake Recipe You’ll Crave
- Total Time: 4 hours 15 minutes
- Yield: 12 servings 1x
- Diet: Vegetarian
Description
A creamy and delicious cherry cheesecake with a buttery graham cracker crust. Perfect for any occasion.
Ingredients
- 2 cups graham cracker crumbs
- 1/2 cup melted butter
- 1/4 cup sugar
- 24 oz cream cheese, softened
- 1 cup sugar
- 1 tsp vanilla extract
- 3 eggs
- 1 can cherry pie filling
Instructions
- Preheat oven to 325°F.
- Mix graham cracker crumbs, melted butter, and 1/4 cup sugar. Press into the bottom of a 9-inch springform pan.
- Beat cream cheese, 1 cup sugar, and vanilla until smooth. Add eggs one at a time, mixing well after each.
- Pour filling over the crust. Bake for 50-55 minutes or until center is set.
- Cool completely, then top with cherry pie filling. Refrigerate for at least 4 hours before serving.
Notes
- Use room temperature cream cheese for smoother texture.
- Cool cheesecake slowly to prevent cracking.
- Chill before serving for best results.
- Prep Time: 20 minutes
- Cook Time: 55 minutes
- Category: Dessert
- Method: Baking
- Cuisine: American
Nutrition
- Serving Size: 1 slice
- Calories: 380
- Sugar: 28g
- Sodium: 320mg
- Fat: 24g
- Saturated Fat: 14g
- Unsaturated Fat: 8g
- Trans Fat: 0.5g
- Carbohydrates: 35g
- Fiber: 1g
- Protein: 6g
- Cholesterol: 120mg
Keywords: cherry cheesecake, dessert, easy cheesecake recipe

")
")
")
")