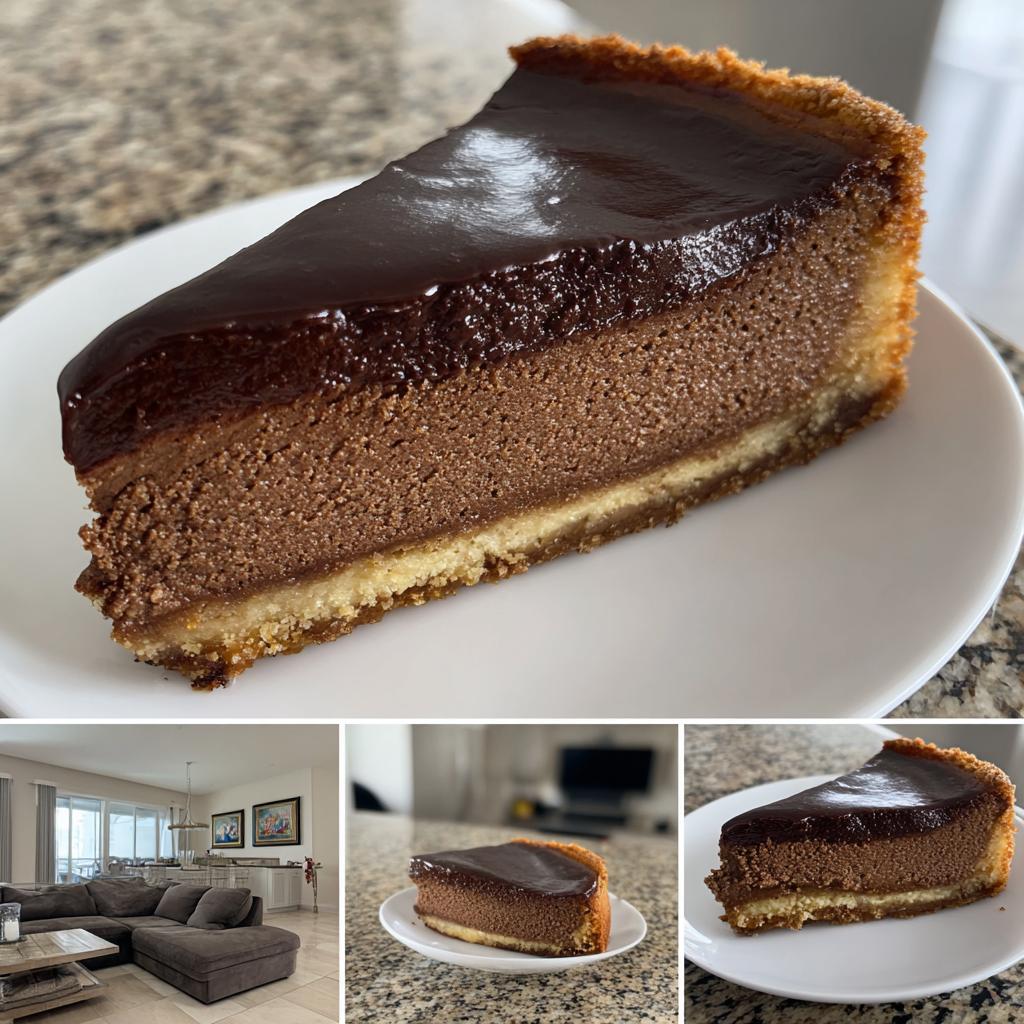
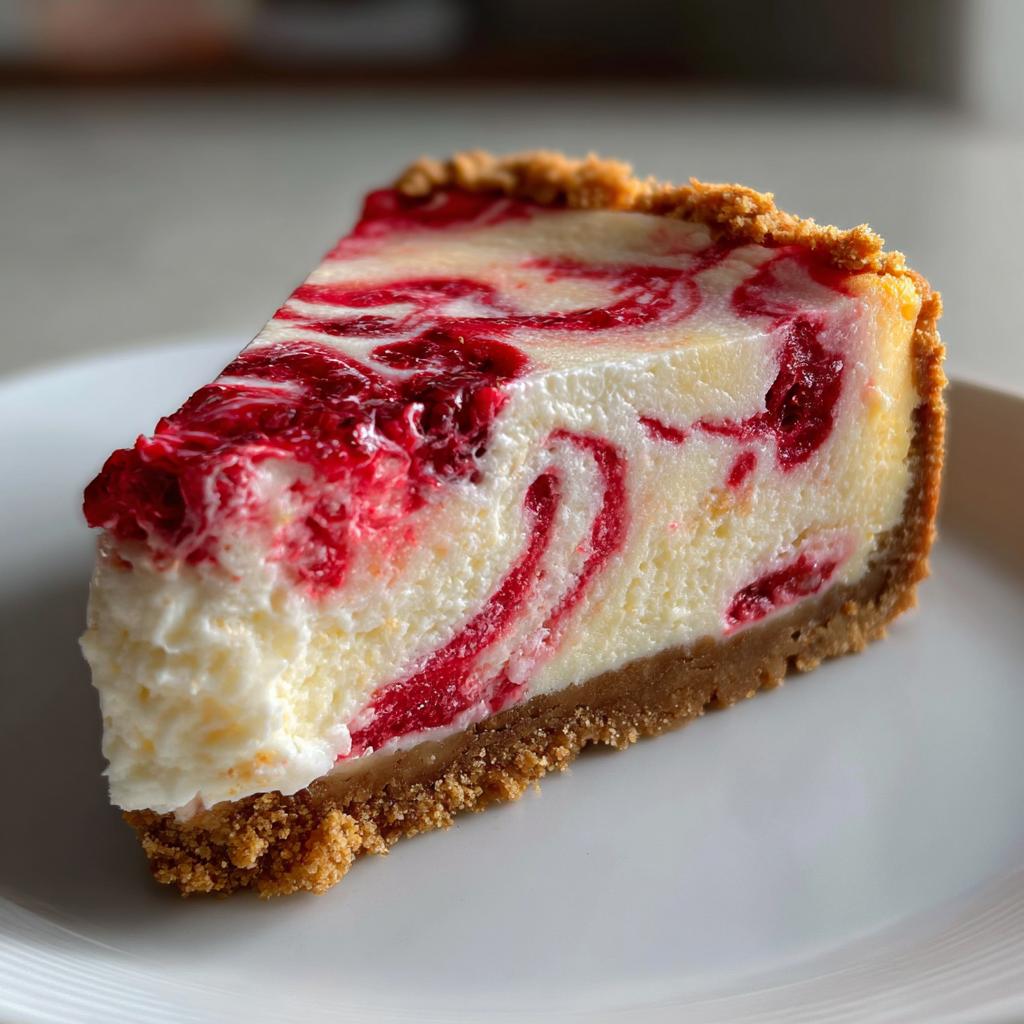
Oh my goodness, let me tell you about my absolute favorite chocolate cheesecake recipe! This isn’t just any dessert – it’s the kind that makes people’s eyes roll back in bliss with that first creamy, chocolatey bite. I’ve been perfecting this recipe for years, ever since my aunt passed down her secret for getting that velvety smooth texture.
What makes this chocolate cheesecake special? It’s all about balance – rich dark chocolate that doesn’t overpower, a buttery biscuit base with just the right crunch, and that signature creamy texture that melts on your tongue. I’ll never forget the first time I made it for a dinner party – halfway through slicing, three people had already asked for the recipe!
The magic happens when you combine quality ingredients with patience (yes, you must wait for it to chill properly!). Trust me, this chocolate cheesecake is worth every minute of prep time. It’s become my go-to for birthdays, holidays, or honestly… just because it’s Tuesday.
Why You’ll Love This Chocolate Cheesecake
Listen, I don’t just make cheesecakes—I make memories. This chocolate cheesecake? It’s the one people beg me to bring to parties. Here’s why:
- That texture! Silky smooth with just the right density—not too heavy, not too light. It practically melts on your fork.
- Deep chocolate flavor from quality dark chocolate, balanced perfectly with the tangy cream cheese. No cheap cocoa powder here!
- Foolproof steps even if you’re new to baking (my cousin’s 13-year-old nailed it on her first try).
- Showstopper looks with zero fuss—it’s elegant enough for weddings but casual enough for backyard BBQs.
Seriously, one bite and you’ll understand why this recipe never leaves my dessert rotation.
Ingredients for Chocolate Cheesecake
Okay, let’s gather our treasures! I’ve learned the hard way that quality ingredients make all the difference with chocolate cheesecake. Here’s exactly what you’ll need (and yes, I’m obsessive about measurements – my kitchen scale gets more action than my coffee maker):
- 200g digestive biscuits (about 14 biscuits) – Graham crackers work too, but digestives give that perfect buttery crunch
- 100g unsalted butter, melted – Use the good stuff! I keep mine golden, not browned, for the crust
- 500g cream cheese, room temperature – This is KEY. Cold cream cheese = lumpy filling. I leave mine out for 2 hours
- 150g granulated sugar – Not powdered! The granules help aerate the filling when beating
- 3 large eggs, room temperature – Cracked into a separate bowl first (trust me, no one wants shell surprises)
- 200g dark chocolate, melted – 70% cocoa is my sweet spot. Chop it small so it melts evenly
- 1 tsp vanilla extract – The real deal, please! Imitation vanilla can’t compare
- 200ml sour cream – Full-fat only. This secret weapon keeps the cheesecake lusciously creamy
See that note about room temperature ingredients? That’s not just fussiness – it’s the difference between a good cheesecake and a “holy cow, did you make this?!” cheesecake. Now let’s get mixing!
Equipment You’ll Need
Before we dive in, let me tell you about my cheesecake toolkit—these are the MVPs that make the magic happen:
- 9-inch springform pan – The hero of our story! That removable ring makes serving a breeze
- Electric mixer – A hand mixer works fine, but my stand mixer gets the creamiest results
- Mixing bowls – One large for filling, one medium for melting chocolate
- Silicone spatula – For scraping every last bit of that glorious batter
- Measuring cups/spoons – Precision matters with cheesecake
That’s it! No fancy gadgets needed—just these trusty tools and some baking passion.
How to Make Chocolate Cheesecake
Alright, let’s get to the fun part! Making this chocolate cheesecake is like conducting a delicious symphony—every step matters, but the payoff is pure magic. Follow these steps closely, and you’ll have a showstopper dessert that’ll make you feel like a pastry pro.
Preparing the Crust
First things first—let’s make that buttery foundation. I always start by preheating my oven to 160°C (320°F) so it’s ready when we need it.
Take those digestive biscuits and crush them until they resemble fine sand. My favorite method? Toss them in a zip-top bag and roll with a rolling pin—great stress relief! Mix the crumbs with melted butter until it looks like wet sand. Now here’s my secret: press the mixture firmly into your springform pan using the bottom of a glass. Really pack it in—this prevents crumbling later. Bake for 10 minutes just to set it, then let it cool completely. (No shortcuts here—a warm crust makes for a soggy bottom!)
Making the Chocolate Cheesecake Filling
Now for the star of the show! In your mixing bowl, beat the room-temperature cream cheese until it’s completely smooth—no lumps allowed! Add sugar gradually and beat until fluffy. This is where patience pays off—about 3 minutes of mixing.
Add eggs one at a time, mixing just until incorporated after each. Overbeating eggs leads to cracks! Meanwhile, melt your chopped chocolate gently (I use a double boiler, but microwave in 30-second bursts works too). Let it cool slightly so it doesn’t cook the eggs when added.
With the mixer on low, blend in vanilla, then drizzle in the chocolate. Finally, fold in sour cream by hand—this keeps the filling airy. The batter should be satiny smooth and pour like thick paint.
Baking and Cooling
Pour your glorious filling over the cooled crust and smooth the top. Bake for 50-60 minutes—the edges should be set but the center will still jiggle slightly when nudged.
Here’s the most important step: turn off the oven, crack the door, and let the cheesecake cool inside for 1 hour. This gradual cooling prevents dramatic temperature changes that cause cracks. Afterward, run a knife around the edge (to prevent sticking), then chill in the fridge for at least 4 hours—overnight is even better!
Resist the urge to peek—good things come to those who wait. Your patience will be rewarded with the creamiest, dreamiest chocolate cheesecake imaginable.
Tips for the Perfect Chocolate Cheesecake
After making this chocolate cheesecake more times than I can count, I’ve picked up some game-changing tricks that’ll take yours from good to “where has this been all my life?” status:
- Water bath magic: Wrap your springform pan in foil and place it in a roasting pan with hot water halfway up the sides. The steam prevents cracks and ensures even baking—my cheesecakes come out flawless every time!
- The knife trick: After baking, run a thin knife around the edge immediately. This stops the cheesecake from sticking as it cools and contracts.
- Room temp is key: I can’t stress this enough—cold ingredients don’t blend smoothly. Take everything out 2 hours before baking.
- Chill time matters: That 4-hour minimum? Non-negotiable. The flavors develop beautifully overnight—if you can wait that long!
Follow these, and you’ll have bakery-quality results right from your own kitchen.
Serving and Storing Chocolate Cheesecake
Now for my favorite part—the grand unveiling! Run a warm knife around the edges before releasing the springform ring for a flawless presentation. I love topping slices with fresh raspberries (their tartness cuts through the richness) or a dollop of barely-sweetened whipped cream. For serious wow factor, drizzle with warm chocolate ganache.
Store leftovers (ha—as if!) covered in the fridge for up to 5 days. To freeze, wrap whole or sliced cheesecake tightly in plastic, then foil—it keeps beautifully for 2 months. Thaw overnight in the fridge, and it’ll taste just-baked. Pro tip: freeze individual slices for emergency chocolate cravings!
Chocolate Cheesecake Variations
Once you’ve mastered this chocolate cheesecake (and trust me, you will!), try these fun twists to keep things exciting in your dessert game. My personal favorite? Swirling melted white chocolate through the batter right before baking – gorgeous marbled slices every time. For peanut butter lovers, layer a cup of warmed PB under the chocolate filling. Feeling fancy? Add a shot of espresso to the melted chocolate for a mocha kick that’ll have guests swooning.
Nutritional Information
Now, let’s be real – we’re not eating chocolate cheesecake for its health benefits! But since folks often ask, here’s the general nutritional picture per slice (based on my standard recipe). Remember, these numbers can change depending on your specific ingredients – like if you use milk chocolate instead of dark, or swap in low-fat cream cheese (though I wouldn’t recommend that last one!).
A typical slice comes in around 420 calories, with 30g of fat. There’s about 28g of sugar – but hey, that’s what makes it so gloriously indulgent! The dark chocolate does give you some antioxidants, and the eggs provide protein. My philosophy? Enjoy a reasonable slice (or two, no judgment here!) as part of balanced eating. Life’s too short to skip dessert this good.
Chocolate Cheesecake FAQs
Over the years, I’ve gotten so many questions about this chocolate cheesecake—here are the ones that pop up most often with my tried-and-true answers:
Can I use milk chocolate instead of dark?
You can, but expect a sweeter, less intense chocolate flavor. I recommend using 70% dark chocolate because its bitterness balances the richness perfectly. If you must use milk chocolate, reduce the sugar by 25g.
Help! My cheesecake cracked—can I fix it?
First, don’t panic! Cracks happen to the best of us. Simply cover them with whipped cream, fresh berries, or a chocolate ganache drizzle. Next time, try the water bath method and don’t overbake—the center should still jiggle slightly when done.
Why does my filling have lumps?
Room-temperature ingredients are non-negotiable! Cold cream cheese won’t blend smoothly. Also, scrape the bowl frequently while mixing to incorporate everything evenly.
Can I make this gluten-free?
Absolutely! Swap the digestive biscuits for gluten-free graham crackers or almond flour mixed with butter (use 150g almond flour + 50g melted butter). The filling is naturally gluten-free.
How do I know when it’s done baking?
The edges should be set, but the center (about a 2-inch circle) should jiggle like Jell-O when you gently shake the pan. It’ll firm up as it cools—overbaking leads to dryness.
Final Thoughts
There you have it—my all-time favorite chocolate cheesecake recipe that never fails to impress. I can’t wait for you to experience that first velvety bite! When you make it (and I know you will), tag me in your photos—I love seeing your creations. Now go preheat that oven and get baking—your dream dessert awaits!
Print
Ultimate 200g Chocolate Cheesecake Recipe You’ll Crave
- Total Time: 5 hours 20 minutes
- Yield: 1 cheesecake (10 slices) 1x
- Diet: Vegetarian
Description
A rich and creamy chocolate cheesecake with a buttery crust. Perfect for any occasion.
Ingredients
- 200g digestive biscuits
- 100g unsalted butter, melted
- 500g cream cheese
- 150g granulated sugar
- 3 large eggs
- 200g dark chocolate, melted
- 1 tsp vanilla extract
- 200ml sour cream
Instructions
- Preheat your oven to 160°C (320°F).
- Crush the biscuits and mix with melted butter. Press into a springform pan to form the base.
- Bake the crust for 10 minutes, then let it cool.
- Beat cream cheese and sugar until smooth. Add eggs one at a time.
- Mix in melted chocolate, vanilla extract, and sour cream.
- Pour the filling over the crust and bake for 50-60 minutes.
- Turn off the oven and let the cheesecake cool inside for an hour.
- Chill in the fridge for at least 4 hours before serving.
Notes
- Use room-temperature cream cheese for smoother texture.
- Let the cheesecake cool gradually to prevent cracking.
- For a glossier finish, add a thin layer of melted chocolate on top.
- Prep Time: 20 minutes
- Cook Time: 60 minutes
- Category: Dessert
- Method: Baking
- Cuisine: American
Nutrition
- Serving Size: 1 slice
- Calories: 420
- Sugar: 28g
- Sodium: 220mg
- Fat: 30g
- Saturated Fat: 18g
- Unsaturated Fat: 9g
- Trans Fat: 0g
- Carbohydrates: 35g
- Fiber: 2g
- Protein: 6g
- Cholesterol: 110mg
Keywords: chocolate cheesecake, dessert, baked cheesecake, creamy dessert
")
")
")
")