Ah, the Christmas season! It’s a time filled with joy, laughter, and of course, a whole lot of baking! There’s something magical about whipping up desserts that not only taste incredible but also look downright stunning. That’s what I love about the *christmas desserts aesthetic* – it’s all about bringing a little sparkle and cheer to the table. I remember as a child, my mom and I would spend hours in the kitchen, flour dusting our noses, while we created delightful treats adorned with colorful icing and festive sprinkles. Those moments shaped my love for holiday baking, and now I’m passing that down to my kids. The excitement of pulling a warm, chocolatey dessert from the oven, waiting for it to cool and then transforming it into a snowy wonderland with powdered sugar is just the best! Trust me, this recipe will not only delight your taste buds but also light up your holiday gatherings with its beautiful presentation!
Ah, the Christmas season! It’s a time filled with joy, laughter, and of course, a whole lot of baking! There’s something magical about whipping up desserts that not only taste incredible but also look downright stunning. That’s what I love about the christmas desserts aesthetic – it’s all about bringing a little sparkle and cheer to the table. I remember as a child, my mom and I would spend hours in the kitchen, flour dusting our noses, while we created delightful treats adorned with colorful icing and festive sprinkles. Those moments shaped my love for holiday baking, and now I’m passing that down to my kids. The excitement of pulling a warm, chocolatey dessert from the oven, waiting for it to cool and then transforming it into a snowy wonderland with powdered sugar is just the best! Trust me, this recipe will not only delight your taste buds but also light up your holiday gatherings with its beautiful presentation!
Ingredients List
Gathering the right ingredients is key to achieving that delightful *christmas desserts aesthetic*. Here’s what you’ll need:
- 1 cup all-purpose flour
- 1/2 cup unsweetened cocoa powder
- 1 cup sugar
- 2 large eggs
- 1/2 cup butter, melted
- 1 tsp vanilla extract
- 1/2 tsp baking powder
- 1/4 tsp salt
- 1 cup powdered sugar for decoration
Make sure to have everything measured and ready to go. It’s all about that festive vibe and the joy of creating something beautiful!
How to Prepare Instructions
Now that you’ve gathered your ingredients, let’s dive into the fun part! Follow these simple steps to whip up a delightful dessert that captures the spirit of the season.
Preheat the Oven
First things first, preheat your oven to 350°F (175°C). This step is super important because it ensures that your dessert bakes evenly. If you skip preheating, you might end up with a chocolatey mess instead of a perfectly fluffy treat. Trust me, your oven needs to be warm and ready for action!
Mix Dry Ingredients
In a medium mixing bowl, combine your all-purpose flour, unsweetened cocoa powder, sugar, baking powder, and salt. I like to whisk these together until everything is well blended. This not only helps to aerate the mixture but also ensures that the baking powder is evenly distributed. You don’t want any surprises when you bite into your dessert!
Combine Wet Ingredients
Next, it’s time to add the wet ingredients! In a separate bowl, beat together the two large eggs, melted butter, and vanilla extract. I usually mix these with a whisk until smooth. Then, pour this lovely mixture into your dry ingredients. Stir gently until everything is just combined. Don’t overmix; you want that batter to have a nice, smooth consistency!
Bake the Dessert
Once your batter is ready, pour it into a greased baking pan. Spread it out evenly and pop it into your preheated oven. Bake for 25-30 minutes, but here’s a little tip: check for doneness by inserting a toothpick into the center. If it comes out clean or with just a few moist crumbs, your dessert is perfect. If it’s still gooey, give it a few more minutes!
Cool and Decorate
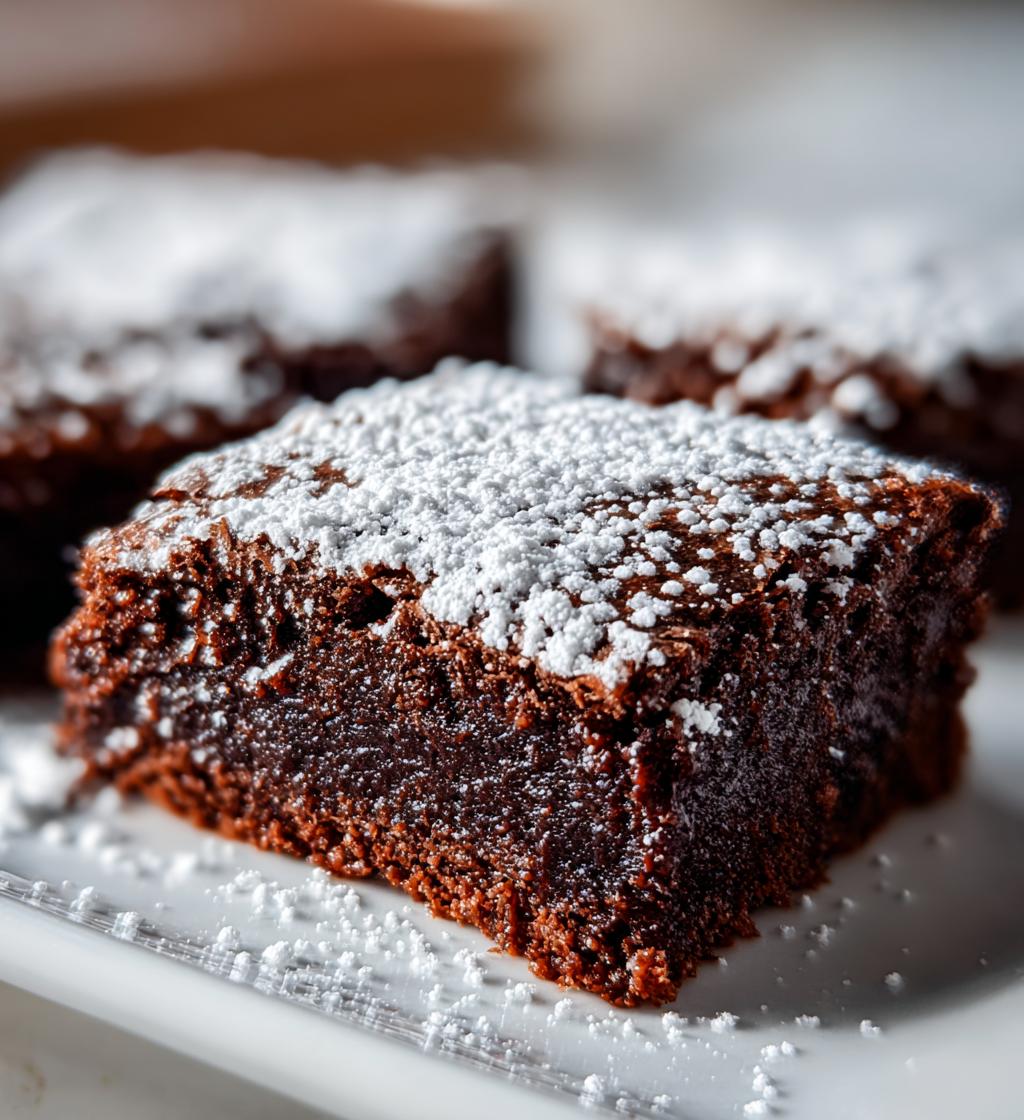
After baking, let your dessert cool in the pan for about 10 minutes, then transfer it to a wire rack to cool completely. This step is crucial because decorating a warm dessert can make a sticky mess! Once it’s cool, grab your powdered sugar and sift it generously over the top. It’s like a winter wonderland on your dessert! You can also add sprinkles for that extra festive touch if you’re feeling adventurous!
Why You’ll Love This Recipe
This dessert isn’t just a treat; it’s an experience that you and your loved ones will cherish! Here’s why you’ll absolutely adore making this recipe:
- Easy Preparation: With just a few simple steps, you’ll be on your way to a delicious dessert that doesn’t require any fancy techniques.
- Visually Appealing: The snowy dusting of powdered sugar transforms this dessert into a stunning centerpiece that captures the essence of the holiday season.
- Delicious Flavor: Rich chocolatey goodness paired with a light, airy texture makes every bite a delightful treat for the taste buds.
- Family-Friendly: This recipe is perfect for baking with kids! They’ll love helping to decorate and can’t wait to savor their creations.
- Perfect for Any Occasion: Whether it’s a holiday gathering or a cozy night in, this dessert fits right in, making every moment a little sweeter.
Trust me, once you make it, you’ll see why this dessert becomes a beloved tradition in your home during the festive season!
Tips for Success
To make sure your dessert turns out absolutely perfect, I’ve got some tried-and-true tips that will help you avoid common pitfalls and ensure a delightful experience in the kitchen. Let’s get you set up for success!
- Measure Accurately: Baking is a science, so accurate measurements are crucial. Use a kitchen scale if you have one, or make sure to spoon and level your flour and cocoa powder instead of scooping directly from the bag. This avoids packing and helps keep your dessert light and airy!
- Room Temperature Ingredients: For the best results, let your eggs and butter sit out for about 30 minutes before mixing. Room temperature ingredients blend more smoothly, creating a better texture in your dessert.
- Don’t Overmix: Once you combine the wet and dry ingredients, mix just until everything is incorporated. Overmixing can lead to a dense dessert, and we’re aiming for that light, fluffy goodness!
- Watch Your Oven: Every oven is a little different! Keep an eye on your dessert as it bakes. If you notice it’s browning too quickly, you can loosely cover it with aluminum foil to prevent burning while it finishes baking.
- Cooling Time is Key: Patience is a virtue when it comes to cooling your dessert! Allowing it to cool completely before decorating not only makes for a cleaner presentation but also prevents the powdered sugar from melting into the chocolate.
- Experiment with Decorations: Feel free to get creative! Try drizzling melted chocolate or adding crushed peppermint candies on top for a festive twist. It’s all about making it personal and special!
With these tips in your back pocket, you’ll be well on your way to creating a stunning dessert that everyone will be raving about. Happy baking!
Variations
One of the best parts of baking is getting to customize your creations! This chocolate dessert is no exception. Here are some fun variations to make it your own and add a little extra flair for those holiday gatherings:
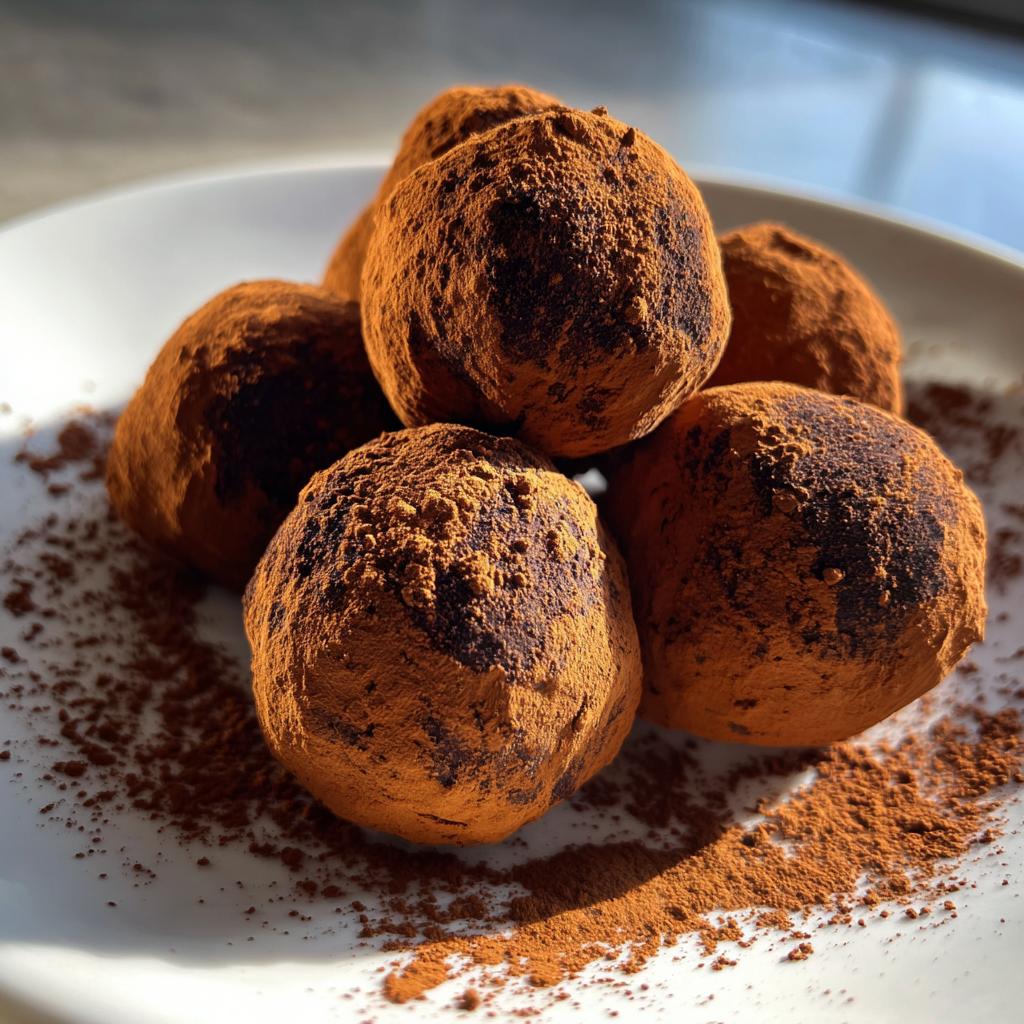
- Festive Sprinkles: Add a pop of color by mixing in festive sprinkles into the batter before baking or sprinkling them on top after dusting with powdered sugar. It adds a fun crunch and a cheerful look!
- Melted Chocolate Drizzle: For a decadent touch, melt some chocolate and drizzle it over the cooled dessert. This not only enhances the chocolate flavor but also makes it look super elegant.
- Crushed Candy Canes: If you’re feeling extra festive, crush some candy canes and sprinkle them on top of the powdered sugar. It adds a delightful minty crunch that screams Christmas!
- Nutty Goodness: Toss in some chopped nuts like walnuts or pecans into the batter for added texture and flavor. They pair beautifully with the chocolate and add a nice bite!
- Fruit Toppings: Fresh berries like raspberries or strawberries can be a beautiful addition. They bring a tartness that complements the sweet chocolate perfectly and can be arranged artfully on top!
- Alternative Frostings: Instead of just powdered sugar, consider a light cream cheese frosting or a whipped ganache for a richer dessert experience. You can even flavor the frosting with a hint of orange or peppermint for that festive twist!
Feel free to mix and match these ideas to suit your taste and make this dessert a reflection of your holiday spirit. The possibilities are endless, and I can’t wait to see how you make it uniquely yours!
Storage & Reheating Instructions
Now that you’ve created this stunning dessert, you might be wondering how to keep it fresh and delicious for later. Don’t worry; I’ve got you covered with simple storage and reheating tips!
First off, to store your leftover chocolate dessert, let it cool completely (remember, patience is key!). Once it’s cool, place it in an airtight container. This keeps it from drying out and helps maintain that lovely texture. If you’ve got any frosting or decorations on top, make sure to cover them gently so they don’t get messed up!
For the best taste, try to enjoy your dessert within 3-4 days. But trust me, it’s so delicious, it might not last that long! If you need to store it for a longer period, you can wrap individual pieces in plastic wrap and then place them in a freezer-safe bag or container. It’ll keep well in the freezer for up to a month.
When it’s time to enjoy your dessert again, just pull it from the freezer and let it thaw in the fridge for a few hours or overnight. If you want to warm it up a bit, pop it in the microwave for about 10-15 seconds. Just be careful not to overdo it! You want it to be warm but not hot, keeping that delightful texture intact.
With these easy storage and reheating tips, you’ll be able to savor the magic of your chocolate dessert long after it’s made. Happy indulging!
Nutritional Information Section
Now, if you’re like me, you probably want to know what you’re indulging in! Here’s a breakdown of the typical nutritional values for one piece of this delightful chocolate dessert. Keep in mind, these are estimates and can vary based on specific ingredients and portion sizes:
- Calories: 150
- Fat: 6g
- Saturated Fat: 4g
- Unsaturated Fat: 2g
- Trans Fat: 0g
- Cholesterol: 30mg
- Sodium: 50mg
- Carbohydrates: 22g
- Fiber: 1g
- Sugar: 20g
- Protein: 2g
This information helps you keep track, but don’t forget to savor each bite! After all, the joy of baking and sharing these treats far outweighs the numbers. Enjoy your sweet creation!
FAQ Section
I’ve gathered some of the most common questions folks have when it comes to making this delightful chocolate dessert that fits perfectly into the *christmas desserts aesthetic*. Let’s dive in!
- Can I substitute ingredients if I don’t have them on hand? Absolutely! If you’re out of all-purpose flour, you can use a gluten-free flour blend. For cocoa powder, you can substitute with Dutch-processed cocoa if needed. Just keep in mind that it might slightly change the flavor and texture!
- How can I make this dessert ahead of time? Great question! You can bake the dessert a day in advance. Just make sure to store it properly in an airtight container once it’s cool. Then, decorate it with powdered sugar on the day you plan to serve it for that fresh, festive look!
- What’s the best way to store leftovers? To keep your dessert fresh, store any leftovers in an airtight container at room temperature for up to 3-4 days. If you want to keep it longer, wrap individual pieces tightly and freeze them for up to a month. Just let them thaw in the fridge when you’re ready to enjoy again!
- Can I add additional flavors to the batter? Definitely! If you want to elevate the flavor, you can mix in a teaspoon of espresso powder for a richer chocolate taste, or add a hint of peppermint extract for a festive twist. Just be careful not to go overboard with the extracts!
- What can I serve with this dessert? This dessert pairs wonderfully with a dollop of whipped cream, a scoop of vanilla ice cream, or even a drizzle of chocolate sauce. Fresh berries on the side add a lovely touch and a burst of freshness to balance the rich chocolate!
Feel free to reach out if you have more questions or share your experiences with this recipe. I love hearing how everyone adds their own twist to these holiday delights!
Print
christmas desserts aesthetic: 7 Stunning Recipes to Try
- Total Time: 45 minutes
- Yield: 12 servings 1x
- Diet: Vegetarian
Description
Delightful and visually appealing desserts for the Christmas season.
Ingredients
- 1 cup all-purpose flour
- 1/2 cup unsweetened cocoa powder
- 1 cup sugar
- 2 large eggs
- 1/2 cup butter, melted
- 1 tsp vanilla extract
- 1/2 tsp baking powder
- 1/4 tsp salt
- 1 cup powdered sugar for decoration
Instructions
- Preheat your oven to 350°F (175°C).
- In a bowl, mix flour, cocoa powder, sugar, baking powder, and salt.
- Add eggs, melted butter, and vanilla extract. Mix until smooth.
- Pour the batter into a greased baking pan.
- Bake for 25-30 minutes or until a toothpick comes out clean.
- Let it cool completely before decorating.
- Sift powdered sugar on top for a festive finish.
Notes
- Store in an airtight container.
- Best served with whipped cream.
- You can add sprinkles for extra decoration.
- Prep Time: 15 minutes
- Cook Time: 30 minutes
- Category: Dessert
- Method: Baking
- Cuisine: American
Nutrition
- Serving Size: 1 piece
- Calories: 150
- Sugar: 20g
- Sodium: 50mg
- Fat: 6g
- Saturated Fat: 4g
- Unsaturated Fat: 2g
- Trans Fat: 0g
- Carbohydrates: 22g
- Fiber: 1g
- Protein: 2g
- Cholesterol: 30mg
Keywords: christmas desserts aesthetic


")
")
")
")