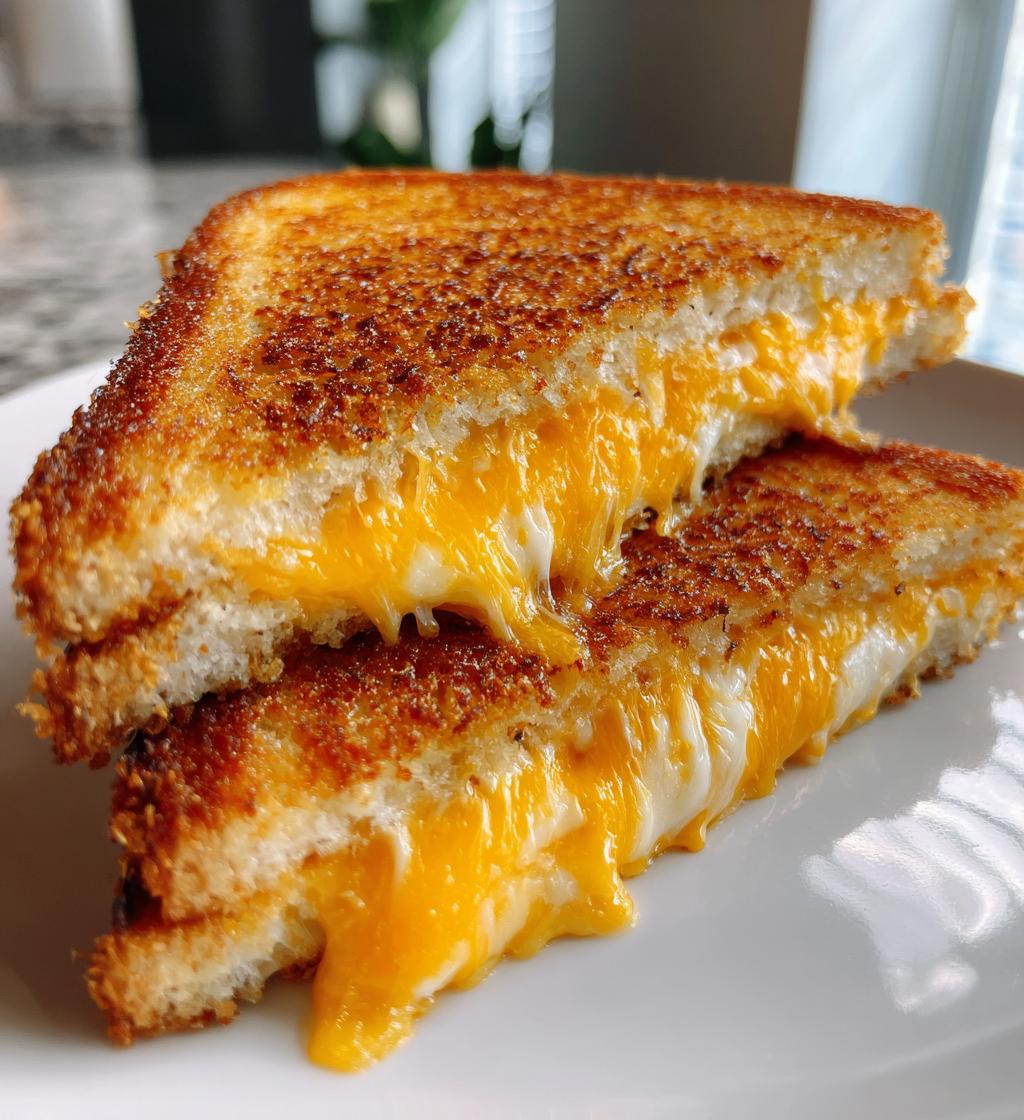
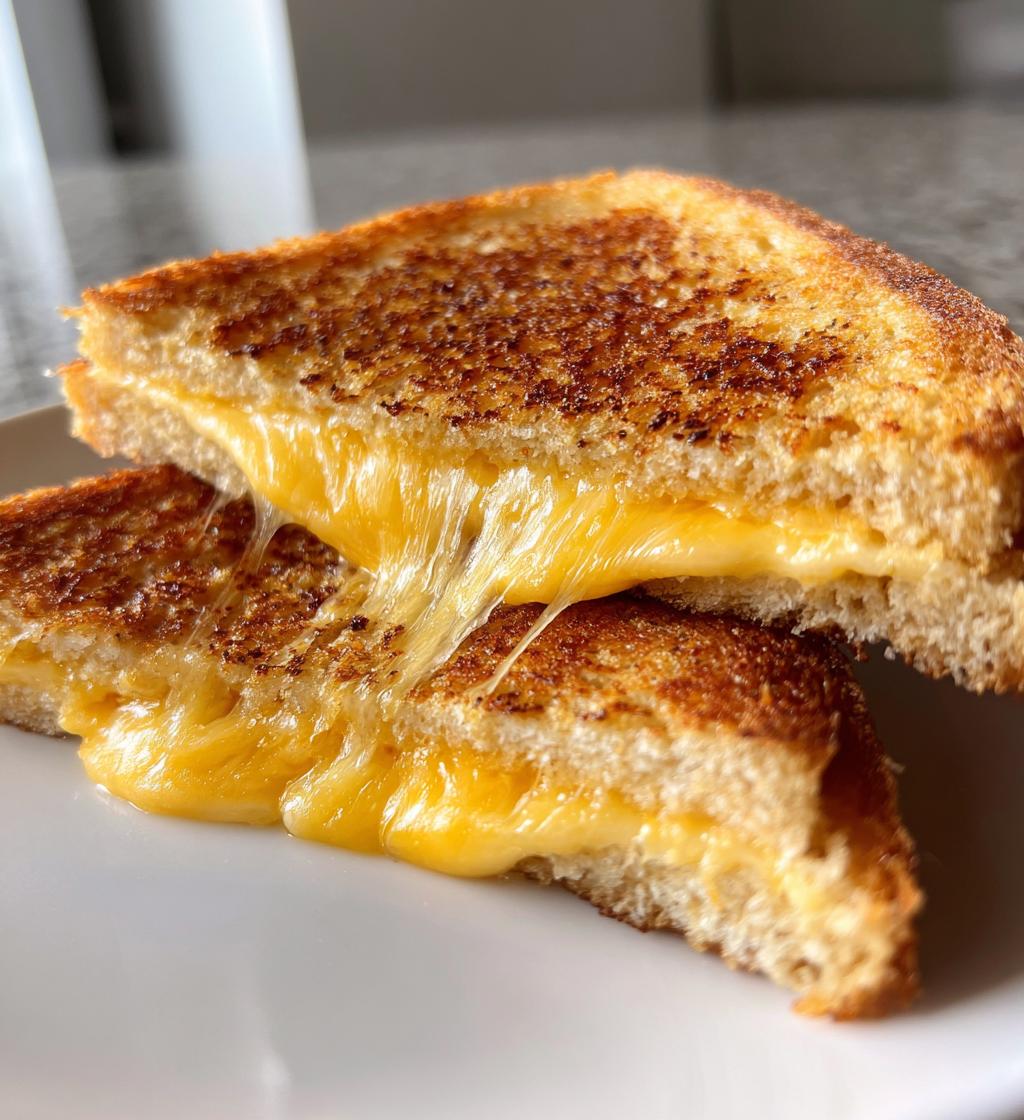
There’s something magical about a classic grilled cheese sandwich, isn’t there? That perfect crunch of golden bread giving way to oozing, melty cheese takes me right back to rainy afternoons at my grandma’s kitchen table. She’d make them with extra-sharp cheddar and a heavy hand with the butter—always insisting the secret was patience. To this day, nothing beats this simple, comforting combo when I need a quick meal that feels like a hug. Just three basic ingredients and a hot skillet are all you need to create pure nostalgia on a plate.
Why You’ll Love This Classic Grilled Cheese Sandwich
Trust me, this isn’t just any sandwich—it’s childhood nostalgia on a plate! Here’s why it’s my go-to comfort food:
- Ready in minutes – Hungry? You’re 8 minutes away from crispy, cheesy perfection
- Foolproof – Even my first attempts turned out delicious (and I burned toast regularly!)
- Endlessly customizable – Swap cheeses or add extras when you’re feeling fancy
- Pure comfort – That first melty bite instantly makes everything better
Ingredients for Classic Grilled Cheese Sandwich
Here’s the beautiful part—you only need three simple ingredients to make magic happen. But don’t let that simplicity fool you! Each one plays a starring role:
- 2 slices of bread – My grandma swore by hearty white bread, but whole wheat works too if that’s your jam. Just make sure it’s not too thin or your cheese might stage a breakout!
- 2 slices of cheddar cheese – Sharp cheddar gives that classic tang, but I’ve been known to sneak in an extra slice when no one’s looking. Pro tip: room temperature cheese melts faster!
- 1 tablespoon butter – Softened just enough to spread easily (leave it out for 15 minutes before cooking). This is what gives that irresistible golden crunch.
See? I told you it was simple. Now go raid your fridge—chances are you’ve got everything already!
Equipment You’ll Need
You probably already have everything, but just in case: a trusty skillet or griddle (nonstick works wonders) and a sturdy spatula for that perfect flip. Feeling fancy? A panini press makes killer grill marks too!
How to Make the Perfect Classic Grilled Cheese Sandwich
Now comes the fun part—turning those simple ingredients into golden, melty magic! I’ve made hundreds of these sandwiches (my kids are obsessed), and these steps never fail me. Just remember: low and slow is the way to go for that perfect crispy-but-not-burned exterior and ooey-gooey center.
Step 1: Prep the Bread and Cheese
First, grab your softened butter—this is key! Trying to spread cold butter tears your bread, and we don’t want that. Use about half a tablespoon per slice, spreading it all the way to the edges (that’s where the best crunch happens).
Now layer your cheese between the unbuttered sides. My grandma taught me to slightly overlap the slices toward the center – this prevents those sad cheese-free corner bites. If your cheese is cold from the fridge, let it sit on the counter while you prep everything else. Room temp cheese melts like a dream!
Step 2: Cook to Golden Perfection
Heat your skillet over medium heat—not high! I learned this the hard way with my first charcoal-black sandwich. Place one buttered bread slice, butter-side down, then the cheese stack, then the second slice butter-side up.
Now the hardest part: don’t touch it! Let it cook for 2-3 minutes until the bottom turns that perfect golden brown (peek carefully with your spatula). When you see little cheese bubbles at the edges, it’s flip time! Gently turn it over and cook another 2-3 minutes until both sides are evenly toasted and the cheese is fully melted. That sizzle sound? Pure music.
Tips for the Best Classic Grilled Cheese Sandwich
After burning my fair share of sandwiches (and rescuing countless from undercooked cheese), here are my hard-earned secrets:
- Cover with a lid for the last minute of cooking – traps steam to melt cheese faster without burning bread
- Use mayo instead of butter sometimes – gives extra crispness and golden color (grandma would gasp, but try it!)
- Add a sprinkle of garlic powder to the butter for a flavor boost that’ll make you swoon
- Press gently with spatula while cooking – helps the layers bond without squeezing out precious cheese
Bonus tip: That last one works great for when you “accidentally” overload the cheese!
Variations on Classic Grilled Cheese Sandwich
Once you’ve mastered the basic recipe (and eaten roughly a hundred of them like I have), it’s time to get creative! Here are my favorite ways to mix things up when I’m feeling adventurous:
- Cheese swaps: Try gruyère for nutty sophistication, pepper jack for a kick, or mozzarella for epic cheese pulls. My personal favorite? Half sharp cheddar, half smoked gouda – it’s like a campfire in sandwich form!
- Add some crunch: A thin layer of crispy bacon or a handful of caramelized onions takes this from simple to sublime. Just don’t tell my grandma I put bacon in hers that one time…
- Veggie boost: Thin tomato slices or avocado add freshness without weighing it down. Pro tip: pat tomatoes dry first so they don’t make your bread soggy!
- Sweet & savory: For breakfast vibes, add a drizzle of honey and thinly sliced apples with your cheddar. Sounds weird, tastes amazing!
The beauty is, you can change one tiny thing and suddenly it’s a whole new sandwich. What wild combinations have you tried?
Serving Suggestions
Nothing beats dunking a classic grilled cheese into a steaming bowl of tomato soup—it’s the ultimate comfort combo! For something different, try it with crisp dill pickles or a simple green salad to cut through the richness. My kids love theirs with apple slices on the side for a sweet crunch.
Storing and Reheating
Let’s be real—leftover grilled cheese is rare in my house! But if you must save some, skip the fridge (it turns bread rubbery). Instead, reheat slices in a dry skillet over medium-low until crispy again. The cheese will get that perfect pull just like fresh!
Classic Grilled Cheese Sandwich Nutrition
Now, let’s be honest—when you’re craving that perfect grilled cheese, nutrition facts are probably the last thing on your mind! But since you asked (or maybe your conscience did), here’s the scoop. These numbers are for my classic recipe with white bread and cheddar, but remember:
Nutrition varies by ingredients. Use whole wheat bread? Add bacon? Different cheeses? Those little changes add up. That said, one sandwich typically comes in around 350 calories, 20g fat (12g saturated), and 15g protein—not bad for something so deliciously comforting!
My grandma’s philosophy? “Everything in moderation—except love and cheese.” And honestly, when that first crispy, melty bite hits, those numbers just melt away too…
FAQs About Classic Grilled Cheese Sandwich
Q: Can I really use mayo instead of butter?
Absolutely! It sounds crazy, but spreading mayo on the outside gives you the crispiest, most golden crust imaginable. My husband thought I’d lost it the first time I tried it—now he insists on mayo every time! Just use a thin, even layer and cook as usual.
Q: Why does my bread burn before the cheese melts?
Ah, the classic grilled cheese dilemma! Your heat’s too high, my friend. Medium heat is the sweet spot—lets the cheese melt gently while the bread toasts evenly. If it’s still happening, try covering the pan for the last minute to trap heat (works like magic).
Q: How do I prevent soggy bread?
Three secrets: 1) Pat any add-ons (like tomatoes) dry with paper towels first 2) Use room temp cheese so it melts faster 3) Don’t overload the fillings! That perfect crispy-to-melty ratio is all about balance.
Q: Can I make these ahead for a crowd?
You bet! Keep cooked sandwiches warm in a 200°F oven on a wire rack (prevents sogginess). For parties, I’ll make a dozen ahead and reheat briefly in the oven—just as crispy as fresh. Pro tip: Label which ones have bacon so vegetarians don’t get surprised!
Q: What’s the best cheese for maximum meltiness?
While cheddar’s the classic, combining cheeses is where the real magic happens. My go-to trio: sharp cheddar for flavor, mozzarella for stretch, and a slice of American (don’t judge!) because its meltability is unbeatable. The trifecta never fails to impress!

3-Ingredient Classic Grilled Cheese Sandwich – Absolute Comfort!
- Total Time: 8 minutes
- Yield: 1 sandwich 1x
- Diet: Vegetarian
Description
A simple and delicious classic grilled cheese sandwich with crispy golden bread and melted cheese.
Ingredients
- 2 slices of bread (white or whole wheat)
- 2 slices of cheddar cheese (or your preferred cheese)
- 1 tablespoon of butter
Instructions
- Heat a skillet or griddle over medium heat.
- Butter one side of each bread slice.
- Place one slice, buttered side down, on the skillet.
- Add the cheese slices on top of the bread.
- Cover with the second bread slice, buttered side up.
- Cook for 2-3 minutes until golden brown.
- Flip carefully and cook the other side for another 2-3 minutes.
- Remove from heat, slice, and serve hot.
Notes
- Use room-temperature butter for easier spreading.
- Experiment with different cheeses like gouda or mozzarella.
- For extra crispiness, cook on slightly lower heat.
- Prep Time: 2 minutes
- Cook Time: 6 minutes
- Category: Lunch
- Method: Grilling
- Cuisine: American
Nutrition
- Serving Size: 1 sandwich
- Calories: 350
- Sugar: 2g
- Sodium: 500mg
- Fat: 20g
- Saturated Fat: 12g
- Unsaturated Fat: 6g
- Trans Fat: 0g
- Carbohydrates: 30g
- Fiber: 2g
- Protein: 15g
- Cholesterol: 50mg
Keywords: grilled cheese, sandwich, quick meal, comfort food
")
")
")
")