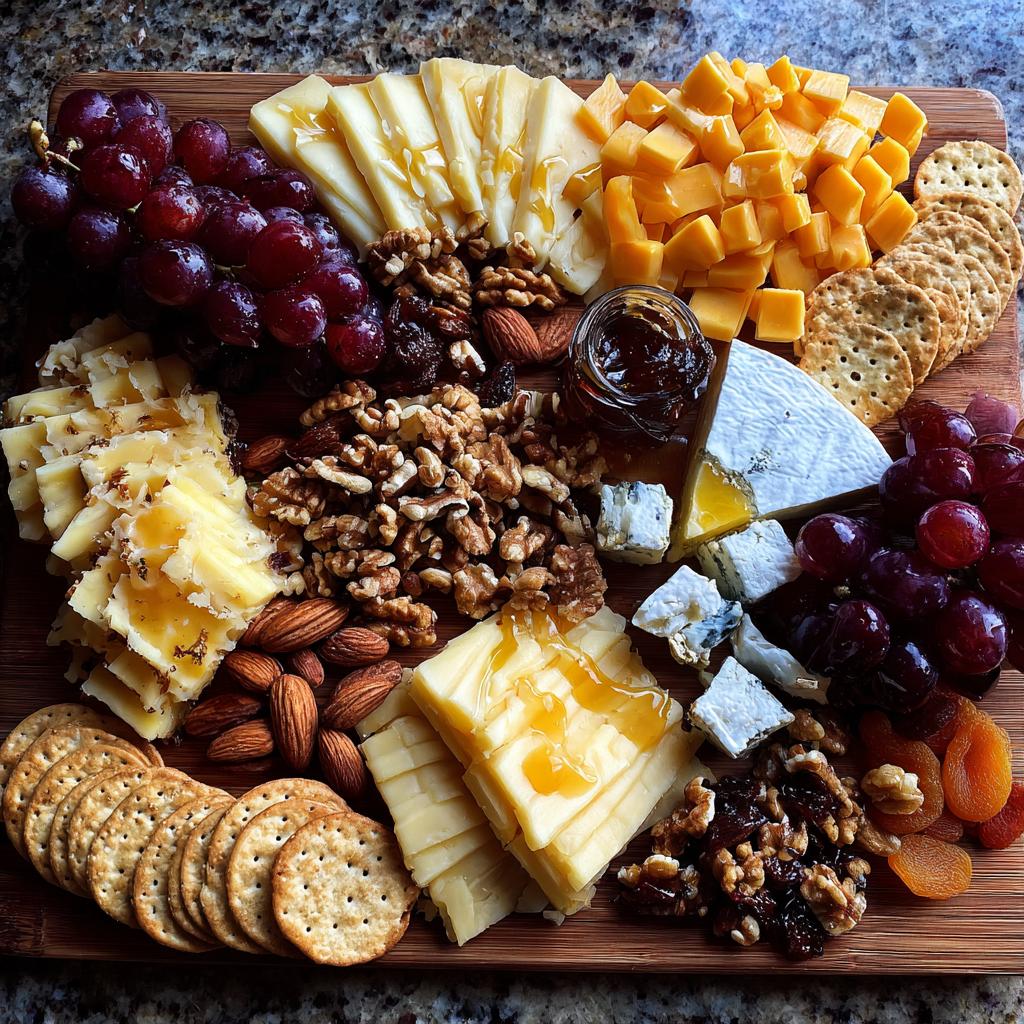
You know those moments when friends suddenly drop by, and you panic because you have nothing to serve? That used to be me—until I discovered the magic of a simple cheese board. Trust me, nothing impresses guests faster than a beautifully arranged spread of cheeses, fruits, and nuts. It looks fancy, but it’s ridiculously easy to throw together.
I’ve lost count of how many times this cheese board has saved me. Last-minute dinner party? Done. Wine night with the girls? Perfect. Even my kids love picking at it while I finish cooking. The best part? You don’t need fancy skills—just a mix of textures and flavors that make everyone think you spent hours. Let me show you how I do it.
Why You’ll Love This Cheese Board
This cheese board is my go-to for so many reasons:
- Effortless entertaining: It comes together in 10 minutes flat—no cooking required!
- Total crowd-pleaser: Even picky eaters find something to love among the variety.
- Endlessly customizable: Swap ingredients based on what’s in your fridge or pantry.
- Visually stunning: The colorful spread always gets “oohs” and “aahs” from guests.
Seriously, once you try it, you’ll wonder how you ever hosted without this trick up your sleeve.
Cheese Board Ingredients
Here’s exactly what you’ll need to create this gorgeous spread – I’ve learned through trial and error that precise measurements make all the difference:
- 100g Cheddar cheese, sliced into thin triangles (the sharper the better for contrast)
- 100g Brie cheese, left whole with the rind on (trust me, it looks rustic and inviting)
- 100g Gouda cheese, cubed (smoked Gouda adds amazing depth if you can find it)
- 50g Blue cheese, crumbled (just enough for bold flavor without overwhelming)
- 1 cup grapes, washed and patted dry (red and green mixed looks stunning)
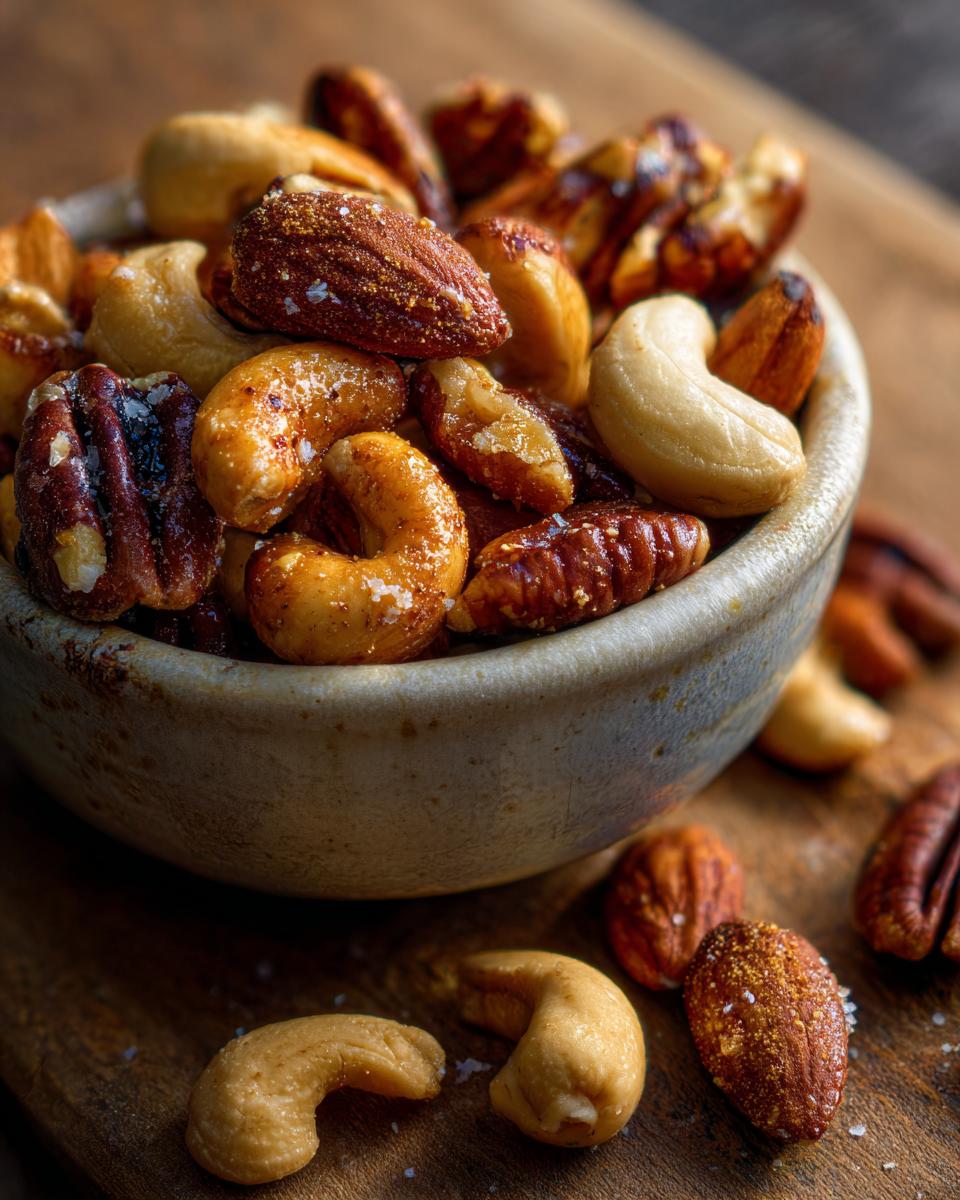
- 1/2 cup almonds, roasted and salted (that crunch is everything)
- 1/2 cup walnuts, halves or pieces (toast them lightly if you have time)
- 1/2 cup dried apricots, halved (their chewy sweetness balances the saltiness)
- 1 box assorted crackers (I like a mix of water crackers and seeded ones)
- 2 tbsp honey, for drizzling (local raw honey takes it next-level)
Ingredient Notes & Substitutions
Don’t stress if you’re missing something – cheese boards are meant to be flexible! Here are my favorite swaps:
Cheeses: Can’t find Brie? Camembert works beautifully. Not a blue cheese fan? Try aged goat cheese instead. The key is having one soft, one hard, one funky, and one mild cheese for balance.
Nuts: Pecans or pistachios make great alternatives to almonds. Just avoid anything too salty – you want the cheese to shine.
Fruits: Fresh figs or sliced pears substitute perfectly for grapes when in season. No dried apricots? Try dates or dried cranberries.
Extras: Sometimes I’ll add a small bowl of olives or cornichons for tang. Fresh rosemary sprigs tucked between items add gorgeous color and aroma.
Remember – there are no wrong answers here! Your cheese board should reflect what you and your guests enjoy most.
How to Make a Cheese Board
Okay, let’s dive in! The secret to a stunning cheese board is all in the assembly. Don’t worry – I’ll walk you through each step so you can create something that looks like it came from a gourmet shop. The most important thing? Have fun with it!
Step 1: Prepare the Cheeses
First, take your cheeses out of the fridge about 30 minutes before serving – this brings out their full flavor. While they’re coming to room temperature, let’s prep:
- Cheddar: Slice into thin triangles – they fan out beautifully on the board. I like to make them about 1/4-inch thick.
- Brie: Leave this whole with the rind on (yes, the rind is edible!) but include a cheese knife so guests can cut their own pieces.
- Gouda: Cube this into bite-sized pieces – about 1/2-inch cubes are perfect for spearing with toothpicks.
- Blue cheese: Simply crumble this with your fingers into rustic chunks. No need to be neat – the messy look adds character!
Pro tip: If you’re prepping ahead, cover the cheeses loosely with wax paper to prevent drying out.
Step 2: Arrange the Board
Now for the fun part! Grab your favorite wooden board, slate, or even a large platter. Here’s how I build mine:
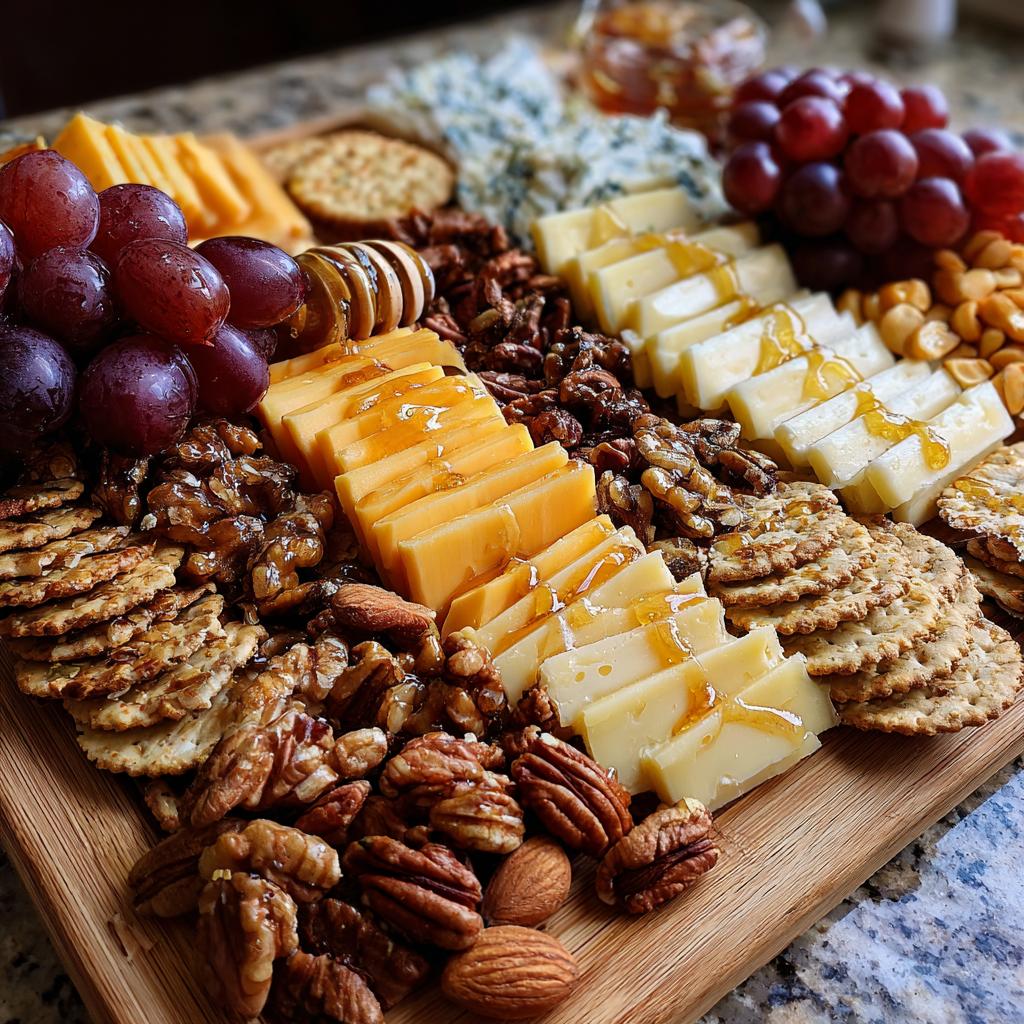
- Start with cheeses: Place them at “compass points” – think 12, 3, 6, and 9 o’clock positions. This creates natural stopping points for guests.
- Add crackers: Pile them in small stacks near each cheese that would pair well with them.
- Fill the gaps: Scatter grapes, nuts, and dried fruits between the cheeses. I like to group similar items together – all grapes in one area, nuts in another.
- Drizzle honey: Either drizzle directly over the brie or place it in a small bowl with a spoon.
My golden rule? Leave some empty space! Overcrowding makes the board look messy. And don’t be afraid to rearrange – I usually step back a few times to check the balance before serving.
Tips for the Perfect Cheese Board
After making countless cheese boards (and learning from my mistakes), I’ve picked up some tricks that take them from good to “wow!” Here are my absolute must-know tips:
Odd numbers work magic: Arrange items in groups of 3 or 5 – it’s more visually appealing than even numbers. Three cheese slices here, five apricot halves there. Trust me, it makes a difference!
Texture is everything: Make sure you’ve got something creamy (Brie), something crunchy (nuts), something chewy (dried fruit), and something crisp (crackers). That variety keeps every bite interesting.
Fresh herbs aren’t just garnish: Tuck rosemary sprigs or thyme between items. They add gorgeous color and make the whole board smell amazing. Plus, guests can nibble on them too!
Labeling helps shy guests: If you’re using unusual cheeses, little name tags prevent the “what’s this?” hesitation. I use mini chalkboard signs or just fold small paper tags.
Temperature matters: Cold mutes flavors, so take cheeses out 30 minutes before serving. But if it’s a hot day, keep the board in a cool spot – melted Brie isn’t pretty!
Have a “cleanup station”: Nearby, set out small plates, napkins, and a bowl for toothpicks or olive pits. It keeps the board looking tidy longer.
Remember – the best cheese board is the one that makes you and your guests happy. If you forget a tip or two? No stress! As long as there’s cheese, you’re golden.
Cheese Board Variations
Once you’ve mastered the basic cheese board, the real fun begins – playing with themes! Here are my favorite ways to mix things up when I want something extra special:
Mediterranean Magic
For a sunny Mediterranean vibe, I swap in:
- Marinated feta or halloumi instead of cheddar
- Kalamata olives and roasted red peppers
- Hummus or tzatziki in small bowls
- Pita chips or lavash crackers
- Fresh figs or dates if they’re in season
This version always transports me to a Greek seaside taverna. A sprinkle of za’atar over the cheeses ties it all together beautifully.
Holiday Showstopper
When December rolls around, my cheese board gets festive with:
- Peppered cranberry goat cheese (so pretty with the red specks!)
- White cheddar with rosemary for a wintery feel
- Spiced nuts tossed with cinnamon and maple syrup
- Dried cranberries and clementine segments
- Gingerbread or shortbread cookies instead of crackers
I arrange everything in a wreath shape with fresh rosemary sprigs – it becomes the centerpiece of every holiday party.
Breakfast Board
Yes, cheese boards work for morning gatherings too! My brunch version includes:
- Creamy mascarpone or ricotta with honey
- Sharp aged cheddar (breakfast isn’t complete without it)
- Fresh berries and sliced apples
- Granola clusters for crunch
- Mini muffins or croissants on the side
Add a pot of good coffee and mimosas, and you’ve got the most relaxed brunch ever. The best part? No cooking required while you’re still half-asleep.
The possibilities are endless – try a Spanish theme with manchego and chorizo, or go French with comté and cornichons. Your cheese board can match any season, holiday, or craving. That’s the beauty of it!
Serving & Storage
Here’s the thing about cheese boards – they them ahead them ahead them ahead them ahead them ahead! But there are a few tricks I’ve learned to keep everything tasting fresh and looking gorgeous until showtime.
Making ahead: You can assemble the whole board (minus the crackers) up to 4 hours before serving. Just cover it loosely with plastic wrap or a clean kitchen towel and keep it in a cool spot. I avoid the fridge if possible – cold cheeses lose their flavor, and condensation can make crackers soggy.
Cheese storage rules: If you must refrigerate after assembling (maybe you prepped it the night before), take it out at least 45 minutes before serving. The cheeses need time to “wake up” and regain their full flavor. Hard cheeses like cheddar can handle longer fridge time, but soft cheeses like Brie are best prepped day-of.
Leftovers: Happily, most components keep well! Separate any uneaten cheeses into airtight containers – they’ll last 3-5 days. Nuts and dried fruits stay fresh for weeks. The only casualty? Crackers tend to go stale quickly, so I always put out fresh ones if I’m serving leftovers.
Pro tip: If your board looks a little sad after sitting out, revive it with a quick refresh – add a handful of fresh grapes, a sprinkle of nuts, and maybe a new drizzle of honey. It’ll look brand new!
Cheese Board FAQs
Over the years, I’ve gotten so many questions about cheese boards from friends and family. Here are the ones that come up most often—along with my tried-and-true answers!
Q: Can I make a cheese board ahead of time?
Absolutely! That’s one of my favorite things about them. You can prep everything 4-6 hours in advance—just wait to add the crackers until right before serving so they stay crisp. Cover the board loosely with plastic wrap and keep it in a cool spot (not the fridge if you can help it).
Q: What are the best cheeses for beginners?
Start with a simple trio: a crowd-pleasing cheddar, a creamy Brie (everyone feels fancy eating it!), and a mild Gouda. These are all approachable flavors that most people enjoy. Save the stinky blues and aged goat cheeses for when you know your crowd better.
Q: How big should my cheese board be?
My rule of thumb? Plan for about 3 ounces of cheese per person if it’s an appetizer, or 5-6 ounces if it’s the main event. A standard wooden cutting board (about 12×18 inches) comfortably serves 6-8 people as a starter.
Q: What if I don’t have fancy serving boards?
Don’t sweat it! I’ve used everything from baking sheets to marble cutting boards to—true story—a clean picture frame with parchment paper. The cheeses and toppings are the stars, not the board itself. Just make sure whatever you use is food-safe and easy to clean.
Q: How do I stop the cheese from drying out during the party?
Two tricks: First, take cheeses out of the fridge 30 minutes before serving (but no more than 2 hours for food safety). Second, if it’s a long gathering, I’ll occasionally brush a tiny bit of olive oil over cut surfaces of hard cheeses to keep them moist.
Nutritional Information
Now, let’s talk numbers—because I know some folks like to keep track (or just want to know how much extra cheese they can sneak!). Keep in mind that nutrition varies based on specific brands and exact quantities used, but here’s the general breakdown per serving:
- Calories: About 350 per generous serving (but who’s counting when it’s this delicious?)
- Fat: 25g (12g saturated, 10g unsaturated)
- Protein: 15g (cheese really delivers here!)
- Carbohydrates: 20g (3g fiber, 12g natural sugars from fruits and honey)
- Sodium: 450mg (mostly from the cheeses – go easy if you’re watching salt intake)
Want to lighten it up? Try swapping some nuts for extra grapes, using whole grain crackers, or choosing lower-sodium cheese options. But honestly? I say enjoy every bite—this is one of those treats where the joy outweighs the numbers!
Share Your Creation
I absolutely love seeing how you put your own spin on this cheese board! There’s something so special about how everyone’s personality shines through in their arrangements. Did you find an amazing local cheese? Get creative with seasonal fruits? I want to see it all!
Snap a photo of your masterpiece and tag me on Instagram – I’ll be your biggest cheerleader! Nothing makes me happier than scrolling through your gorgeous boards while sipping my morning coffee. And who knows? Your creation might just inspire someone else to try their first cheese board.
If you’re shy about posting, no pressure at all. But I hope you’ll take a moment to admire your handiwork before everyone digs in. That moment when you step back and think “Wow, I made that!” is one of my favorite parts of hosting. Happy arranging, friends – can’t wait to see what you create!
Print
10-Minute Stunning Cheese Board That Wows Every Guest
- Total Time: 10 minutes
- Yield: 6 servings 1x
- Diet: Vegetarian
Description
A simple cheese board with a variety of cheeses, fruits, nuts, and crackers for easy entertaining.
Ingredients
- 100g Cheddar cheese
- 100g Brie cheese
- 100g Gouda cheese
- 50g Blue cheese
- 1 cup grapes
- 1/2 cup almonds
- 1/2 cup walnuts
- 1/2 cup dried apricots
- 1 box assorted crackers
- 2 tbsp honey
Instructions
- Slice the cheeses into bite-sized pieces.
- Arrange the cheeses on a wooden board or platter.
- Add the grapes, almonds, walnuts, and dried apricots around the cheeses.
- Place the crackers in small piles on the board.
- Drizzle honey over some of the cheeses or serve it in a small bowl on the side.
- Serve immediately or refrigerate until ready to serve.
Notes
- Use a mix of soft, hard, and blue cheeses for variety.
- Adjust the quantities based on the number of guests.
- Add fresh herbs like rosemary for extra flavor.
- Prep Time: 10 minutes
- Cook Time: 0 minutes
- Category: Appetizer
- Method: No-Cook
- Cuisine: International
Nutrition
- Serving Size: 1 serving
- Calories: 350
- Sugar: 12g
- Sodium: 450mg
- Fat: 25g
- Saturated Fat: 12g
- Unsaturated Fat: 10g
- Trans Fat: 0g
- Carbohydrates: 20g
- Fiber: 3g
- Protein: 15g
- Cholesterol: 50mg
Keywords: cheese board, appetizer, party food, easy entertaining

")
")
")
")