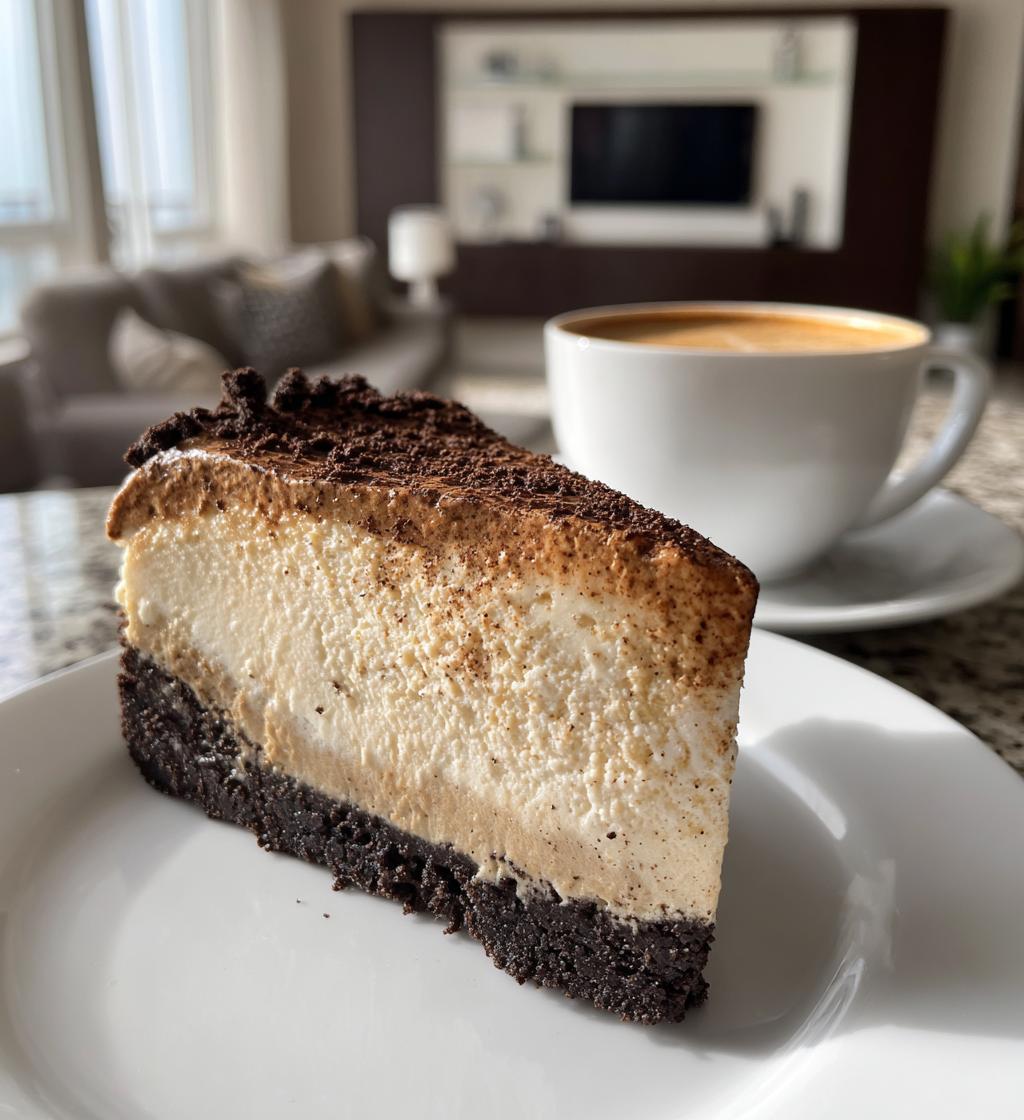
Oh my gosh, if you love coffee as much as I do, you’re going to flip for this espresso cheesecake. Picture this: rich, creamy cheesecake infused with bold espresso flavor, all nestled into a chocolate cookie crust that gives just the right amount of crunch. It’s like your favorite coffee drink turned into the most decadent dessert.
This recipe has been my go-to for dinner parties and lazy Sunday treats ever since my best friend, Sarah, begged me to recreate the “life-changing” slice she had at some fancy café. After about six tries (and way too many taste tests), I nailed it—and now my friends won’t let me show up to gatherings without it!
What makes it special? That deep coffee flavor that doesn’t overpower, the silky smooth texture, and the fact that it’s secretly easy to make. No fancy techniques here—just good ingredients and a little patience while it chills. Trust me, after one bite, you’ll understand why Sarah still texts me “CHEESECAKE EMERGENCY” whenever she craves it.
Why You’ll Love This Espresso Cheesecake
Let me tell you why this cheesecake has converted so many coffee skeptics in my life—it’s just that good. First off, that rich espresso flavor hits all the right notes without being bitter, thanks to using quality instant espresso powder (my secret weapon). The creamy texture is dreamy—like velvet on a fork—and the chocolate crust? Absolute perfection.
Here’s why this dessert never fails:
- Crowd-pleaser magic: Works for fancy dinners and casual coffee dates (I’ve served it both ways!)
- No stress: Easier than most cheesecakes—no water bath needed!
- Make-ahead win: Tastes even better after chilling overnight (if you can resist that long)
- Endless customization: Top with whipped cream, chocolate shavings, or a caramel drizzle for extra wow
My neighbor once told me it tastes like “a cappuccino and dessert had a baby”—and honestly? That’s the best compliment this cheesecake could get.
Ingredients for Espresso Cheesecake
Gather these simple ingredients—each one plays a starring role in making this cheesecake unforgettable. Measure everything before you start (my “mise en place” obsession saves me from mid-recipe panic!).
- 1 1/2 cups chocolate cookie crumbs (I crush Oreos—filling and all—for extra richness)
- 1/4 cup melted butter (salted or unsalted both work, but I prefer salted for balance)
- 3 (8 oz) packages cream cheese, softened completely (take it out 2 hours ahead—trust me!)
- 1 cup granulated sugar (don’t pack it—just scoop and level)
- 3 large eggs, room temperature (cold eggs = lumpy batter, and we don’t want that)
- 1/4 cup sour cream (the tang cuts through the sweetness perfectly)
- 2 tbsp instant espresso powder (splurge on the good stuff—it makes ALL the difference)
- 1 tsp vanilla extract (real stuff, not imitation—this is a dessert, not a science experiment)
- 1/4 tsp salt (balances the sweetness and enhances the coffee flavor)
Ingredient Notes & Substitutions
Baking is science, but I believe in flexibility too! Here’s how to adapt without losing that magic:
Crust: No chocolate cookies? Graham crackers work (use 2 tbsp sugar in the crust). Gluten-free? Any GF cookie crumb does the trick.
Espresso powder: Can’t find it? Dissolve 2 shots of cooled espresso in 1 tbsp hot water (reduce sour cream by 1 tbsp). Decaf works fine—the flavor’s what matters!
Dairy swaps: Greek yogurt replaces sour cream in a pinch (same amount). For a lighter version, use Neufchâtel cheese instead of cream cheese—just expect a slightly softer texture.
Egg alert: Room temp is non-negotiable for smooth batter. If you forget, submerge eggs in warm water for 10 minutes. Vegan? I’ve had luck with silken tofu blend (though it changes the texture).
My rule? First time, follow the recipe exactly. Then get creative—that’s how my caramel-swirl variation was born!
Equipment You’ll Need
Here’s the short-and-sweet list of tools that’ll make your espresso cheesecake journey smooth as buttercream:
- 9-inch springform pan (the hero of cheesecakes—lets you release those perfect slices without disaster)
- Stand mixer or handheld electric mixer (my KitchenAid’s been my cheesecake wingman for years)
- Rubber spatula (for scraping every last bit of that delicious batter—waste not!)
- Measuring cups & spoons (precision matters—especially with espresso powder)
Bonus items if you’re fancy: a pastry brush for buttering the pan (though fingers work too), and a fine-mesh sieve for dusting cocoa powder on top. But honestly? These four basics are all you really need for magic to happen.
How to Make Espresso Cheesecake
Alright, coffee lovers—let’s dive into making this dreamy dessert! I promise it’s easier than it looks, especially when you follow these simple steps. Just take your time, enjoy the process (and maybe sneak a spoonful of batter—I won’t tell).
Step 1: Prepare the Crust
First things first: that chocolatey foundation! Grab your springform pan and give it a quick butter spray or rub—this is your insurance policy against stuck crusts.
Mix your cookie crumbs and melted butter until it resembles wet sand (you should be able to pinch it and have it hold together). Now, here’s my trick: dump the crumbs into the pan and use the bottom of a measuring cup to press them firmly across the base and slightly up the sides. I do a little “tamping dance” to get it even—no crumb left behind!
Pop the crust in the fridge for 15 minutes while you preheat the oven to 325°F. No pre-baking needed—this baby sets up perfectly as the cheesecake bakes.
Step 2: Make the Cheesecake Filling
Now for the star: that creamy, coffee-kissed filling. Start by beating the cream cheese on medium-low speed until it’s completely smooth—about 2 minutes. Scrape down the bowl! Those sneaky lumps hide in the corners.
Gradually add the sugar while mixing, then crank up the speed to medium for 1 minute until fluffy. Here’s where patience pays off: add eggs one at a time, mixing just until the yellow disappears after each. Overbeating eggs = cracks, and we’re aiming for cheesecake perfection!
Finally, gently fold in the sour cream, espresso powder (watch that gorgeous color deepen!), vanilla, and salt. The batter should look like a mocha cloud—silky with no streaks.
Step 3: Bake & Cool
Pour the filling over your chilled crust—it’ll come right to the top, and that’s okay! Smooth the top with an offset spatula or the back of a spoon.
Bake for 45-50 minutes. You’ll know it’s done when the edges are set but the center still has a slight jiggle (like Jell-O, not a wave pool). Turn off the oven, crack the door, and let it cool inside for 1 hour. This slow magic prevents shocking cracks!
Transfer to a wire rack to cool completely—about 2 hours—before refrigerating for at least 4 hours (overnight is gold). The wait is torture, but that first creamy, coffee-packed bite? Worth every second.
Tips for Perfect Espresso Cheesecake
After making this cheesecake more times than I can count (and eating even more slices!), I’ve learned a few secrets for bakery-worthy results every time. First—and I can’t stress this enough—room temperature ingredients are non-negotiable. Cold cream cheese = lumpy batter, and nobody wants that! I leave mine out overnight if I’m baking in the morning.
For ultra-smooth texture, consider a water bath: wrap your springform pan in foil, place it in a roasting pan, and pour hot water halfway up the sides. It bakes gently, preventing those dreaded cracks. (No foil? A baking sheet with water on the rack below works too.)
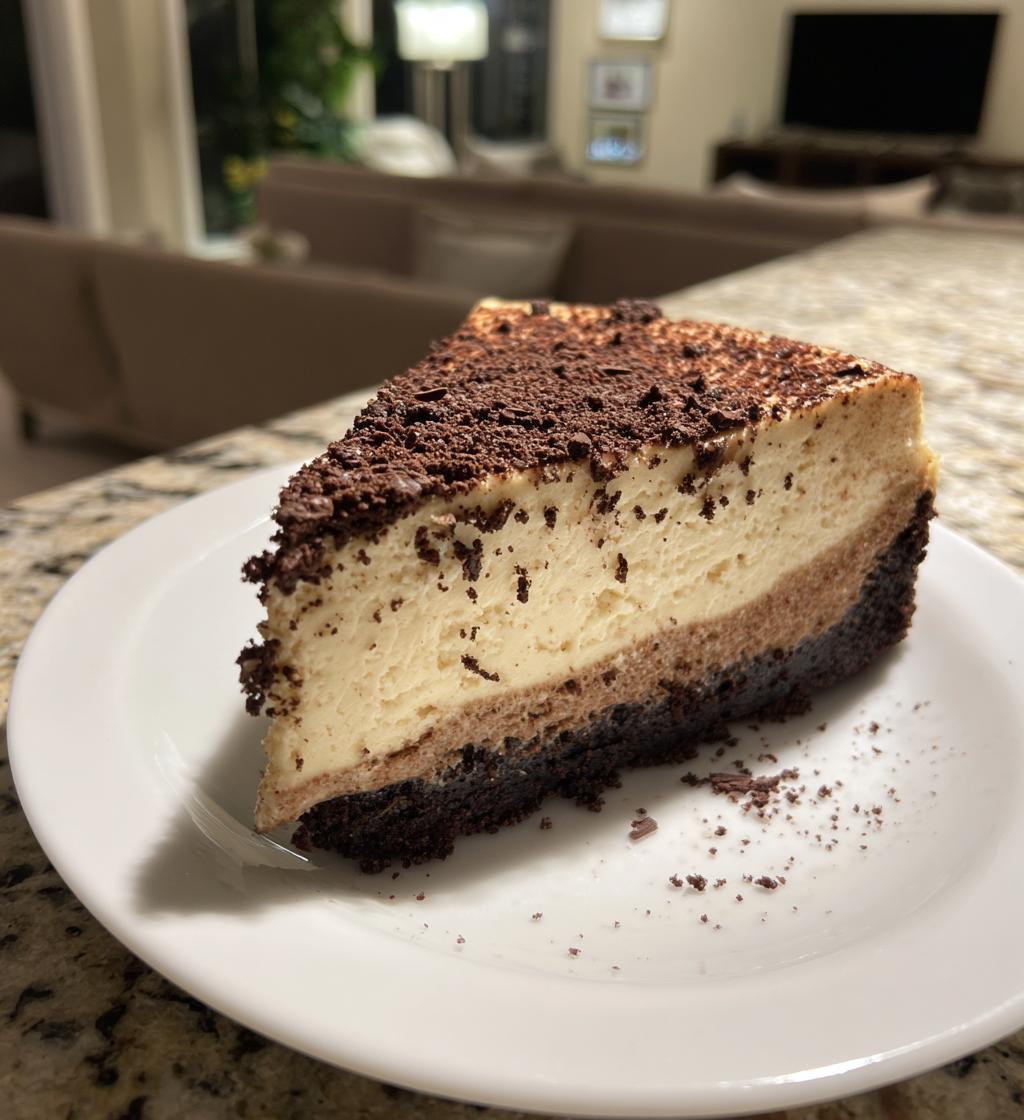
The chilling time isn’t just about setting—it intensifies the flavors! Minimum 4 hours, but overnight is magic. Pro tip: run a hot knife around the edge before chilling for cleaner slices later. And if cracks appear? A dusting of cocoa powder or whipped cream topping hides all sins!
Serving Suggestions
Okay, let’s talk about dressing up this gorgeous espresso cheesecake for its grand debut! My favorite way? A simple dollop of freshly whipped cream with a sprinkle of espresso powder on top—it’s like the foam on your latte. For chocolate lovers (hi, that’s me), warm up some ganache and drizzle it artfully over each slice—the way the bittersweet chocolate plays with the coffee flavor? *Chef’s kiss*
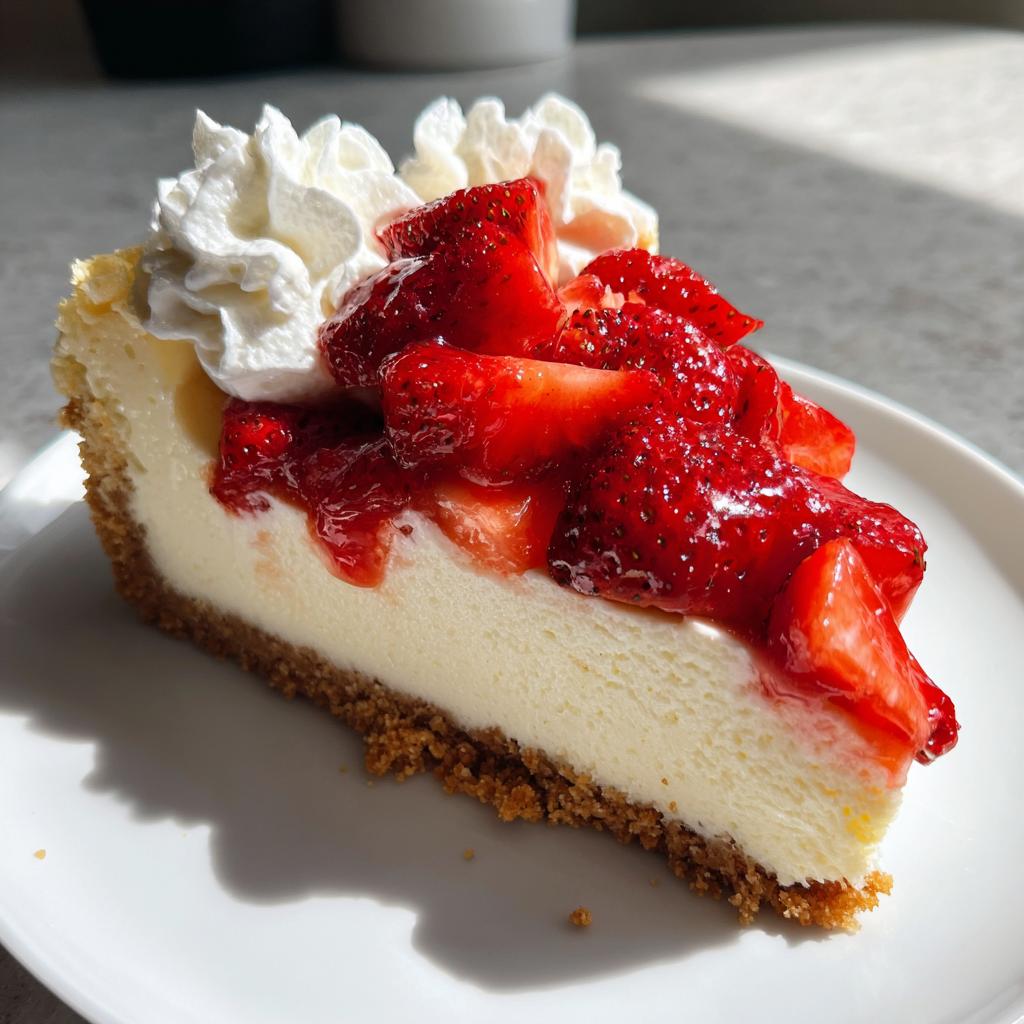
Got berries? A handful of raspberries or strawberries cuts through the richness beautifully. And if you’re feeling extra? Shave some dark chocolate curls over the whole cake before serving. Honestly though? It’s spectacular all on its own—I’ve been known to eat it straight from the fridge with just a fork!
Storage & Reheating
Here’s how to keep your espresso cheesecake tasting fresh—because let’s be real, it rarely lasts long in my house! Once cooled, cover it tightly with plastic wrap or foil and refrigerate for at least 4 hours (though overnight is ideal). It’ll stay perfect for 3-5 days—if you can resist that long!
For longer storage, slice and freeze individual portions on a parchment-lined tray before wrapping in plastic and foil. They’ll keep for up to 1 month—thaw overnight in the fridge when cravings strike. Pro tip: freeze slices with parchment between them so they don’t stick together. No reheating needed—this cheesecake tastes best cold, straight from the fridge!
Nutritional Information
Okay, let’s be real—this espresso cheesecake isn’t exactly health food (and honestly, why would we want it to be?). But if you’re curious about what you’re indulging in, here’s the scoop per generous slice:
Approximate nutrition per serving:
- Calories: ~380 (worth every single one!)
- Fat: 25g (that’s where the creamy magic comes from)
- Saturated Fat: 14g (mostly from the cream cheese—no regrets)
- Carbs: 34g (hello, chocolate crust and sugar)
- Sugar: 28g (it’s dessert, after all)
- Protein: 6g (surprise! Eggs and dairy do their thing)
Important note: These numbers can vary based on your specific ingredients—like using full-fat vs reduced-fat cream cheese or different cookie brands for the crust. I calculated based on my go-to Oreo crust and regular Philadelphia cream cheese.
My philosophy? Life’s too short to stress over dessert nutrition facts. Enjoy a slice (or two) with your coffee, savor every bite, and maybe take an extra walk tomorrow. Balance, right?
FAQs About Espresso Cheesecake
Got questions? I’ve got answers! Here are the most common things people ask me about this espresso cheesecake—along with all my hard-earned baking wisdom to help you avoid any kitchen disasters.
Can I use fresh espresso instead of powder?
Absolutely! If you’ve got an espresso machine, you can substitute 2 shots of cooled espresso for the powder. Just reduce the sour cream by 1 tablespoon to account for the extra liquid. The flavor will be slightly different—more nuanced and aromatic—but still delicious. My Italian aunt swears this is the only way to make it!
Help! My cheesecake cracked—how do I fix it?
First, don’t panic—this happens to the best of us! Most cracks are purely cosmetic and don’t affect taste. My go-to fixes: 1) Dust with cocoa powder or powdered sugar, 2) Cover with whipped cream rosettes, or 3) Get fancy with a chocolate ganache drizzle (which also tastes amazing). Next time, try cooling it more slowly—leave it in the turned-off oven with the door cracked for an hour before moving to the counter.
Are there vegan substitutions?
Yes, though the texture changes a bit. For vegan cream cheese, I recommend Kite Hill or Miyoko’s brand. Replace eggs with 1/4 cup silken tofu per egg (blend it smooth first!), and use coconut yogurt instead of sour cream. The crust works great with vegan butter and any plant-based cookies. It won’t be as firm, but still creamy and delicious!
Can I Make This Without a Springform Pan?
No springform? No problem! Line a regular 9-inch cake pan with parchment paper so it hangs over the edges—this becomes your “handles” to lift the cheesecake out after chilling. You can also make individual servings in muffin tins lined with cupcake papers (bake for 25-30 minutes). Just know the presentation won’t be as elegant, but the taste remains incredible!
How Long Does It Keep?
In the fridge, covered tightly, it stays perfect for 3-5 days (if it lasts that long!). For longer storage, freeze individual slices: wrap in plastic, then foil, and they’ll keep for up to 1 month. Thaw overnight in the fridge—no microwave needed! Pro tip: write the date on freezer bags so you don’t forget when you made it.
Can I Reduce the Sugar?
You can, but expect texture changes. For every 1/4 cup sugar removed, add 1 tablespoon cornstarch to help set the cheesecake. Alternatively, swap half the sugar with erythritol or monk fruit blend (I like Lakanto). Maple syrup works too—use 3/4 cup plus 2 extra tablespoons flour. Just know it’ll be softer and less sliceable, but still tasty with coffee!
Final Thoughts
There you have it—my absolute favorite espresso cheesecake recipe that never fails to impress! Whether you’re making it for a special occasion or just because Tuesday deserves dessert (my personal philosophy), this coffee-lover’s dream is guaranteed to satisfy those creamy, caffeinated cravings.
I’d love to hear how your cheesecake turns out! Did you stick with the classic version or add your own twist? Snap a photo and tag me—there’s nothing I enjoy more than seeing your baking adventures. And if you have questions, don’t hesitate to reach out. After all these years, I’m still discovering new ways to perfect this recipe, and I’m always happy to swap tips with fellow cheesecake enthusiasts.
Most importantly? Have fun with it! Baking should be joyful, not stressful. Even if your first attempt isn’t picture-perfect (mine certainly wasn’t!), the taste will still be incredible. Now go forth, brew some strong coffee, and get ready to fall in love with every silky, espresso-kissed bite.
Print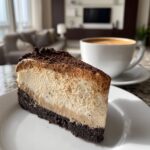
Decadent Espresso Cheesecake Recipe You’ll Crave Daily
- Total Time: 1 hour 10 minutes (plus chilling)
- Yield: 10 servings 1x
- Diet: Vegetarian
Description
A rich and creamy espresso cheesecake with a chocolate crust. Perfect for coffee lovers who enjoy a decadent dessert.
Ingredients
- 1 1/2 cups chocolate cookie crumbs
- 1/4 cup melted butter
- 3 (8 oz) packages cream cheese, softened
- 1 cup granulated sugar
- 3 large eggs
- 1/4 cup sour cream
- 2 tbsp instant espresso powder
- 1 tsp vanilla extract
- 1/4 tsp salt
Instructions
- Preheat oven to 325°F (165°C).
- Mix cookie crumbs and melted butter, press into a 9-inch springform pan.
- Beat cream cheese and sugar until smooth.
- Add eggs one at a time, mixing after each.
- Stir in sour cream, espresso powder, vanilla, and salt.
- Pour filling over crust.
- Bake for 45-50 minutes or until center is set.
- Cool completely before refrigerating for at least 4 hours.
Notes
- Use high-quality espresso powder for best flavor.
- Let cheesecake cool slowly to prevent cracking.
- Store leftovers in the refrigerator for up to 5 days.
- Prep Time: 20 minutes
- Cook Time: 50 minutes
- Category: Dessert
- Method: Baking
- Cuisine: American
Nutrition
- Serving Size: 1 slice
- Calories: 380
- Sugar: 28g
- Sodium: 320mg
- Fat: 25g
- Saturated Fat: 14g
- Unsaturated Fat: 8g
- Trans Fat: 0g
- Carbohydrates: 34g
- Fiber: 1g
- Protein: 6g
- Cholesterol: 115mg
Keywords: espresso cheesecake, coffee dessert, chocolate crust, creamy cheesecake

")
")
")
")