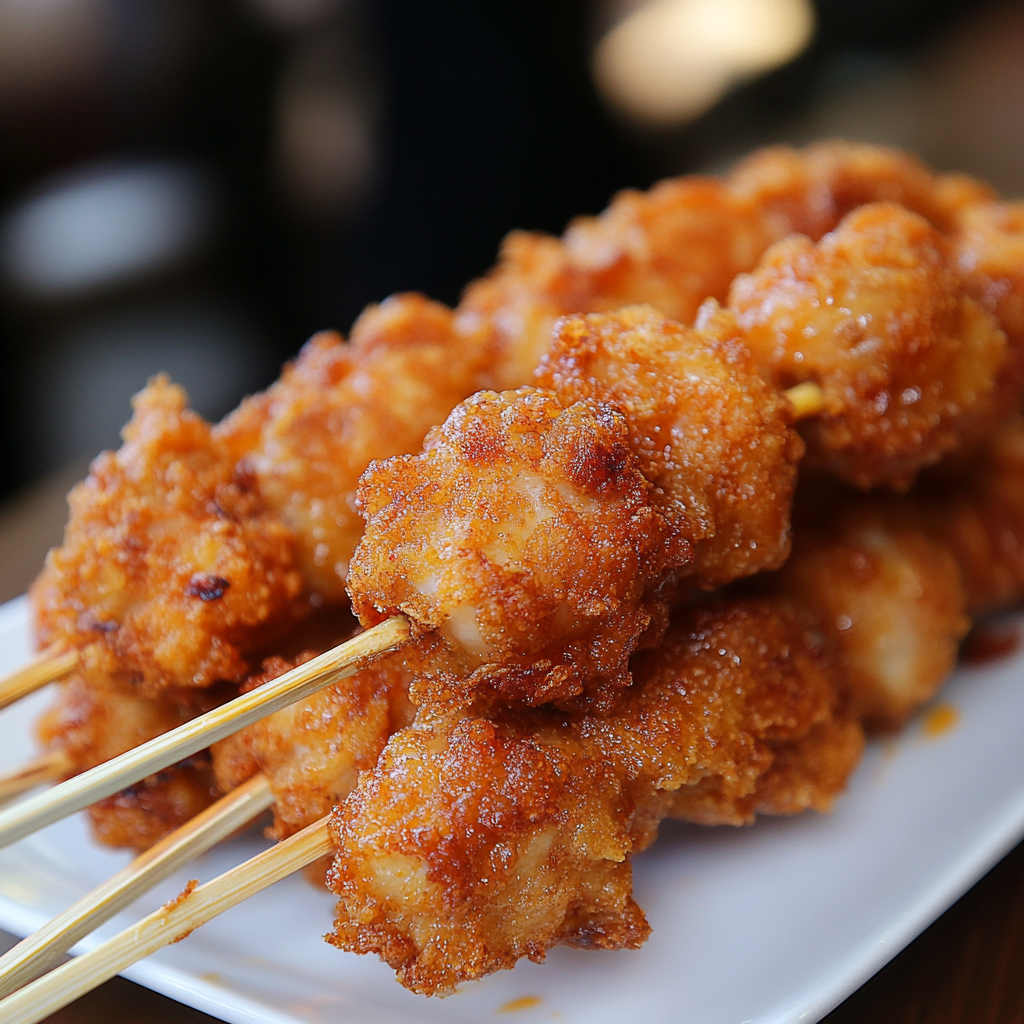
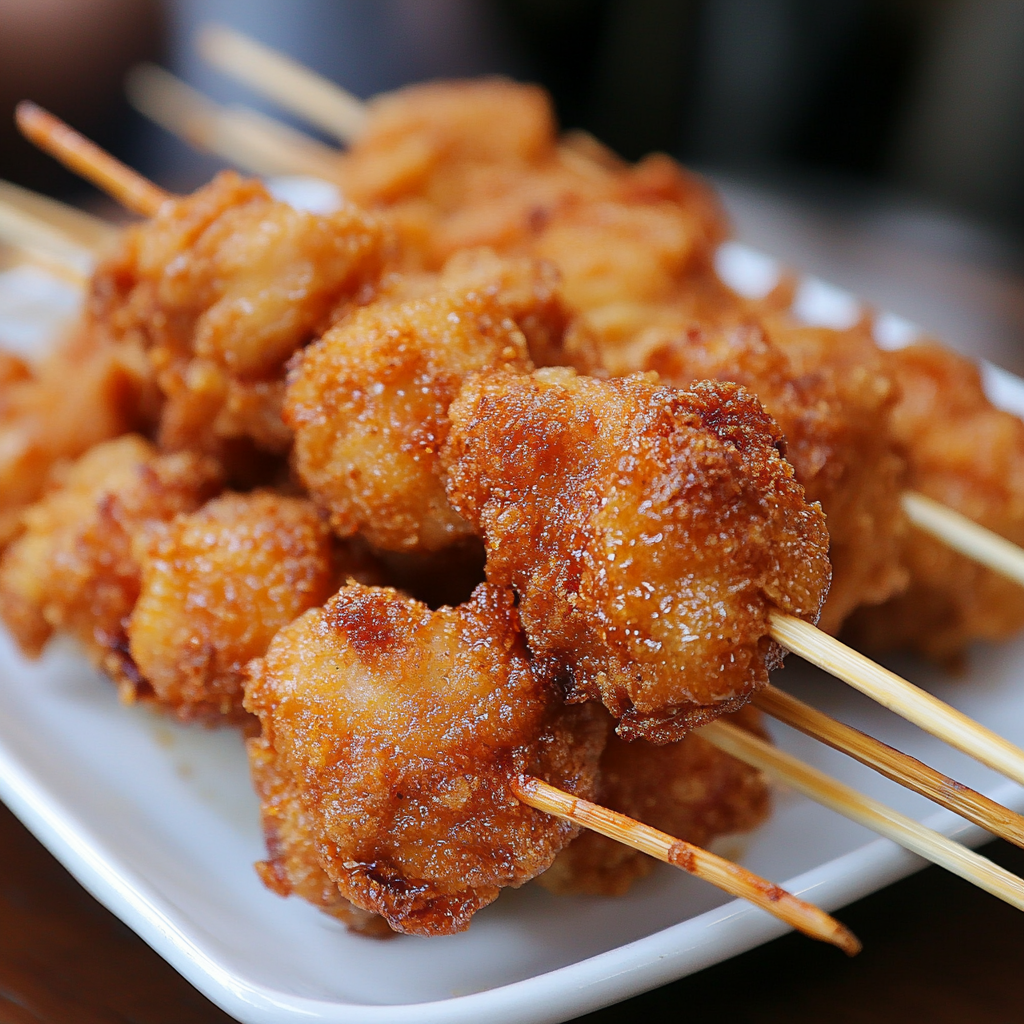
Fried chicken on a stick is a delightful twist on the classic fried chicken we all know and love. Imagine tender, juicy pieces of chicken, perfectly seasoned and coated in a crispy, golden crust, all neatly skewered for easy eating. It’s like a party on a stick! This dish is not just about the chicken; it’s about the experience of enjoying it. Whether you’re at a backyard barbecue, a fair, or simply cooking at home, these skewers bring a sense of fun and festivity to any meal.
Ingredients for Fried Chicken on a Stick
To create the perfect fried chicken on a stick, you’ll need a handful of simple yet essential ingredients. Each one plays a vital role in bringing out the flavors and textures that make this dish so irresistible. Here’s what you’ll need:
- Chicken Breast: 500 grams, cut into bite-sized pieces. I love using chicken breast because it’s lean and cooks quickly, ensuring that each piece remains juicy and tender.
- Skewers: 10-12 skewers, preferably soaked in water for 30 minutes if they’re wooden. This prevents them from burning during frying. I often use bamboo skewers, but metal ones work just as well!
- All-Purpose Flour: 1 cup. This is the first step in creating that crispy coating. It helps the egg and breadcrumbs stick to the chicken.
- Eggs: 2, beaten. The egg acts as a glue, binding the flour and breadcrumbs to the chicken. Plus, it adds a lovely richness!
- Breadcrumbs: 1 cup, preferably panko for extra crunch. Panko breadcrumbs are light and airy, giving the chicken a delightful crunch that I can’t resist.
- Seasoning: Salt, pepper, garlic powder, and paprika to taste. These spices elevate the flavor of the chicken, making each bite a burst of deliciousness.
- Oil for Frying: Enough for deep frying (about 2-3 cups). I usually opt for vegetable or canola oil, as they have a high smoke point and are perfect for frying.
Gathering these ingredients is the first step in your culinary adventure. I always find joy in preparing my kitchen, laying out everything I need. It’s like setting the stage for a delicious performance! Once you have everything ready, you’ll be well on your way to creating a dish that’s not only tasty but also brings smiles to the faces of those you share it with. Let’s move on to the tools you’ll need to make this fried chicken on a stick a reality!
Tools Needed for Fried Chicken on a Stick
Before diving into the cooking process, it’s essential to gather the right tools. Having the right equipment not only makes the cooking experience smoother but also ensures that your fried chicken on a stick turns out perfectly every time. Here’s a list of the tools I find indispensable when making this delightful dish:
- Mixing Bowls: A couple of mixing bowls are crucial for marinating the chicken and preparing the breading station. I love using glass bowls because they’re easy to clean and let me see the vibrant colors of the ingredients.
- Shallow Dishes: You’ll need three shallow dishes for the flour, eggs, and breadcrumbs. These help in the breading process, allowing for easy dipping. I often use pie plates or large dinner plates for this purpose.
- Skewers: As mentioned earlier, 10-12 skewers are necessary. If you’re using wooden skewers, don’t forget to soak them in water for 30 minutes to prevent burning. I find that bamboo skewers work wonderfully for this recipe!
- Deep Frying Pan or Large Pot: A deep frying pan or a large pot is essential for frying the chicken. I prefer using a heavy-bottomed pot, as it retains heat well and helps achieve that golden-brown color.
- Slotted Spoon or Tongs: These tools are perfect for carefully placing the skewers in the hot oil and flipping them as they cook. I always keep a pair of tongs handy; they make handling the skewers a breeze!
- Paper Towels: You’ll need paper towels to drain the excess oil after frying. I like to line a plate with them to absorb the oil, ensuring my chicken stays crispy and not greasy.
- Thermometer (Optional): If you want to be precise, a cooking thermometer can help you check the oil temperature. Ideally, it should be around 350°F (175°C) for frying. I sometimes use this to ensure I’m frying at the perfect temperature!
Having these tools ready makes the cooking process feel like a well-choreographed dance. I often find myself humming a little tune as I gather everything, excited for the deliciousness that’s about to unfold. With the right tools in hand, you’re all set to start preparing your fried chicken on a stick. Let’s move on to the preparation steps that will lead you to that crispy, golden goodness!
Preparation of Fried Chicken on a Stick
Step 1: Preparing the Chicken
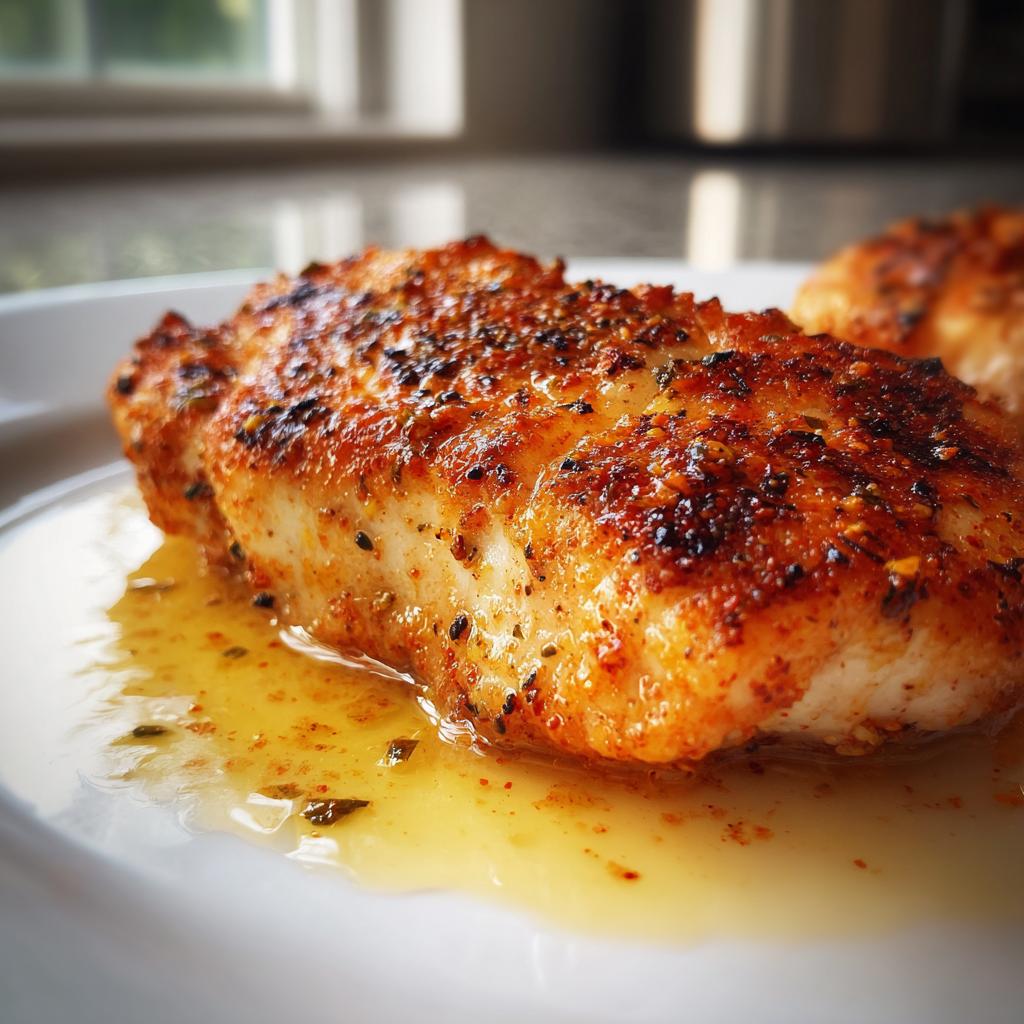
Let’s kick things off by preparing the chicken! I always start by cutting the chicken breast into bite-sized pieces. This makes it easier to skewer and ensures that each piece cooks evenly. In a mixing bowl, I season the chicken with salt, pepper, garlic powder, and paprika. The aroma of the spices fills the air, and I can already imagine the delicious flavors that will come alive during cooking. I let the chicken marinate for about 15-20 minutes. This step is crucial because it allows the flavors to seep into the meat, making every bite a burst of savory goodness!
Step 2: Making the Batter for Fried Chicken on a Stick
Now, it’s time to set up my breading station! I grab three shallow dishes and fill them with flour, beaten eggs, and breadcrumbs. The flour is the first layer of protection, helping the egg and breadcrumbs stick to the chicken. I love using panko breadcrumbs for that extra crunch! As I prepare the batter, I can’t help but think about how satisfying it is to create that crispy coating. It’s like wrapping each piece of chicken in a cozy, crunchy blanket!
Step 3: Skewering the Chicken
With the chicken marinated and the batter ready, it’s time to assemble the skewers! I take each piece of marinated chicken and dip it into the flour, making sure it’s fully coated. Then, I dip it into the beaten eggs, letting any excess drip off before rolling it in the breadcrumbs. I repeat this process for all the chicken pieces, and soon enough, I have a beautiful array of breaded chicken ready to be skewered. I thread the chicken onto the skewers, leaving a little space between each piece. This ensures even cooking and allows the hot oil to circulate around each piece, creating that perfect golden crust!
Step 4: Frying the Chicken on a Stick
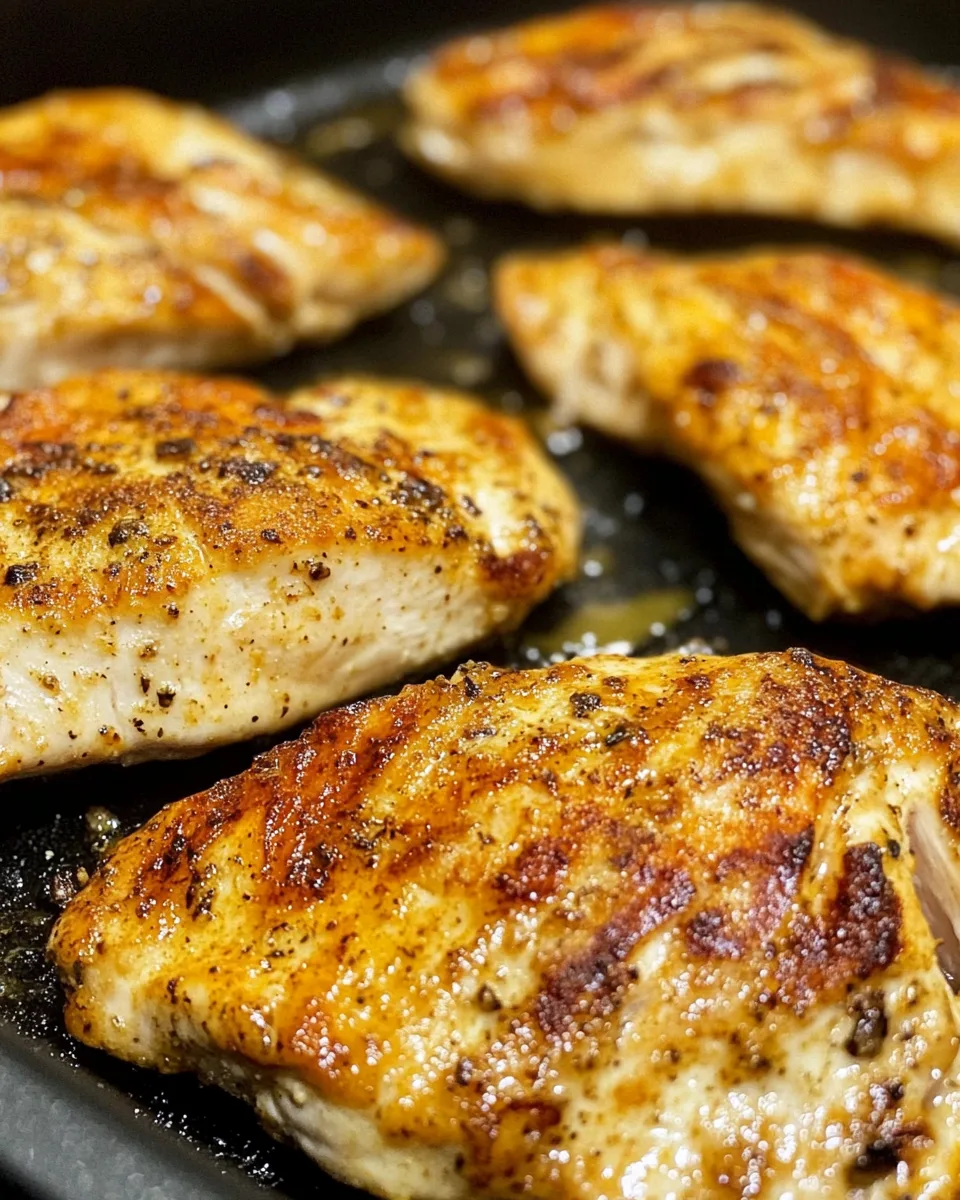
Now comes the exciting part—frying! I heat the oil in my deep frying pan over medium-high heat. To check if the oil is ready, I drop a small piece of bread into the oil. If it sizzles and bubbles, I know it’s time to fry! Carefully, I place the skewers in the hot oil, making sure not to overcrowd the pan. I fry them for about 4-5 minutes, turning occasionally to ensure they cook evenly. The sound of sizzling chicken fills my kitchen, and I can hardly wait to taste the crispy goodness!
Step 5: Draining and Cooling the Fried Chicken on a Stick
Once the chicken is golden brown and cooked through, I carefully remove the skewers from the oil using tongs. I place them on a plate lined with paper towels to absorb any excess oil. This step is essential for keeping the chicken crispy and not greasy. As I watch the steam rise, I can hardly contain my excitement! The aroma is simply irresistible, and I know that soon, I’ll be enjoying these delicious fried chicken on a stick skewers. With the preparation complete, it’s time to serve them up and enjoy!
Serving Suggestions for Fried Chicken on a Stick
Dipping Sauces for Fried Chicken on a Stick
Ah, the moment of truth! Once your fried chicken on a stick is ready, it’s time to think about the dipping sauces. These sauces can elevate your dish from delicious to absolutely divine! I love to set up a little dipping station with a variety of sauces, allowing everyone to choose their favorites. Here are some of my go-to options:
- Barbecue Sauce: A classic choice! The smoky sweetness of barbecue sauce pairs perfectly with the crispy chicken. I often make my own by mixing ketchup, brown sugar, and a splash of vinegar for that homemade touch.
- Ranch Dressing: Creamy and tangy, ranch dressing is a crowd-pleaser. It adds a cool contrast to the hot, crispy chicken. I like to whip up a quick ranch by combining sour cream, mayonnaise, and a sprinkle of herbs.
- Honey Mustard: This sweet and tangy sauce is another favorite in my household. The combination of honey and mustard creates a delightful flavor that complements the chicken beautifully.
- Spicy Sriracha Sauce: For those who enjoy a kick, sriracha is the way to go! I sometimes mix it with a bit of mayonnaise to create a spicy mayo that’s perfect for dipping.
Setting out these sauces not only adds flavor but also makes the meal interactive and fun! I love watching my kids experiment with different combinations, giggling as they find their perfect match. It’s all about enjoying the experience together!
Side Dishes to Pair with Fried Chicken on a Stick
Now that we have our dipping sauces ready, let’s talk about side dishes! Pairing your fried chicken on a stick with the right sides can create a well-rounded meal that satisfies everyone at the table. Here are some of my favorite side dishes that complement this dish:
- Coleslaw: A crunchy, refreshing coleslaw is a fantastic side. The coolness of the slaw balances the hot, crispy chicken. I love to make mine with a tangy vinaigrette for a lighter touch.
- French Fries: You can never go wrong with classic fries! Whether you prefer them crispy or soft, they’re the perfect companion to fried chicken. I sometimes sprinkle them with a bit of paprika for an extra kick!
- Macaroni and Cheese: Creamy, cheesy goodness! Mac and cheese is a comfort food favorite that pairs wonderfully with fried chicken. It’s like a warm hug on a plate!
- Grilled Vegetables: For a healthier option, I love serving grilled vegetables. The smoky flavor from the grill adds depth to the meal, and it’s a great way to sneak in some greens!
These side dishes not only enhance the meal but also create a colorful and inviting spread. I often find myself arranging everything on a big platter, making it look as good as it tastes. Sharing this meal with family and friends is what it’s all about, and I can’t wait for you to experience the joy of fried chicken on a stick!
Tips for Perfect Fried Chicken on a Stick
Choosing the Right Chicken
When it comes to making the best fried chicken on a stick, the choice of chicken is crucial. I always opt for fresh, high-quality chicken breast. It’s lean, tender, and cooks quickly, which is perfect for this recipe. If you’re feeling adventurous, you can also use chicken thighs for a juicier bite. They have a bit more fat, which can add extra flavor. Just remember, the key is to cut the chicken into uniform pieces. This ensures that they cook evenly, giving you that perfect golden brown color all around!
Another tip I’ve learned over the years is to let the chicken sit at room temperature for about 15 minutes before cooking. This helps it cook more evenly and prevents the meat from becoming tough. Plus, it’s a great time to get your breading station ready! I can’t stress enough how important it is to choose the right chicken. It sets the foundation for your fried chicken on a stick adventure!
Ensuring a Crispy Coating on Fried Chicken on a Stick
Ah, the crispy coating! It’s what makes fried chicken on a stick so irresistible. To achieve that perfect crunch, I have a few tried-and-true tips. First, make sure to coat the chicken pieces thoroughly in flour before dipping them in the egg. This step is essential because the flour helps the egg adhere better, creating a solid base for the breadcrumbs.
Speaking of breadcrumbs, I highly recommend using panko breadcrumbs. They’re lighter and airier than regular breadcrumbs, which means they fry up beautifully, giving you that extra crunch. When rolling the chicken in breadcrumbs, don’t be shy! Press down gently to ensure an even coating. This little trick makes a world of difference!
Another secret I’ve discovered is to let the breaded chicken rest for about 10 minutes before frying. This allows the coating to set, which helps it stay on during the frying process. And when it comes to frying, make sure your oil is hot enough—around 350°F (175°C) is ideal. If the oil isn’t hot enough, the coating can become soggy instead of crispy. Trust me, these tips will help you achieve that mouthwatering crunch that everyone loves!
FAQs about Fried Chicken on a Stick
Can I bake fried chicken on a stick instead of frying it?
Absolutely! If you’re looking for a healthier option, baking is a fantastic alternative. I often bake my fried chicken on a stick when I want to enjoy the same delicious flavors without the extra oil. To do this, preheat your oven to 400°F (200°C). After breading the chicken, place the skewers on a baking sheet lined with parchment paper. For an extra crispy finish, I like to spray the chicken lightly with cooking spray or brush it with a bit of oil. Bake for about 20-25 minutes, flipping halfway through, until the chicken is cooked through and golden brown. It’s a great way to enjoy this dish with less guilt!
What are some variations of fried chicken on a stick?
The beauty of fried chicken on a stick is its versatility! You can easily switch things up to suit your taste. One of my favorite variations is to marinate the chicken in different sauces before breading. For instance, teriyaki or buffalo sauce can add a unique twist. You can also experiment with different coatings, like using crushed cornflakes or even seasoned potato chips for a fun crunch. If you’re feeling adventurous, try adding veggies like bell peppers or zucchini between the chicken pieces on the skewers. This not only adds color but also a delightful flavor contrast!
How do I store leftover fried chicken on a stick?
If you happen to have leftovers (which is rare in my house!), storing them properly is key to keeping them tasty. Allow the chicken to cool completely before placing it in an airtight container. I usually layer parchment paper between the pieces to prevent them from sticking together. You can store them in the refrigerator for up to 3 days. When you’re ready to enjoy them again, I recommend reheating them in the oven at 350°F (175°C) for about 10-15 minutes. This helps restore that crispy texture, making it almost as good as fresh!
Can I use different types of meat for this recipe?
Definitely! While chicken is the star of this recipe, you can use other meats as well. I’ve had great success with turkey breast, which is lean and delicious. If you’re a fan of pork, try using pork tenderloin cut into bite-sized pieces. For a more adventurous option, shrimp or even firm fish like salmon can be skewered and fried. Just remember to adjust the cooking time based on the type of meat you choose. Each variation brings its own unique flavor, making fried chicken on a stick a truly customizable dish!
Conclusion on Fried Chicken on a Stick
As I wrap up this culinary journey, I can’t help but feel a sense of joy and satisfaction. Fried chicken on a stick is more than just a dish; it’s a celebration of flavors, textures, and memories. Each bite transports me back to those sunny afternoons spent grilling in the backyard, laughter echoing around me as friends and family gather to enjoy a meal together. It’s a dish that brings people closer, creating moments that linger long after the last skewer is devoured.
Print
Fried Chicken on a Stick: A Fun, Tasty Delight!
- Total Time: 40 minutes
- Yield: 10-12 skewers
- Diet: Gluten Free
Description
Fried chicken on a stick is a delightful twist on the classic fried chicken, featuring tender, juicy pieces of chicken coated in a crispy, golden crust, all skewered for easy eating.
Ingredients
- Chicken Breast: 500 grams, cut into bite-sized pieces
- Skewers: 10-12 skewers, preferably soaked in water for 30 minutes if they’re wooden
- All-Purpose Flour: 1 cup
- Eggs: 2, beaten
- Breadcrumbs: 1 cup, preferably panko
- Seasoning: Salt, pepper, garlic powder, and paprika to taste
- Oil for Frying: Enough for deep frying (about 2-3 cups)
Instructions
- Prepare the chicken by cutting it into bite-sized pieces and marinating with salt, pepper, garlic powder, and paprika for 15-20 minutes.
- Set up a breading station with three shallow dishes for flour, beaten eggs, and breadcrumbs.
- Coat each piece of marinated chicken in flour, then dip in eggs, and finally roll in breadcrumbs.
- Skewer the breaded chicken pieces onto the soaked skewers.
- Heat oil in a deep frying pan over medium-high heat and fry the skewers for about 4-5 minutes until golden brown.
- Remove the skewers from the oil and place them on a plate lined with paper towels to drain excess oil.
Notes
- For a healthier option, consider baking the chicken at 400°F (200°C) for 20-25 minutes.
- Experiment with different marinades and coatings for unique flavors.
- Store leftovers in an airtight container in the refrigerator for up to 3 days.
- Prep Time: 30 minutes
- Cook Time: 10 minutes
- Category: Appetizer
- Method: Frying
- Cuisine: American
Nutrition
- Serving Size: 1 skewer
- Calories: 250
- Sugar: 1g
- Sodium: 300mg
- Fat: 15g
- Saturated Fat: 2g
- Unsaturated Fat: 10g
- Trans Fat: 0g
- Carbohydrates: 20g
- Fiber: 1g
- Protein: 15g
- Cholesterol: 70mg
Keywords: fried chicken, skewers, appetizer, party food, easy recipe
")
")
")
")