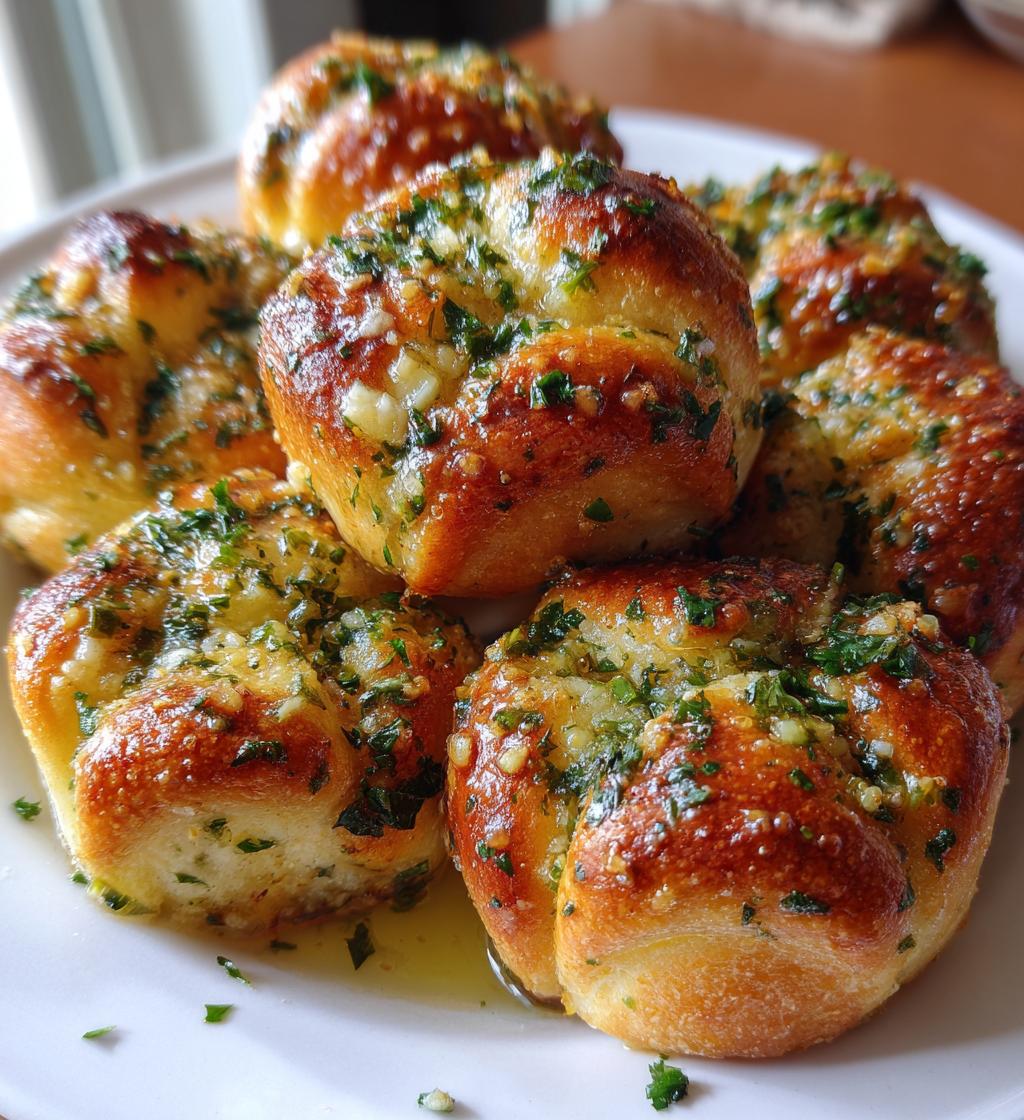
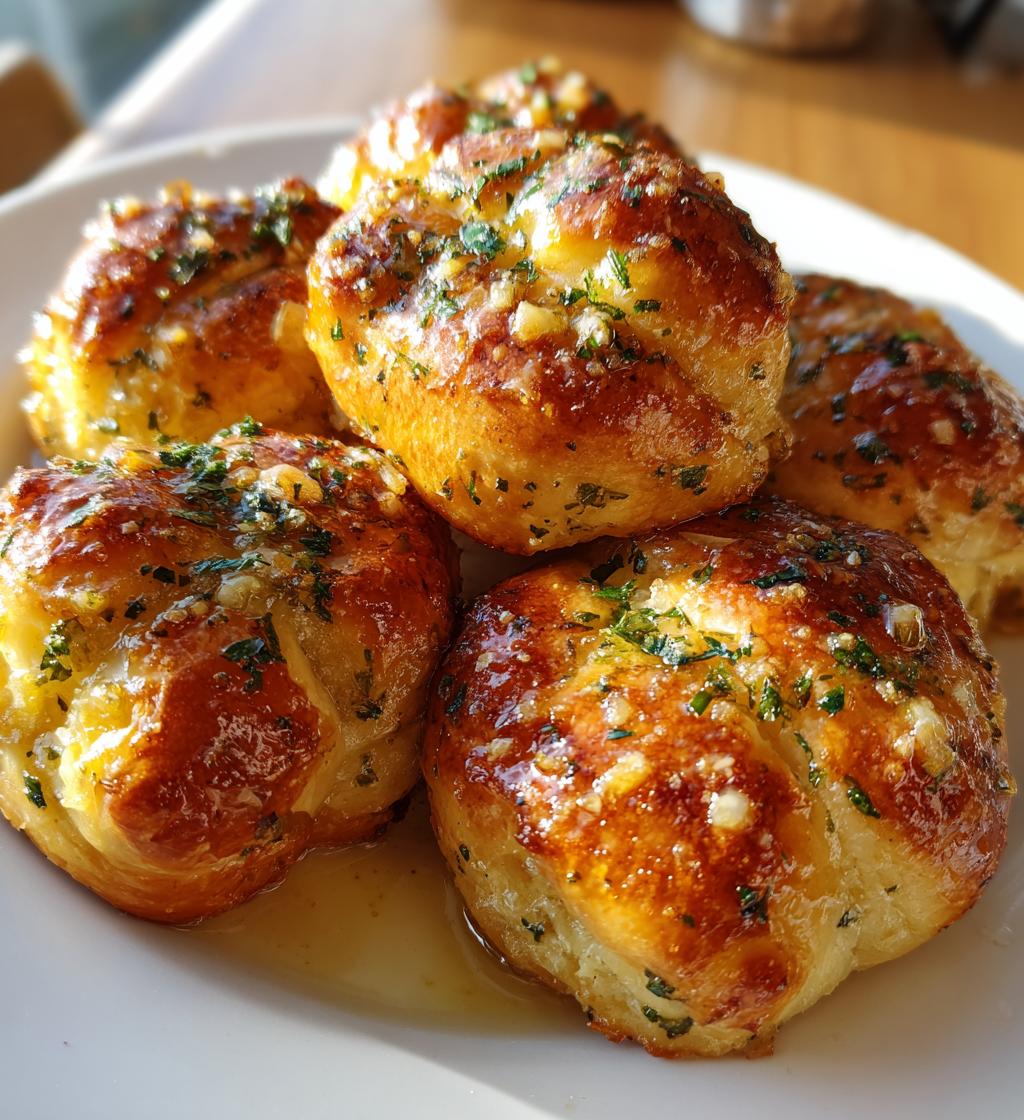
There’s something magical about pulling apart warm, fluffy garlic knots fresh from the oven. That first bite—when the soft bread gives way to a buttery garlic punch—always takes me back to my first job at a tiny pizzeria. I’d sneak knots straight from the sheet pan when the chef wasn’t looking! These little twisted wonders are my ultimate comfort food, equally perfect for dunking in marinara at a party or sopping up pasta sauce on a Tuesday night. They’re shockingly easy to make, too. Just flour, yeast, and a ridiculous amount of garlic butter transform into golden bites that disappear faster than you can say “more please.”
Why You’ll Love These Garlic Knots
Trust me, once you try homemade garlic knots, there’s no going back. Here’s why:
- They’re ridiculously easy—no fancy skills needed, just simple dough and a whole lot of garlic butter
- Total crowd-pleasers at parties (I’ve seen people hover by the tray waiting for the next batch!)
- That smell—when the garlic hits the warm butter, your kitchen will smell like an Italian trattoria
- Endlessly versatile—serve them with pasta, soup, or just eat them straight off the baking sheet like I do
Ingredients for Perfect Garlic Knots
Here’s everything you’ll need to make garlic knots that’ll have everyone begging for the recipe:
- 2 cups all-purpose flour (plus extra for dusting)
- 1 packet active dry yeast (that’s 2 1/4 teaspoons)
- 1 teaspoon sugar – just enough to wake up the yeast
- 3/4 cup warm water (about 110°F – think baby bottle temperature)
- 2 tablespoons olive oil – for that perfect dough texture
- 4 cloves garlic, minced (fresh is best, but measure with your heart!)
- 3 tablespoons butter, melted (salted is my preference)
- 1 tablespoon fresh parsley, finely chopped
- 1/2 teaspoon dried oregano – the secret flavor booster
- 1 teaspoon salt – brings all the flavors together
Pro tip: Measure your flour by spooning it into the cup and leveling off – no packing! This makes all the difference in getting that perfect, fluffy texture.
Essential Equipment for Garlic Knots
You don’t need fancy gadgets—just grab these basics:
- A large mixing bowl (for that glorious dough)
- Baking sheet (I swear by my old half-sheet pan)
- Pastry brush (to slather on the garlic butter while they’re hot)
That’s it! Now let’s get kneading.
How to Make Garlic Knots Step by Step
Okay friends, let’s make some magic happen! I’ve broken this down into foolproof steps – just follow along and you’ll be swimming in garlicky goodness in no time.
Preparing the Dough
First, wake up that yeast! In your mixing bowl, combine the warm water (test it on your wrist – should feel comfortably warm, not hot), sugar, and yeast. Give it a quick stir and walk away for 5 minutes. When you come back, it should look foamy and smell slightly beer-like – that’s your sign the yeast is alive and happy!
Now add the flour, olive oil, and salt. Time to get your hands dirty! Knead for about 5 minutes until the dough feels smooth and elastic – it’ll start off sticky but become supple as you work it. Pro tip: If it’s sticking too much to the counter, resist adding more flour! Just keep kneading – it’ll come together.
Pop the dough back in the bowl, cover with a damp towel, and let it rise in a warm spot (I use my oven with just the light on) for about an hour. It should double in size – poke it gently and if the indentation stays, it’s ready!
Shaping and Baking the Knots
Punch down the dough (so satisfying!) and turn it out onto a lightly floured surface. Divide into 12 equal pieces – I use a bench scraper but a knife works too. Roll each piece into a rope about 6 inches long, then tie into a simple knot (don’t overthink this – they don’t have to be perfect!).
Arrange your knots on a parchment-lined baking sheet, leaving a little space between them. Bake at 375°F for 15-20 minutes – they’re done when golden brown but still soft. Watch them closely after 15 minutes – you want golden perfection, not little hockey pucks!
Garlic Butter Finishing
While the knots bake, mix up that glorious garlic butter: melt the butter (microwave is fine), then stir in the minced garlic, parsley, and oregano. The second those knots come out of the oven, brush them generously with the garlic butter – you’ll hear it sizzle as it soaks in! This is THE moment that transforms good bread into irresistible garlic knots. Don’t be shy – get every nook and cranny!
Let them cool just enough so you don’t burn your mouth, then dig in. Warning: These disappear FAST, so hide a few for yourself if you want seconds!
Tips for the Best Garlic Knots
Want garlic knots that’ll make your nonna proud? Here are my tried-and-true tricks:
- Fresh garlic is non-negotiable—that jarred stuff just won’t give you the same punchy flavor
- Let your dough rise in a warm spot (near the oven or in a barely-warm microwave) for maximum puff
- Brush the garlic butter while knots are piping hot—they’ll absorb it like little flavor sponges
- Knead until your dough passes the “windowpane test”—it should stretch thin without tearing
Bonus tip: Double the garlic butter and keep some for dipping—trust me, you’ll thank me later!
Garlic Knots Variations
The beauty of garlic knots is how easily you can mix them up! Try these fun twists:
- Cheesy upgrade: Sprinkle Parmesan or mozzarella on top before baking
- Spicy kick: Add red pepper flakes to the garlic butter
- Herb garden: Mix in fresh basil or rosemary with the parsley
- Dietary swaps: Use vegan butter and nutritional yeast for dairy-free versions
Once you master the basic recipe, the flavor possibilities are endless!
Serving and Storing Garlic Knots
Nothing beats garlic knots fresh from the oven, but here’s how to keep them tasting amazing:
- Serve warm with marinara for dipping – it’s classic for a reason!
- Store leftovers in an airtight container at room temp for up to 2 days
- Revive day-old knots by wrapping in foil and warming at 350°F for 5 minutes
- Freeze unbaked knots – just thaw, let rise, and bake when needed
Pro tip: Make extra garlic butter to brush on when reheating – it brings them right back to life!
Garlic Knots Nutrition Information
Here’s the scoop on what’s in each delicious knot (based on my recipe):
- 120 calories – totally worth it!
- 5g fat (2g saturated)
- 16g carbs, 1g fiber
- 3g protein – bonus bread fuel
- 150mg sodium – go easy if you’re watching salt
Remember, these numbers can change if you tweak ingredients or go wild with the garlic butter (no judgment here!).
Common Questions About Garlic Knots
Over the years, I’ve gotten every garlic knot question imaginable! Here are the ones I hear most:
“Can I use garlic powder instead of fresh garlic?”
Oh honey, I’ll be honest—fresh garlic makes all the difference! Powder works in a pinch (use about 1/2 teaspoon), but you’ll miss that bright, punchy flavor. If you must substitute, try minced jarred garlic before resorting to powder.
“Why are my knots dry?”
Two likely culprits: overbaking (set a timer!) or skimping on the garlic butter bath. Those golden babies should come out when they’re just firm to the touch—they’ll keep cooking a bit on the sheet. And drown them in butter the second they’re out!
“Can I make the dough ahead?”
Absolutely! After the first rise, punch it down, wrap tightly, and refrigerate overnight. Let it warm up for 30 minutes before shaping—the flavor actually improves!
“Help—my dough won’t rise!”
Check your yeast expiration date first. If that’s fine, your water might’ve been too hot (it kills yeast) or too cold (it sleeps). Aim for bathwater warmth—around 110°F. Also, drafts can sabotage rising—try my oven-with-the-light-on trick!
Print
25 Irresistible Garlic Knots That Disappear Instantly
- Total Time: 1 hour 30 mins
- Yield: 12 knots 1x
- Diet: Vegetarian
Description
Garlic knots are soft, fluffy bread rolls flavored with garlic butter and herbs, perfect as an appetizer or side dish.
Ingredients
- 2 cups all-purpose flour
- 1 packet active dry yeast
- 1 tsp sugar
- 3/4 cup warm water
- 2 tbsp olive oil
- 1 tsp salt
- 4 cloves garlic, minced
- 3 tbsp butter, melted
- 1 tbsp parsley, chopped
- 1/2 tsp dried oregano
Instructions
- In a bowl, mix yeast, sugar, and warm water. Let sit for 5 minutes until frothy.
- Add flour, olive oil, and salt. Knead into a smooth dough.
- Cover and let rise for 1 hour or until doubled in size.
- Divide dough into small pieces and roll into knots.
- Place knots on a baking sheet and bake at 375°F for 15-20 minutes.
- Mix melted butter, minced garlic, parsley, and oregano.
- Brush garlic butter over warm knots and serve.
Notes
- Use fresh garlic for the best flavor.
- Let dough rise in a warm place for better results.
- Serve warm for maximum enjoyment.
- Prep Time: 1 hour 10 mins
- Cook Time: 20 mins
- Category: Appetizer
- Method: Baking
- Cuisine: Italian
Nutrition
- Serving Size: 1 knot
- Calories: 120
- Sugar: 1g
- Sodium: 150mg
- Fat: 5g
- Saturated Fat: 2g
- Unsaturated Fat: 3g
- Trans Fat: 0g
- Carbohydrates: 16g
- Fiber: 1g
- Protein: 3g
- Cholesterol: 5mg
Keywords: garlic knots, bread rolls, appetizer, side dish, Italian
")
")
")
")