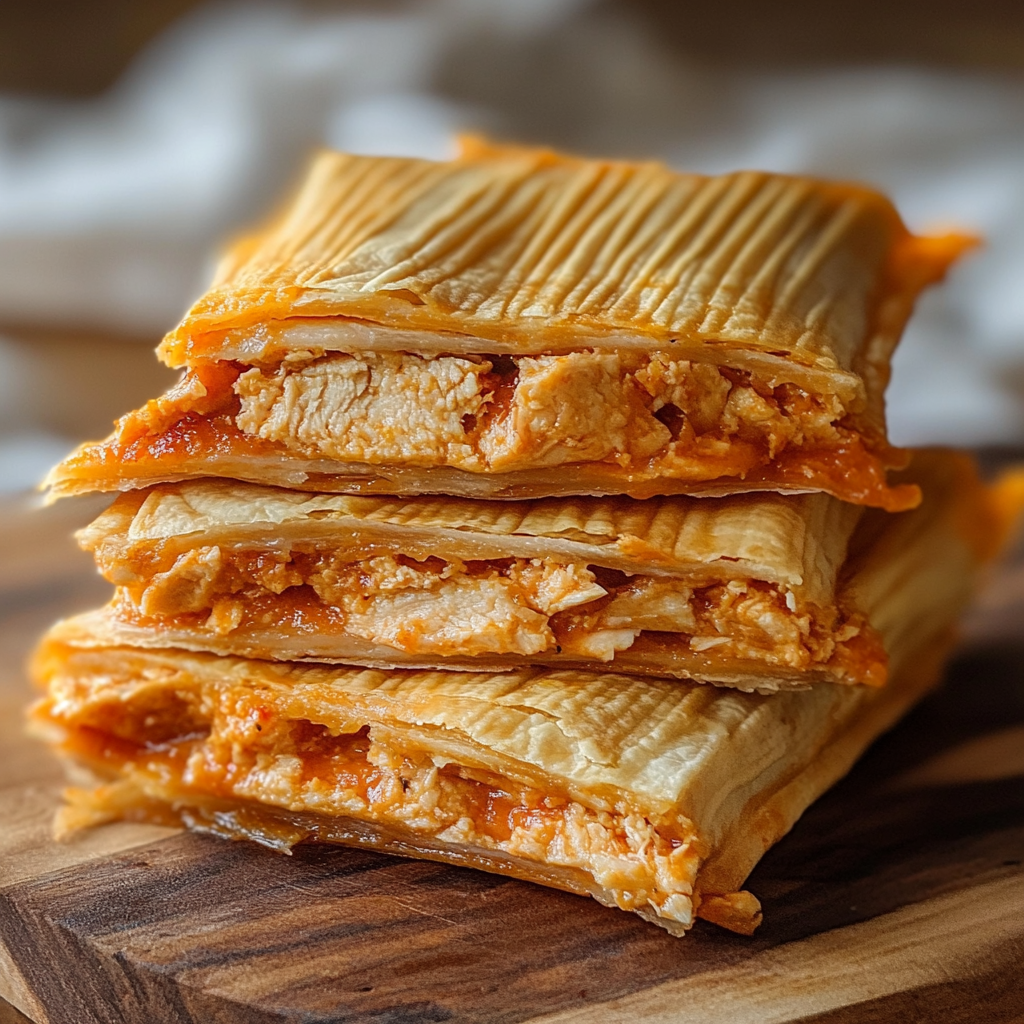
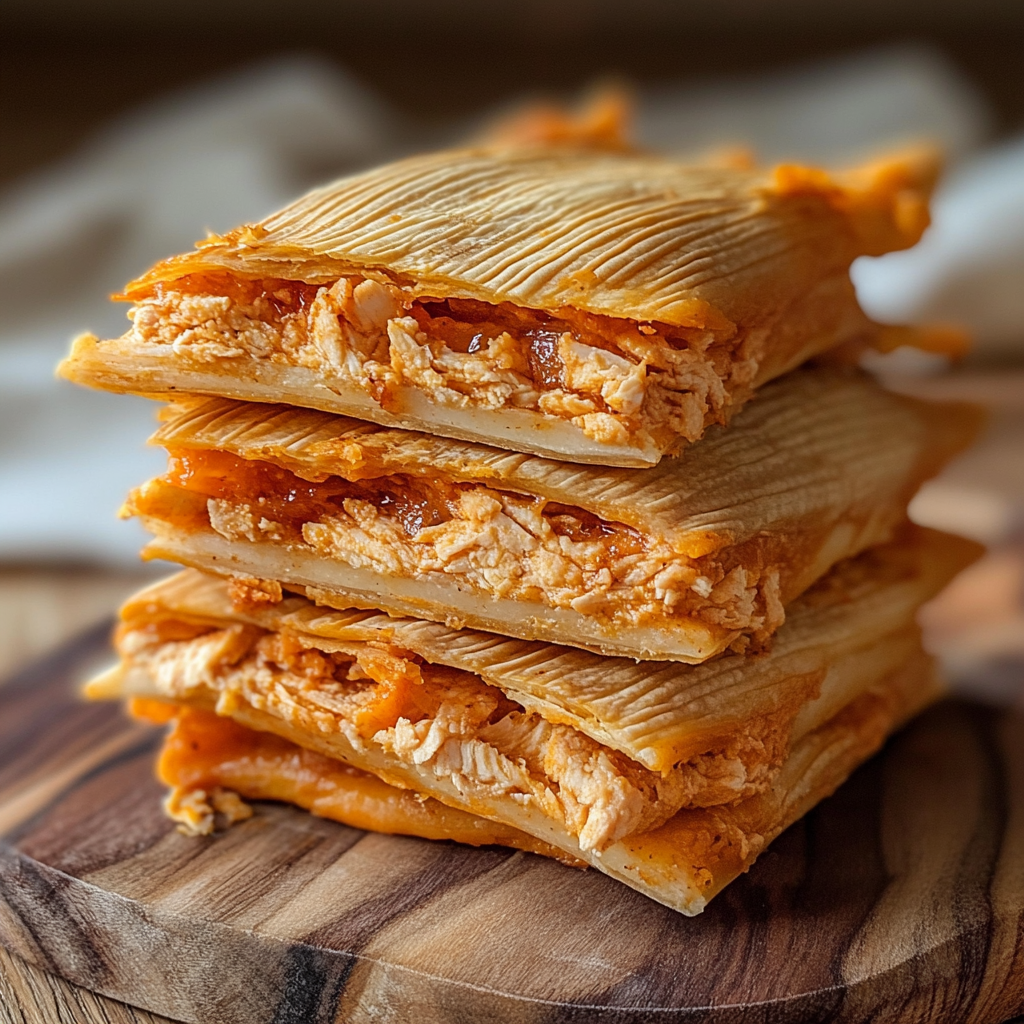
As a passionate home cook, I find joy in exploring the rich tapestry of culinary traditions. One dish that has captured my heart is the humble tamale. These delightful bundles of masa and filling are not just food; they are a celebration of culture, family, and history. Today, I want to share my journey of learning how to make chicken tamales, a dish that brings warmth and comfort to any table.
Ingredients for How to Make Chicken Tamales
Essential Ingredients
Before diving into the delightful world of tamale-making, let’s gather our essential ingredients. Each component plays a vital role in creating that perfect bite. Here’s what you’ll need:
- Masa Harina: This is the heart of your tamales. I use 2 cups of masa harina, which gives the tamales their signature texture. It’s like the canvas for your culinary masterpiece!
- Cooked Chicken Breast: You’ll need 1 pound of cooked and shredded chicken. I love using leftover rotisserie chicken for convenience and flavor. It’s a time-saver and adds a delicious depth to the filling.
- Chicken Broth: 1 ½ cups of chicken broth keeps the masa moist and flavorful. Plus, it’s perfect for mixing with the chicken filling to keep it juicy.
- Corn Husks: You’ll need 12-15 soaked corn husks. These are essential for wrapping your tamales. Soaking them in warm water makes them pliable and easy to work with.
- Baking Powder: Just 1 teaspoon helps the masa rise a bit, giving it a light texture.
- Salt: A teaspoon of salt enhances all the flavors. Trust me, it’s a must!
- Cumin, Chili Powder, and Garlic Powder: Each of these spices adds a unique flavor profile. I use 1 teaspoon of each to create a warm, savory taste that dances on your palate.
Optional Ingredients for Customization
One of the best parts about making chicken tamales is the opportunity to customize them to your liking. Here are some optional ingredients that can elevate your tamales:
- Cheese: Adding cheese to the chicken filling can create a creamy texture. I often sprinkle in some shredded cheese for a delightful surprise!
- Vegetables: Diced bell peppers, onions, or even corn can add a pop of color and flavor. I love sneaking in some veggies for added nutrition.
- Spices: Feel free to experiment with spices like smoked paprika or oregano. Each spice can bring a new twist to your tamales.
- Salsa: For those who enjoy a kick, adding salsa to the filling can spice things up. It’s like a fiesta in every bite!
Gathering these ingredients is the first step in your tamale adventure. I can already feel the excitement bubbling up as I think about the deliciousness that awaits. Let’s move on to the tools we’ll need to make this culinary journey a success!
Tools Needed for How to Make Chicken Tamales
Kitchen Tools and Equipment
Before we roll up our sleeves and dive into the tamale-making process, let’s gather the essential tools. Having the right equipment can make all the difference in your cooking experience. Here’s what you’ll need:
- Large Mixing Bowls: I always keep a couple of these handy. One for mixing the masa dough and another for the chicken filling. It keeps things organized and makes the process smoother.
- Steamer Pot: A good steamer pot is crucial for cooking your tamales. I love using a multi-tiered steamer, which allows me to cook a large batch at once. It’s like a little tower of deliciousness!
- Measuring Cups and Spoons: Precision is key in cooking. I use these to measure out my ingredients accurately, ensuring that every bite is just right.
- Spatula or Wooden Spoon: These are perfect for mixing the masa and chicken filling. I prefer a wooden spoon; it feels sturdy and gives me a good grip while mixing.
- Kitchen Towel: A damp kitchen towel is essential for covering the tamales while they steam. It helps keep the moisture in, ensuring they come out tender and delicious.
Recommended Utensils for Best Results
In addition to the basic tools, there are a few utensils that can elevate your tamale-making game. Here are my favorites:
- Pastry Brush: This handy tool is great for spreading the masa evenly on the corn husks. It helps create a smooth layer, making assembly a breeze.
- Rubber Gloves: If you’re like me and enjoy getting your hands in the mix, consider wearing rubber gloves. They keep things clean and make handling the masa easier.
- Tamale Spreader: While not essential, a tamale spreader can help you achieve the perfect thickness of masa on the husks. It’s a little gadget that makes a big difference!
- Sharp Knife: A sharp knife is useful for cutting the chicken into smaller pieces or chopping vegetables. It’s always good to have a reliable knife in the kitchen.
With these tools at your disposal, you’re well on your way to mastering how to make chicken tamales. I can already picture the delicious aroma filling my kitchen as I prepare to steam these delightful bundles. Let’s move on to the next step: preparing the chicken filling!
Step-by-Step Preparation: How to Make Chicken Tamales
Step 1: Preparing the Chicken Filling
Let’s kick things off by preparing the chicken filling. This step is where the magic begins! I usually start by shredding my cooked chicken. If you’re using leftover rotisserie chicken, it’s already packed with flavor, which makes my job easier. I simply pull the chicken apart with my fingers or use two forks to shred it into bite-sized pieces.
Once the chicken is shredded, I transfer it to a mixing bowl. Here’s where I like to add a splash of chicken broth to keep it moist. It’s like giving the chicken a little bath! I also sprinkle in some extra spices if I’m feeling adventurous. Sometimes, I toss in a pinch of smoked paprika or a dash of lime juice for a zesty kick. The key is to taste as you go; it’s all about finding that perfect balance of flavors!
Step 2: Making the Masa Dough
Now that the filling is ready, it’s time to make the masa dough. This part is like creating the foundation of a beautiful house. In a large mixing bowl, I combine the masa harina, baking powder, salt, cumin, chili powder, and garlic powder. The aroma of the spices wafting through the air is simply delightful!
Next, I gradually pour in the chicken broth while mixing with a spatula. I love watching the dry ingredients transform into a soft, pliable dough. It’s like magic! If the dough feels a bit dry, I add a splash more broth until it reaches the perfect consistency. It should be moist but not sticky, like a soft pillow ready to cradle the delicious filling.
Step 3: Assembling the Tamales
With the filling and masa ready, it’s time for the fun part—assembling the tamales! I take a soaked corn husk and lay it flat on my countertop, wide end facing me. Spreading about 2-3 tablespoons of masa dough onto the center of the husk feels like painting a canvas. I leave some space at the edges, just like framing a picture.
Then, I place a spoonful of the shredded chicken filling right in the center of the masa. It’s like tucking in a cozy blanket! I fold the sides of the husk over the masa and filling, then fold the bottom up to secure the tamale. It’s important to make sure they’re snug but not too tight, as the masa will expand while cooking. I repeat this process with the remaining husks, masa, and filling, creating a little army of tamales ready for steaming!
Step 4: Cooking the Tamales
Now comes the moment of truth—cooking the tamales! I fill my steamer pot with water and bring it to a gentle simmer. The sound of bubbling water is music to my ears! I carefully place the tamales upright in the steamer basket, with the open end facing up. It’s like arranging little soldiers standing tall and proud.
To keep the moisture in, I cover the tamales with a damp kitchen towel. This step is crucial for ensuring they come out tender and delicious. I let them steam for about 1 to 1.5 hours, and the anticipation builds as the aroma fills my kitchen. I often peek in to check on them, and when I see the masa pulling away from the husk, I know they’re almost ready!
Once cooked, I carefully remove the tamales from the steamer and let them cool slightly. The moment I take that first bite, I’m transported to a world of flavor and comfort. It’s a labor of love that’s worth every minute spent in the kitchen!
Serving Suggestions for How to Make Chicken Tamales
Traditional Accompaniments
Once your chicken tamales are ready, it’s time to think about how to serve them. In my experience, traditional accompaniments can elevate the dish to new heights. One of my favorites is a vibrant salsa. Whether it’s a fresh pico de gallo or a smoky salsa verde, the bright flavors complement the rich tamales beautifully. I love the way the acidity of the salsa cuts through the savory filling, creating a perfect balance.
Another classic pairing is sour cream. A dollop of creamy goodness adds a luscious texture that makes each bite even more delightful. Sometimes, I sprinkle a bit of chopped cilantro on top for a pop of color and freshness. And let’s not forget about avocado! Sliced or mashed, avocado brings a buttery richness that pairs perfectly with the spices in the tamales.
For those who enjoy a little heat, I recommend serving your tamales with pickled jalapeños or a spicy hot sauce. The kick of heat adds an exciting layer of flavor that can make your taste buds dance! These traditional accompaniments not only enhance the tamales but also create a festive atmosphere at the table.
Creative Serving Ideas
While traditional accompaniments are fantastic, I also love to get a little creative when serving my chicken tamales. One fun idea is to create a tamale platter. I arrange the tamales on a large serving dish, surrounded by an array of toppings. Think of it as a tamale bar! Guests can customize their own tamales with toppings like guacamole, shredded cheese, or even a drizzle of chipotle crema. It’s interactive and adds an element of fun to the meal.
Another creative twist is to serve tamales in a bowl of warm broth. I like to make a light chicken broth infused with herbs and spices, then place the tamales right in the bowl. It’s like a cozy hug in a bowl! The broth keeps the tamales moist and adds a comforting warmth that’s perfect for chilly evenings.
For a unique dessert twist, consider making sweet tamales! You can fill them with fruits like strawberries or chocolate, then serve them with a drizzle of honey or a sprinkle of cinnamon. It’s a delightful way to end the meal on a sweet note.
With these serving suggestions, your chicken tamales will not only taste amazing but also look beautiful on the table. I can’t wait for you to experience the joy of sharing this dish with family and friends. Let’s move on to some tips for perfecting your tamale-making skills!
Tips for Perfecting How to Make Chicken Tamales
Common Mistakes to Avoid
As I’ve journeyed through the world of tamale-making, I’ve learned a few lessons along the way. Here are some common mistakes to avoid, ensuring your chicken tamales turn out perfectly every time!
- Not Soaking the Corn Husks: One of the biggest blunders is skipping the soaking step. If the corn husks aren’t softened, they can tear easily, making it difficult to wrap your tamales. I always soak them for at least 30 minutes in warm water to make them pliable and easy to work with.
- Too Much or Too Little Masa: Finding the right amount of masa is crucial. If you spread too much, the tamales can be heavy and dense. Too little, and they might fall apart. I aim for about 2-3 tablespoons of masa per husk, creating a nice balance.
- Overcooking or Undercooking: Timing is everything when it comes to steaming. If you undercook the tamales, the masa will be gummy. Overcooking can dry them out. I recommend checking them after an hour; they should easily pull away from the husk when done.
- Skipping the Taste Test: Don’t forget to taste your masa and filling before assembling! Adjusting the seasoning at this stage can make a world of difference. I always take a small bite to ensure the flavors are just right.
By avoiding these common pitfalls, you’ll be well on your way to mastering how to make chicken tamales that are both delicious and satisfying. Now, let’s talk about how to store and reheat your tamales for future enjoyment!
Storage and Reheating Tips
After all that hard work, you might find yourself with leftover tamales. Don’t worry; they store beautifully! Here’s how I keep my tamales fresh:
- Refrigeration: If you have leftover tamales, let them cool completely before storing. I place them in an airtight container and keep them in the refrigerator for up to 3 days. This way, they stay moist and flavorful!
- Freezing: For longer storage, I freeze my tamales. I wrap each tamale in plastic wrap and then place them in a freezer-safe bag. They can last up to 3 months in the freezer. When I’m ready to enjoy them, I simply thaw them in the fridge overnight.
- Reheating: To reheat, I love steaming them again. It keeps the masa soft and tender. I place the tamales in a steamer basket over simmering water for about 20-30 minutes. Alternatively, you can microwave them wrapped in a damp paper towel for about 1-2 minutes, but I find steaming gives the best results.
With these storage and reheating tips, you can savor the deliciousness of your chicken tamales even after the initial feast. I can’t wait for you to try making them and share the joy they bring to your table!
FAQs About How to Make Chicken Tamales
What type of chicken is best for tamales?
When it comes to choosing chicken for tamales, I always recommend using cooked chicken breast. It’s lean, tender, and easy to shred. However, if you want to add more flavor, consider using dark meat, like thighs. They’re juicier and can bring a richer taste to your filling. I often use leftover rotisserie chicken, which is not only convenient but also packed with flavor. The key is to ensure the chicken is well-seasoned, as it will enhance the overall taste of your tamales!
Can I make tamales ahead of time?
Absolutely! Making tamales ahead of time is a fantastic idea, especially if you’re planning for a gathering. You can prepare the tamales, steam them, and then let them cool completely. Once cooled, I recommend storing them in an airtight container in the refrigerator for up to 3 days. If you want to make them even further in advance, you can freeze them before steaming. Just wrap each tamale tightly in plastic wrap and place them in a freezer-safe bag. When you’re ready to enjoy them, simply steam them from frozen, adding a few extra minutes to the cooking time!
How do I know when tamales are done cooking?
Knowing when your tamales are done is crucial for achieving that perfect texture. I always check them after about an hour of steaming. The masa should easily pull away from the corn husk when they’re ready. If you find that the masa is still sticking, give them a little more time. The aroma wafting through your kitchen will also be a good indicator that they’re close to being done. Trust your senses; they’ll guide you to tamale perfection!
Can I freeze chicken tamales?
Yes, you can definitely freeze chicken tamales! In fact, it’s one of my favorite ways to enjoy them later. After you’ve assembled the tamales, wrap each one tightly in plastic wrap and place them in a freezer-safe bag. They can last up to 3 months in the freezer. When you’re ready to indulge, simply steam them from frozen, adding a bit of extra time to ensure they’re heated through. It’s like having a little taste of home waiting for you whenever you need a comforting meal!
Conclusion: Mastering How to Make Chicken Tamales
As I reflect on my journey of learning how to make chicken tamales, I can’t help but feel a sense of accomplishment and joy. Each step, from preparing the filling to steaming those delightful bundles, has been a labor of love. The process may seem daunting at first, but trust me, the rewards are well worth the effort. There’s something magical about gathering friends and family around the table to share a meal that you’ve poured your heart into.
Print
How to make chicken tamales that wow your guests!
- Total Time: 2 hours
- Yield: 12-15 tamales
- Diet: Gluten Free
Description
A detailed guide on how to make delicious chicken tamales, including history, ingredients, and step-by-step instructions.
Ingredients
- Masa Harina: 2 cups
- Cooked Chicken Breast: 1 pound, shredded
- Chicken Broth: 1 ½ cups
- Corn Husks: 12-15, soaked
- Baking Powder: 1 teaspoon
- Salt: 1 teaspoon
- Cumin: 1 teaspoon
- Chili Powder: 1 teaspoon
- Garlic Powder: 1 teaspoon
Instructions
- Prepare the chicken filling by shredding the cooked chicken and mixing it with chicken broth and spices.
- Make the masa dough by combining masa harina, baking powder, salt, and spices, then adding chicken broth until the dough is soft and pliable.
- Assemble the tamales by spreading masa on soaked corn husks, adding chicken filling, and folding them securely.
- Cook the tamales in a steamer for 1 to 1.5 hours, ensuring they are covered with a damp towel to retain moisture.
Notes
- Soak corn husks for at least 30 minutes before using.
- Adjust seasoning in the filling to taste before assembling.
- Check tamales for doneness by ensuring masa pulls away from the husk.
- Store leftovers in an airtight container in the refrigerator for up to 3 days or freeze for up to 3 months.
- Prep Time: 30 minutes
- Cook Time: 1.5 hours
- Category: Main Dish
- Method: Steaming
- Cuisine: Mexican
Nutrition
- Serving Size: 1 tamale
- Calories: 200
- Sugar: 1g
- Sodium: 300mg
- Fat: 5g
- Saturated Fat: 1g
- Unsaturated Fat: 4g
- Trans Fat: 0g
- Carbohydrates: 30g
- Fiber: 3g
- Protein: 10g
- Cholesterol: 30mg
Keywords: chicken tamales, tamale recipe, Mexican cuisine, homemade tamales
")
")
")
")