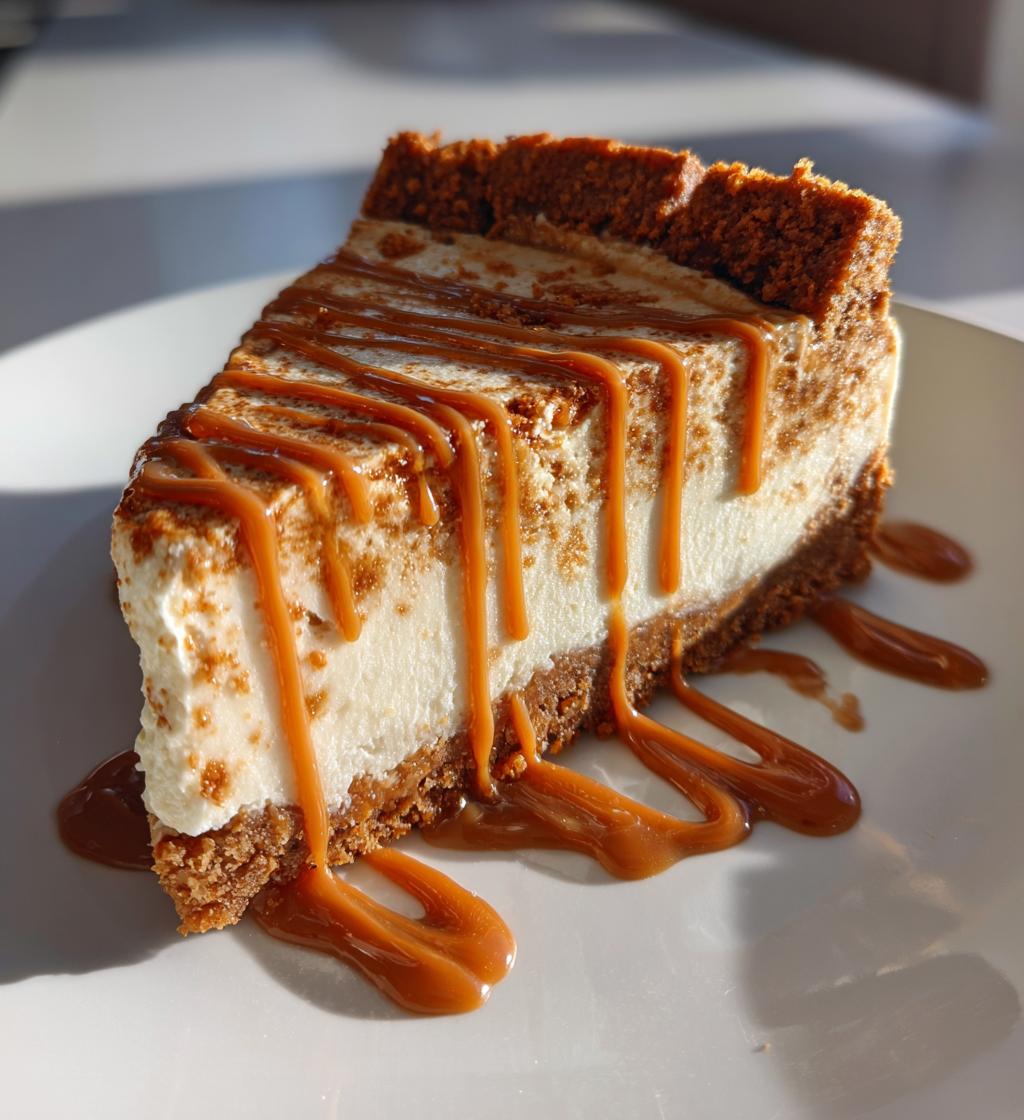
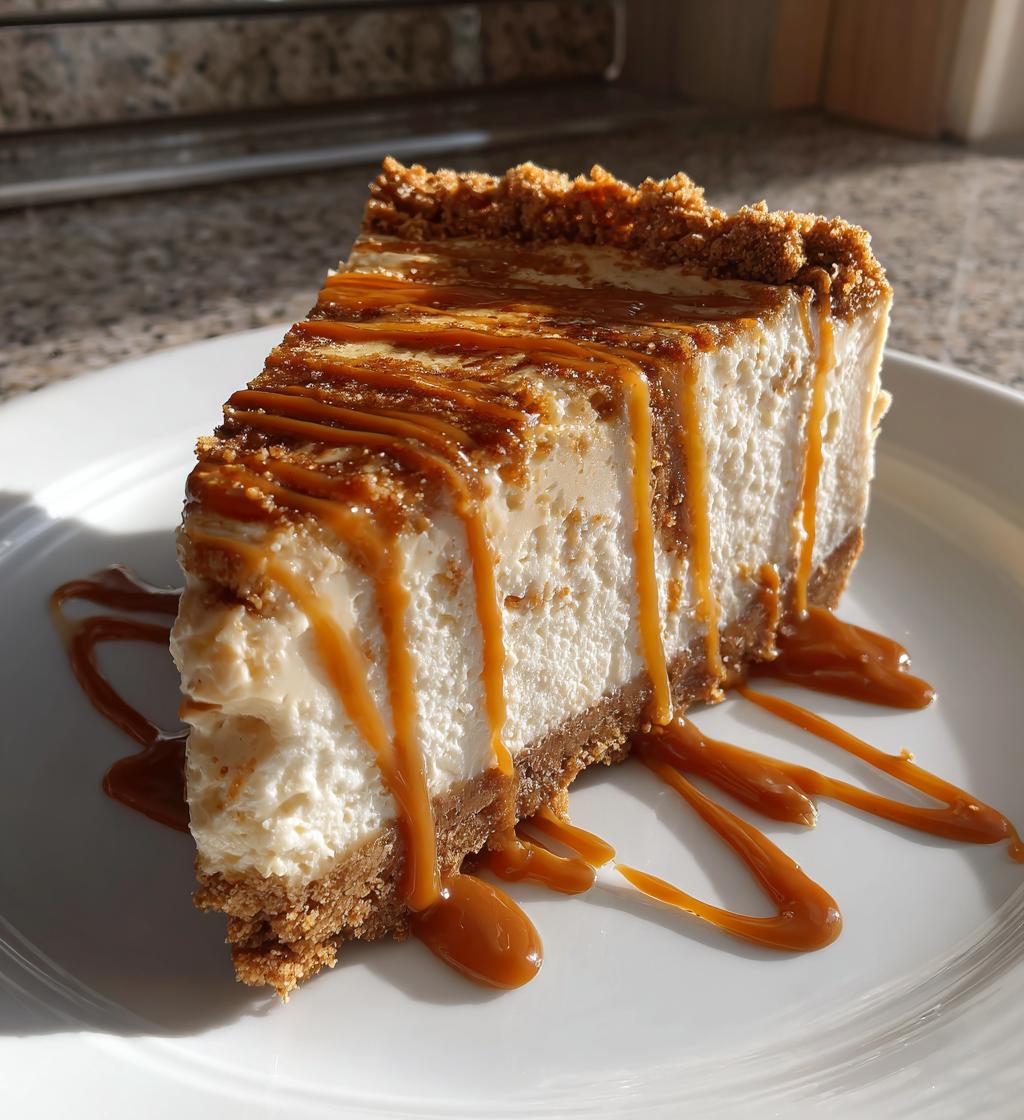
Oh my goodness, let me tell you about the first time I tried No-Bake Biscoff Cheesecake—it was love at first bite! That creamy, dreamy texture combined with the caramelized spice of Biscoff cookies? Absolute magic. After years of making no-bake desserts (and eating way too many slices “for research”), this recipe has become my go-to when I need something impressive without turning on the oven.
What makes this cheesecake special? It’s ridiculously easy—just crush, mix, chill—but tastes like you spent hours in the kitchen. The contrast between the crunchy Biscoff base and that velvety filling gets me every time. Trust me, once you try this, you’ll be making it for every potluck, birthday, or “just because it’s Tuesday” occasion!
Why You’ll Love This No-Bake Biscoff Cheesecake
Let me count the ways this dessert will steal your heart (and probably your waistline):
- No oven needed – Perfect for hot summer days or when you just can’t be bothered to bake
- That Biscoff magic – The caramelized, spiced cookie flavor shines through every creamy bite
- Foolproof texture – Silky smooth filling that sets up perfectly without any fussy water baths
- Instant crowd-pleaser – I’ve yet to meet someone who doesn’t go back for seconds
- Looks fancy – That Biscoff drizzle on top makes it look bakery-worthy with zero effort
Seriously, this cheesecake checks all the boxes – easy, delicious, and always a hit!
Ingredients for No-Bake Biscoff Cheesecake
Here’s everything you’ll need to make this dreamy dessert—trust me, these simple ingredients transform into something magical:
- 250g Biscoff biscuits (about 24 cookies) – crushed into fine crumbs (save a few for decoration if you’re feeling fancy!)
- 100g butter – melted but cooled slightly (I use salted for that extra depth, but unsalted works too)
- 500g full-fat cream cheese – softened to room temperature (this is non-negotiable for that perfect creamy texture)
- 200g icing sugar – sifted to avoid lumps (you can reduce to 180g if you prefer less sweetness)
- 300ml double cream – that’s heavy whipping cream for my US friends, chilled right until whipping
- 1 tsp vanilla extract – the good stuff, not imitation! (I sometimes add a splash more—no one’s judging)
- Biscoff spread – for drizzling (about 3-4 tbsp, but let’s be real—I never measure this part)
Pro tip from my many kitchen experiments: Using full-fat everything makes this cheesecake luxuriously rich. I’ve tried “light” versions and they just don’t set the same way or deliver that melt-in-your-mouth experience!
Equipment You’ll Need
Grab these basics from your kitchen—chances are you’ve already got most of them:
- 20cm springform tin – The removable sides make serving a breeze (and prevent cheesecake casualties!)
- Food processor – For blitzing those Biscoff biscuits to perfect crumbs in seconds (a rolling pin works in a pinch)
- Electric mixer – Hand or stand mixer both work beautifully for that luscious filling
- Silicone spatula – My MVP for scraping every last bit of filling into the tin
That’s it—no fancy gadgets required! Though I won’t stop you if you want to add a piping bag for swirls of extra Biscoff on top.
How to Make No-Bake Biscoff Cheesecake
Okay, let’s get to the fun part—making this dreamy dessert! Don’t let the fancy look fool you; it’s seriously simple. Just follow these steps, and you’ll have a showstopper cheesecake with minimal effort.
Preparing the Biscoff Base
First things first—that irresistible crunchy base! Grab your food processor (or a trusty zip-top bag and rolling pin) and blitz the Biscoff biscuits into fine crumbs. You want them sandy, not chunky—this ensures they’ll hold together beautifully.
Now, pour in your melted butter and mix until it looks like wet sand. Line your springform tin with parchment (just the bottom is fine) and dump in the buttery crumbs. Here’s my secret: use the bottom of a glass to press them down firmly and evenly. Really pack it in—this prevents crumbling when slicing later. Pop it in the fridge to chill for 30 minutes while you make the filling.
Making the Cheesecake Filling
This is where the magic happens! Beat your softened cream cheese (I can’t stress enough how important room temp is—no lumps!) with the icing sugar and vanilla until smooth and fluffy. In another bowl, whip the cold double cream to stiff peaks—it should hold its shape when you lift the whisk.
Now, gently fold the whipped cream into the cream cheese mixture in thirds. Take your time here! Overmixing can deflate the cream, and we want that cloud-like texture. The filling should be thick but still pourable—like a luxurious mousse.
Assembling and Chilling
Pour that luscious filling over your chilled base and smooth the top with a spatula. Here comes the fun part—warm your Biscoff spread slightly (10 seconds in the microwave does the trick) and drizzle it artfully over the top. Swirl it with a toothpick if you’re feeling fancy!
Now, the hardest part—waiting! Chill your cheesecake for at least 4 hours, but overnight is even better. This sets the texture perfectly and lets those Biscoff flavors deepen. When you’re ready to serve, run a warm knife around the edge before releasing the springform sides. Slice, savor, and prepare for compliments!
Tips for Perfect No-Bake Biscoff Cheesecake
After making this cheesecake more times than I can count (purely for “quality control,” of course), I’ve picked up some foolproof tricks:
- Chill that base! Don’t skip the 30-minute fridge time—it prevents crumbly disasters when slicing.
- Full-fat or bust – Low-fat cream cheese and cream just don’t set right. This is dessert—go big or go home!
- Whip it good – Beat the cream until stiff peaks form. If it droops when you lift the whisk, keep going!
- Room temp cream cheese – Leave it out for 2 hours. Cold cheese = lumpy filling (and no one wants that).
- Patience is key – That 4-hour chill isn’t optional. Overnight? Even better for clean slices.
Follow these, and you’ll get that dreamy texture every single time!
Variations and Serving Ideas
Oh, the fun you can have with this recipe! Here are my favorite twists:
- Caramel dream – Drizzle salted caramel over the Biscoff topping for an extra-decadent treat
- Coffee pairing – Serve slices with espresso—the bitterness cuts through the sweetness perfectly
- Peanut butter swap – Replace half the Biscoff spread with smooth peanut butter for a nutty twist
- Mini versions – Make individual cheesecakes in muffin tins (perfect for parties!)
- Crunchy topping – Sprinkle crushed Biscoff biscuits or chopped hazelnuts on top for texture
My Sunday ritual? A slice with strong coffee while pretending I’m at a fancy café. Pure bliss!
Storing and Freezing No-Bake Biscoff Cheesecake
Here’s the scoop on keeping your cheesecake tasting fresh (not that it’ll last long!):
- Fridge life: Covered with clingfilm, it stays perfect for 3 days—if you can resist eating it all at once!
- Freezer friendly: Slice it first, wrap each piece tightly in clingfilm, then foil. Freeze for up to 2 months.
- Thawing tip: Move frozen slices to the fridge overnight—no microwave shortcuts or you’ll lose that perfect texture.
Fun fact: I always stash an extra slice in the freezer for “emergencies.” You know, like Tuesday.
Nutritional Information
Now, I’ll be honest—this is not health food, folks! But hey, everything in moderation, right? The nutritional values below are estimates per slice (about 1/8 of the cheesecake) based on the ingredients I use:
- Calories: Around 450 kcal (worth every bite if you ask me!)
- Sugar: 30g (mostly from the Biscoff and icing sugar—it’s dessert, after all)
- Fat: 35g (that’s what makes it so gloriously creamy)
Important note: These numbers can vary depending on your exact ingredients and portion sizes. Different brands of cream cheese or Biscoff might change things slightly. I’m all about enjoying treats mindfully, so if you’re tracking carefully, definitely calculate based on your specific products!
Frequently Asked Questions
Can I use low-fat cream cheese?
I wouldn’t recommend it—low-fat versions make the filling too soft. Full-fat cream cheese gives that perfect firm-yet-creamy texture we all love. If you must substitute, try a blend of low-fat and mascarpone for better results.
How long should I chill it for firm slices?
At least 4 hours, but overnight is ideal. The longer it chills, the cleaner your slices will be. Pro tip: Dip your knife in hot water and wipe dry between cuts for picture-perfect wedges every time!
Can I make this without a springform tin?
Absolutely! Use a regular cake tin lined with parchment paper (let some hang over the edges). When set, lift the whole cheesecake out using the paper “handles.” Just be extra careful when slicing.
Why did my cheesecake turn out lumpy?
Two likely culprits: cold cream cheese (always soften it!) or overmixing the whipped cream into the filling. Fold gently in thirds until just combined—some streaks are okay!
Can I freeze the whole cheesecake?
You bet! Wrap the chilled cheesecake tightly in clingfilm, then foil. Freeze for up to 2 months. Thaw overnight in the fridge before serving—no one will guess it wasn’t made fresh that day!
Share Your Creation!
Nothing makes me happier than seeing your gorgeous cheesecake creations! Snap a photo of your masterpiece—I want to see those perfect swirls of Biscoff and that dreamy creamy filling. Tag me on Instagram @[yourhandle] or leave a star rating below so I can celebrate your baking win!
Pro tip: Natural light makes those caramel tones pop in photos. And if your slice isn’t Instagram-perfect? Who cares—it’ll still taste incredible! Some of my ugliest cheesecakes have been the most delicious (and disappeared the fastest).
Your feedback helps me create more recipes you’ll love. Did you add a fun twist? Change up the toppings? I’m all ears—drop a comment and let’s geek out about Biscoff together!
Print
Irresistible No-Bake Biscoff Cheesecake in 4 Easy Steps
- Total Time: 4 hrs 50 mins
- Yield: 8 servings 1x
- Diet: Vegetarian
Description
A quick and easy no-bake cheesecake with a Biscoff biscuit base and creamy filling.
Ingredients
- 250g Biscoff biscuits
- 100g butter, melted
- 500g cream cheese, softened
- 200g icing sugar
- 300ml double cream
- 1 tsp vanilla extract
- Biscoff spread for topping
Instructions
- Crush the Biscoff biscuits into fine crumbs.
- Mix the crumbs with melted butter and press into a lined tin.
- Chill the base for 30 minutes.
- Beat the cream cheese, icing sugar, and vanilla until smooth.
- Whip the double cream until thick and fold into the cream cheese mix.
- Spread the filling over the chilled base.
- Drizzle Biscoff spread on top and chill for at least 4 hours.
Notes
- Use full-fat cream cheese for best results.
- Chill the cheesecake overnight for a firmer texture.
- Add extra Biscoff biscuits for decoration.
- Prep Time: 20 mins
- Cook Time: 0 mins
- Category: Dessert
- Method: No-Bake
- Cuisine: International
Nutrition
- Serving Size: 1 slice
- Calories: 450 kcal
- Sugar: 30g
- Sodium: 250mg
- Fat: 35g
- Saturated Fat: 20g
- Unsaturated Fat: 12g
- Trans Fat: 0g
- Carbohydrates: 40g
- Fiber: 1g
- Protein: 5g
- Cholesterol: 80mg
Keywords: no-bake cheesecake, Biscoff dessert, easy dessert
")
")
")
")