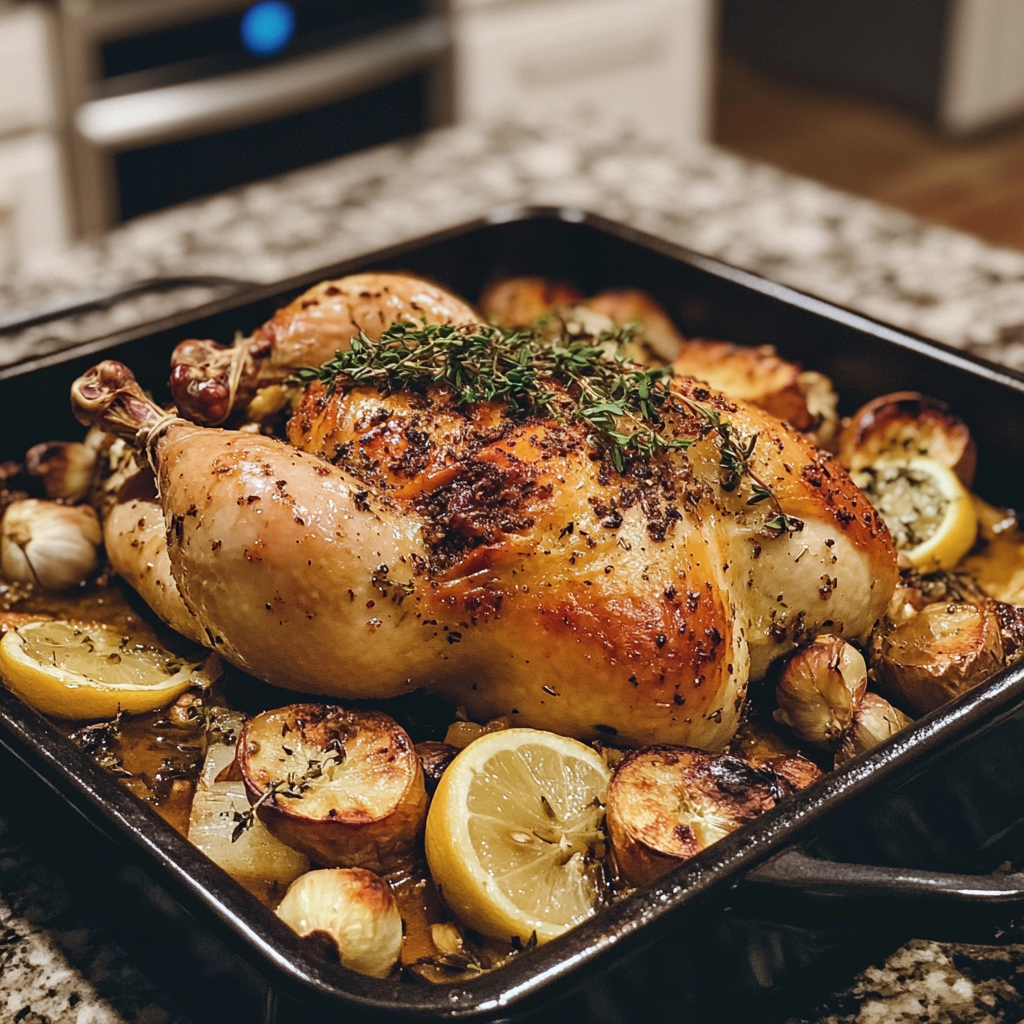
As a passionate home cook, there’s something truly magical about roasting a whole chicken. The aroma that fills the kitchen as it cooks is like a warm hug, inviting everyone to gather around the table. I remember the first time I attempted this culinary adventure. I was nervous, but the end result was a golden-brown masterpiece that made my heart swell with pride. Roasting a whole chicken is not just about the meal; it’s about creating memories and sharing love through food.
Ingredients for Roasting the Perfect Whole Chicken
When it comes to roasting the perfect whole chicken, the ingredients you choose can make all the difference. I’ve learned that simplicity often leads to the most delicious results. Let’s dive into the essential ingredients that will elevate your chicken from ordinary to extraordinary!
First and foremost, you’ll need a whole chicken. I usually opt for one that weighs between 4 to 5 pounds. This size is perfect for roasting, as it cooks evenly and provides enough meat to feed a family or a small gathering. When selecting your chicken, look for one that is fresh and has a plump appearance. If you can, choose organic or free-range options for the best flavor and quality.
Next up is olive oil. Just two tablespoons will do the trick! This golden liquid not only helps the skin crisp up beautifully but also adds a rich flavor. I love drizzling it all over the chicken, making sure every nook and cranny is coated. It’s like giving your chicken a luxurious spa treatment!
Now, let’s talk about seasoning. Salt and black pepper are your best friends here. A tablespoon of salt and a teaspoon of black pepper will enhance the chicken’s natural flavors. I always make sure to season both the inside and outside of the chicken. It’s like giving it a warm, flavorful hug!
Don’t forget the aromatics! Four smashed garlic cloves and a handful of fresh herbs—like rosemary, thyme, or parsley—will infuse your chicken with delightful flavors. I love the way the herbs perfume the kitchen as they roast, creating an inviting atmosphere that makes everyone’s mouth water.
Lastly, we can’t overlook the lemon. Just one lemon, halved, adds a bright, zesty note that balances the richness of the chicken. When it roasts, the lemon releases its juices, creating a deliciously tangy flavor that seeps into the meat. It’s like a burst of sunshine in every bite!
So, to recap, here’s a quick list of the ingredients you’ll need:
- Whole chicken (4-5 lbs)
- Olive oil (2 tablespoons)
- Salt (1 tablespoon, or to taste)
- Black pepper (1 teaspoon, or to taste)
- Garlic (4 cloves, smashed)
- Fresh herbs (a handful, such as rosemary, thyme, or parsley)
- Lemon (1, halved)
With these ingredients in hand, you’re well on your way to creating a mouthwatering roasted chicken that will impress your family and friends. Let’s move on to the tools you’ll need to make this culinary adventure a success!
Tools Needed for Roasting the Perfect Whole Chicken
As I’ve journeyed through the world of home cooking, I’ve discovered that having the right tools can make all the difference in achieving that perfect roast. It’s like having a trusty sidekick by your side, ready to assist you in creating culinary magic. Let me share with you the essential tools I always keep handy when roasting a whole chicken.
First on my list is a sturdy roasting pan. I prefer one with high sides to catch all those delicious juices that drip down as the chicken cooks. A good roasting pan not only holds the chicken securely but also allows for even heat distribution. If you don’t have a roasting pan, a large baking sheet with raised edges will work just fine. Just make sure to line it with aluminum foil for easy cleanup!
Next, I can’t stress enough the importance of a reliable meat thermometer. This little gadget is a game-changer! It takes the guesswork out of cooking and ensures your chicken is perfectly done. I love inserting the thermometer into the thickest part of the thigh, avoiding the bone, to get an accurate reading. When it hits 165°F (75°C), I know my chicken is ready to shine!
Another tool I find invaluable is a pair of kitchen tongs. They’re perfect for maneuvering the chicken in and out of the oven without burning my fingers. Plus, they help me baste the chicken with its own juices, ensuring every bite is packed with flavor. It’s like giving your chicken a little love while it cooks!
Don’t forget about a carving knife and a cutting board. Once your chicken has rested and is ready to be served, a sharp carving knife will make slicing through the tender meat a breeze. I always use a sturdy cutting board to catch any juices that may escape during carving. It’s all about keeping the mess to a minimum while maximizing flavor!
Lastly, I recommend having some aluminum foil on hand. It’s great for tenting the chicken if it starts to brown too quickly. This way, you can ensure the meat stays juicy while the skin gets that beautiful golden color. It’s like a protective blanket for your chicken!
To summarize, here’s a quick list of the tools you’ll need:
- Sturdy roasting pan or large baking sheet
- Reliable meat thermometer
- Kitchen tongs
- Carving knife
- Cutting board
- Aluminum foil
With these tools in your kitchen arsenal, you’re all set to embark on your roasting adventure. Each tool plays a vital role in ensuring your chicken turns out succulent and delicious. Now, let’s move on to the step-by-step preparation that will lead you to the perfect roast!
Step-by-Step Preparation for Roasting the Perfect Whole Chicken
Now that we have our ingredients and tools ready, it’s time to dive into the step-by-step preparation for roasting the perfect whole chicken. I find that following these steps not only makes the process smoother but also adds to the excitement of creating a delicious meal. Let’s get started!
Step 1: Preparing the Chicken
First things first, let’s prepare our chicken. I always start by removing the chicken from its packaging. It’s like unwrapping a gift! Once it’s out, I pat it dry with paper towels. This step is crucial because moisture is the enemy of crispy skin. Imagine trying to fry a wet piece of chicken—it just won’t work! So, I make sure to get it nice and dry.
Next, I check the cavity of the chicken for any leftover giblets or neck. If I find any, I remove them and set them aside. Sometimes, I toss them into a pot to make a flavorful broth later. It’s all about maximizing every part of the chicken!
Step 2: Seasoning the Chicken
Now comes the fun part—seasoning! I drizzle the olive oil all over the chicken, making sure to coat it evenly. It’s like giving the chicken a warm, golden hug. Then, I sprinkle salt and black pepper generously, both inside and out. I always say, “Seasoning is key!” It’s what brings out the natural flavors of the chicken.
After that, I take a moment to stuff the cavity with the smashed garlic cloves, fresh herbs, and halved lemon. As I do this, I can already imagine the wonderful aroma that will fill my kitchen. It’s like a flavor explosion waiting to happen!
Step 3: Prepping the Oven
With the chicken prepped and seasoned, it’s time to get the oven ready. I preheat it to 425°F (220°C). This high temperature is essential for achieving that crispy, golden skin we all crave. While the oven heats up, I take a moment to admire my beautifully seasoned chicken. It’s like a work of art, just waiting to be transformed into a delicious meal!
Step 4: Roasting the Chicken
Once the oven is preheated, I carefully place the chicken breast-side up in my trusty roasting pan. I love hearing that sizzle as it hits the hot pan! It’s like the chicken is saying, “Let’s get this party started!” I roast it for about 1 hour and 15 minutes, but I always keep an eye on it. Halfway through, I like to baste the chicken with its own juices. It’s a little extra love that ensures every bite is juicy and flavorful.
Step 5: Checking for Doneness
As the roasting time approaches, I grab my trusty meat thermometer. I insert it into the thickest part of the thigh, avoiding the bone. When it reads 165°F (75°C), I know my chicken is ready to come out of the oven. It’s like a little victory dance in my kitchen! If it’s not quite there yet, I give it a few more minutes and check again. Patience is key here!
Once it’s done, I remove the chicken from the oven and let it rest for about 15-20 minutes. This resting period is crucial as it allows the juices to redistribute throughout the meat. Trust me, you don’t want to skip this step! It’s like letting the chicken take a well-deserved break before the big reveal.
And there you have it! With these steps, you’re well on your way to roasting the perfect whole chicken. The anticipation builds as you prepare to carve and serve it. Let’s move on to some serving suggestions that will make your meal even more delightful!

Serving Suggestions for Roasting the Perfect Whole Chicken
Now that we’ve successfully roasted our chicken, it’s time to think about how to serve it. I believe that a delicious meal is not just about the main dish; it’s about the entire experience. The right side dishes and sauces can elevate your roasted chicken from great to absolutely unforgettable. Let me share some of my favorite serving suggestions that will make your dinner a hit!
Side Dishes to Complement Your Chicken
When it comes to side dishes, I like to keep things simple yet flavorful. Roasted vegetables are always a winner in my kitchen. I often toss carrots, potatoes, and Brussels sprouts with olive oil, salt, and pepper, then roast them alongside the chicken. The veggies soak up all those delicious juices, creating a symphony of flavors on the plate. It’s like a colorful garden that adds vibrancy to your meal!
Another favorite of mine is creamy mashed potatoes. There’s something so comforting about a fluffy mound of potatoes, especially when they’re smothered in gravy. I like to add a touch of garlic and butter for extra richness. It pairs perfectly with the juicy chicken, making every bite a delightful experience.
If you’re looking for something lighter, a fresh salad is a fantastic option. I love mixing greens with cherry tomatoes, cucumbers, and a zesty vinaigrette. The crunch of the vegetables adds a refreshing contrast to the tender chicken. It’s like a burst of freshness that brightens up the entire meal!
To sum it up, here are some side dishes that pair beautifully with roasted chicken:
- Roasted vegetables (carrots, potatoes, Brussels sprouts)
- Creamy mashed potatoes
- Fresh garden salad with vinaigrette
- Garlic bread or dinner rolls
Sauces and Gravies for Roasted Chicken
No roasted chicken is complete without a delicious sauce or gravy to drizzle on top. I love making a simple pan gravy using the drippings from the roasting pan. After removing the chicken, I place the pan on the stovetop and add a bit of flour to create a roux. Then, I whisk in some chicken broth and let it simmer until it thickens. The result is a rich, savory gravy that enhances the flavors of the chicken. It’s like a warm hug in a bowl!
If you’re in the mood for something a bit different, consider a tangy chimichurri sauce. This vibrant green sauce made with parsley, garlic, vinegar, and olive oil adds a fresh kick to the roasted chicken. I love drizzling it over the chicken just before serving. It’s like a burst of flavor that dances on your taste buds!
Here’s a quick list of sauces and gravies that can elevate your roasted chicken:
- Homemade pan gravy
- Chimichurri sauce
- Honey mustard glaze
- Barbecue sauce for a smoky twist
With these serving suggestions, your roasted chicken dinner will be a feast for the senses. The combination of flavors, textures, and colors will create a memorable meal that your family and friends will rave about. Now, let’s move on to some tips that will help you perfect your roasting technique!
Tips for Roasting the Perfect Whole Chicken
As I’ve honed my skills in the kitchen, I’ve learned that even the smallest details can make a big difference when it comes to roasting a whole chicken. It’s like the secret ingredients that turn a good dish into a great one! Here, I’ll share some valuable tips that will help you avoid common pitfalls and ensure your chicken turns out perfectly every time. Let’s dive in!
Common Mistakes to Avoid
One of the biggest mistakes I see home cooks make is not letting the chicken come to room temperature before roasting. I always take my chicken out of the fridge about 30 minutes before cooking. This simple step helps the chicken cook more evenly, resulting in juicy meat and crispy skin. Imagine trying to roast a cold chicken—it’s like trying to run a marathon in winter boots!
Another common error is under-seasoning. I can’t stress enough how important it is to season generously. Don’t be shy with the salt and pepper! It’s what brings out the chicken’s natural flavors. I always remind myself that seasoning is like a warm hug for the chicken, making it feel loved and appreciated.
Also, be cautious about opening the oven door too often. Each time you peek inside, you let out heat, which can lead to uneven cooking. I try to resist the urge to check on my chicken until it’s almost done. Instead, I rely on my trusty meat thermometer to tell me when it’s ready. It’s like having a little kitchen assistant that keeps me on track!
Lastly, don’t skip the resting period after roasting. I know it’s tempting to dive right in, but letting the chicken rest for 15-20 minutes is crucial. This allows the juices to redistribute, ensuring every bite is moist and flavorful. Think of it as giving your chicken a well-deserved spa day before the big reveal!
How to Store Leftovers
After enjoying a delicious roasted chicken dinner, I always find myself with some tasty leftovers. Storing them properly is key to keeping that flavor intact! I like to carve any remaining meat off the bones and place it in an airtight container. This way, I can easily use it for sandwiches, salads, or soups later in the week. It’s like having a little treasure trove of deliciousness waiting for me!
For the bones and carcass, I recommend saving them to make homemade chicken broth. I simply place them in a pot, cover with water, and add some veggies and herbs. After simmering for a few hours, I have a rich, flavorful broth that’s perfect for soups or risottos. It’s a great way to minimize waste and maximize flavor!
When it comes to storing leftovers, I always label my containers with the date. This helps me keep track of how long they’ve been in the fridge. Generally, I try to use leftover chicken within 3-4 days. If I can’t finish it in time, I’ll freeze it for later use. Just make sure to wrap it tightly to prevent freezer burn. It’s like saving a little piece of comfort for a rainy day!
With these tips in mind, you’re well on your way to mastering the art of roasting a whole chicken. Avoiding common mistakes and knowing how to store leftovers will ensure that your culinary adventure is both successful and satisfying. Now, let’s move on to some frequently asked questions that can help clarify any lingering doubts you may have!
FAQs about Roasting the Perfect Whole Chicken
How long does it take to roast a whole chicken?
Ah, the age-old question! The cooking time for roasting a whole chicken can vary based on its size. Generally, I find that a chicken weighing between 4 to 5 pounds takes about 1 hour and 15 minutes to 1 hour and 30 minutes at 425°F (220°C). However, I always recommend using a meat thermometer to check for doneness. When the internal temperature reaches 165°F (75°C) in the thickest part of the thigh, you know it’s ready to come out of the oven. It’s like a little victory dance in the kitchen when I see that perfect temperature!
What temperature should I roast a whole chicken at?
For the best results, I always roast my chicken at 425°F (220°C). This high temperature helps achieve that crispy, golden skin we all crave while ensuring the meat stays juicy and tender. It’s like giving your chicken a warm, inviting hug that makes it feel right at home in the oven! If you prefer a slower roast, you can lower the temperature to 375°F (190°C), but be prepared for a longer cooking time. Just remember, the key is to keep an eye on that meat thermometer!
Should I cover the chicken while roasting?
Covering the chicken while roasting is a bit of a personal preference. I usually don’t cover mine, as I love that crispy skin that develops during cooking. However, if you notice that the chicken is browning too quickly, you can tent it with aluminum foil. This way, you can protect the skin while allowing the meat to cook through. It’s like giving your chicken a cozy blanket to keep it warm while it finishes roasting!
How can I ensure my chicken is juicy?
Juiciness is the holy grail of roasted chicken! To ensure your chicken stays moist, I always recommend a few key steps. First, let the chicken come to room temperature before roasting. This helps it cook evenly. Second, don’t skimp on the seasoning! Generously seasoning both the inside and outside of the chicken enhances its natural flavors. Lastly, remember to let the chicken rest after roasting. This resting period allows the juices to redistribute throughout the meat, ensuring every bite is succulent and flavorful. It’s like giving your chicken a well-deserved spa day before the big reveal!
With these FAQs answered, I hope you feel more confident in your roasting journey. Remember, cooking is all about experimenting and finding what works best for you. Now, let’s wrap up our culinary adventure with some final thoughts on roasting the perfect whole chicken!
Conclusion on Roasting the Perfect Whole Chicken
As I reflect on my journey of roasting the perfect whole chicken, I can’t help but feel a sense of accomplishment and joy. It’s more than just a cooking technique; it’s a celebration of flavors, aromas, and the love that goes into preparing a meal for family and friends. Each step, from selecting the freshest ingredients to the final carving, is a part of a beautiful ritual that brings people together.
Print
Roasting the Perfect Whole Chicken: Unlock Juicy Flavor!
- Total Time: 1 hour 45 minutes
- Yield: 4-6 servings
- Diet: Gluten Free
Description
A comprehensive guide to roasting the perfect whole chicken, focusing on ingredients, tools, preparation steps, serving suggestions, and tips for success.
Ingredients
- Whole chicken (4-5 lbs)
- Olive oil (2 tablespoons)
- Salt (1 tablespoon, or to taste)
- Black pepper (1 teaspoon, or to taste)
- Garlic (4 cloves, smashed)
- Fresh herbs (a handful, such as rosemary, thyme, or parsley)
- Lemon (1, halved)
Instructions
- Prepare the chicken by removing it from packaging and patting it dry.
- Season the chicken with olive oil, salt, and black pepper, both inside and out.
- Stuff the cavity with smashed garlic, fresh herbs, and halved lemon.
- Preheat the oven to 425°F (220°C).
- Place the chicken breast-side up in a roasting pan and roast for about 1 hour and 15 minutes.
- Baste the chicken halfway through cooking with its own juices.
- Check for doneness using a meat thermometer; it should read 165°F (75°C).
- Let the chicken rest for 15-20 minutes before carving.
Notes
- Let the chicken come to room temperature before roasting for even cooking.
- Season generously to enhance flavor.
- Avoid opening the oven door frequently to maintain heat.
- Rest the chicken after roasting to keep it juicy.
- Prep Time: 30 minutes
- Cook Time: 1 hour 15 minutes
- Category: Main Course
- Method: Roasting
- Cuisine: American
Nutrition
- Serving Size: 1/6 of chicken
- Calories: 350
- Sugar: 0g
- Sodium: 600mg
- Fat: 20g
- Saturated Fat: 5g
- Unsaturated Fat: 15g
- Trans Fat: 0g
- Carbohydrates: 0g
- Fiber: 0g
- Protein: 40g
- Cholesterol: 120mg
Keywords: roast chicken, whole chicken, cooking, recipe, home cooking

")
")
")
")