Oh my gosh, have you ever had that moment where you’re craving juicy, crispy-skinned chicken but dread waiting forever for it to cook? That was me every Sunday until I discovered spatchcocking – my game-changing secret for perfect oven-roasted chicken every single time. I’ll never forget the first time I tried it; I was skeptical about cutting out the backbone (it felt a bit rebellious!), but wow, what a difference it made.
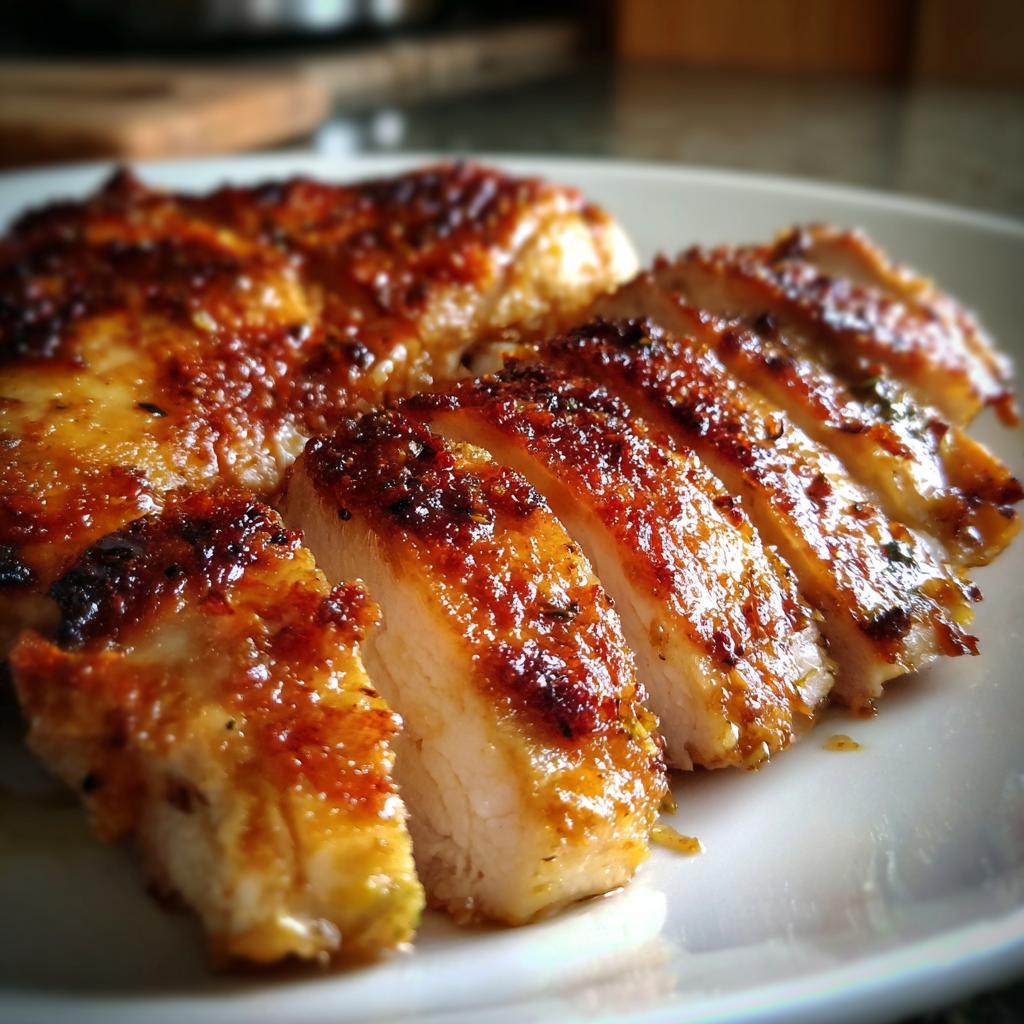
Spatchcock chicken in the oven cooks so evenly – no more dry breast meat while waiting for the thighs to finish! The flattened shape means all that glorious skin gets maximum crispiness, and the cooking time gets cut nearly in half. My family now calls this “magic chicken” because it’s consistently delicious and ready in about half the time of traditional roasting methods.
What I love most is how simple it really is – just one slightly daring snip with kitchen shears (careful, they’re sharp!), a good seasoning rub, and your oven does the rest. The first time I served this to friends, they thought I’d spent hours on some fancy chef technique. Nope! Just smart, efficient cooking that delivers amazing results.
Why You’ll Love This Spatchcock Chicken Oven Recipe
This method will change your chicken game forever – here’s why:
- Faster cooking: Flattening means heat reaches all parts evenly, cutting roasting time nearly in half
- Crispy skin everywhere: No more soggy spots – that flattened shape lets every inch get golden and crackly
- Perfect doneness: Say goodbye to dry breasts and undercooked thighs – everything finishes at the same time
- Simple flavors: Just oil, salt, pepper and a few pantry spices make magic happen
- Impressive results: Looks like a fancy restaurant dish with minimal effort
Trust me, once you try spatchcocking, you’ll never roast a whole chicken the old way again!
Ingredients for Spatchcock Chicken Oven
Gathering the right ingredients makes all the difference with this recipe – and the best part is, you probably have most of them already! Here’s exactly what you’ll need:
- 1 whole chicken (3-4 lbs): Pat it dry with paper towels – this is the secret to getting that golden crispy skin we all crave
- 2 tbsp olive oil: Just enough to help the seasoning stick and promote browning
- 1 tsp each salt, black pepper, garlic powder, and paprika: My go-to spice blend that never fails to impress
- 1 lemon, halved: Tuck these under the chicken – they’ll steam and infuse amazing flavor
- 4 sprigs fresh thyme or rosemary: Either works beautifully, but I’m partial to thyme’s lemony notes with chicken
See? Nothing fancy – just simple ingredients that work together to create something truly special. Now let’s get cooking!
Equipment You’ll Need
You won’t need anything fancy for this spatchcock chicken recipe – just a few kitchen basics that you probably already have:
- Cutting board: A sturdy one that won’t slip while you’re working
- Kitchen shears: For that one slightly scary (but oh-so-satisfying) backbone removal
- Roasting pan or baking sheet: Anything oven-safe that gives the chicken some breathing room
- Meat thermometer: Non-negotiable for perfect doneness every time
Bonus items if you want them: parchment paper for easier cleanup, or a cast iron skillet for extra crispy skin. That’s it – no fancy tools required!
How to Make Spatchcock Chicken in the Oven
Now for the fun part – let’s turn that whole chicken into the juiciest, crispiest masterpiece you’ve ever made! I’ve broken it down into simple steps that even first-timers can nail on the first try.
Step 1: Prep the Chicken
Place your chicken breast-side down on a sturdy cutting board. Grab those kitchen shears (careful, they’re sharp!) and cut along one side of the backbone – you’ll feel the ribs as you go. Repeat on the other side and remove the backbone completely (save it for stock!). Flip the chicken over and press down firmly on the breastbone until you hear a slight crack and the chicken lies flat. See? Not so scary after all!
Step 2: Season and Roast
Rub that beautiful bird all over with olive oil – get it in every nook and cranny! Then sprinkle your spice mix evenly over both sides, rubbing it in gently. Nestle the lemon halves and herbs underneath the chicken (this creates a delicious steaming effect). Pop it in a 425°F oven on the middle rack and roast for about 40-50 minutes. The smell will drive you crazy!
Step 3: Rest and Carve
When your thermometer hits 165°F at the thickest part of the thigh, pull that golden beauty out and let it rest for a full 10 minutes – this keeps all those precious juices inside where they belong. Then carve it just like you would a regular roast chicken, marveling at how evenly cooked every piece is!
Tips for Perfect Spatchcock Chicken Oven
After making this dozens of times (yes, my family requests it weekly!), I’ve learned a few tricks that guarantee perfection:
- Pat that skin dry: Use paper towels to thoroughly dry the chicken before seasoning – moisture is the enemy of crispiness!
- Preheat properly: Always let your oven fully reach 425°F before the chicken goes in – this jumpstarts the crisping process
- Thermometer placement: Check the thickest part of the thigh, avoiding bone, for the most accurate reading
- Don’t toss the backbone: Freeze it with other chicken scraps for the most flavorful homemade stock later
- Resting is non-negotiable: Those 10 minutes let juices redistribute – cut too soon and they’ll all run out!
Follow these simple tips and you’ll have restaurant-quality chicken that’ll make you feel like a kitchen rockstar!
Serving Suggestions
Oh, the possibilities with this spatchcock chicken! My absolute favorite way to serve it is with crispy roasted potatoes – they soak up all those delicious pan juices. A simple green salad cuts through the richness perfectly, or go all out with garlic mashed potatoes and honey-glazed carrots. Honestly, it’s so flavorful that even just some crusty bread makes a perfect partner!
Storing and Reheating
Leftovers? (As if that ever happens in my house!) If you’re lucky enough to have some, store it in an airtight container in the fridge for up to 3 days. When reheating, skip the microwave – it’ll turn that glorious crispy skin soggy. Instead, pop it in a 350°F oven for about 10-15 minutes until warmed through. The skin will crisp right back up, almost like new! Pro tip: drizzle a tiny bit of chicken broth over the meat before reheating to keep it extra juicy.
Spatchcock Chicken Oven FAQ
Over the years, I’ve gotten so many great questions about this recipe – here are the ones that come up most often with my tried-and-true answers:
Can I use dried herbs instead of fresh? Absolutely! Just use about 1/3 the amount (so 1 tsp dried thyme instead of 1 tbsp fresh). The flavor will be slightly more concentrated, but still delicious. I do this all the time when my herb garden isn’t cooperating!
How can I get the skin even crispier? If you’re a crunch fanatic like me, after roasting, turn your oven to broil and let the chicken crisp up for just 1-2 minutes – watch it like a hawk though! That high heat works magic on the skin.
Should I brine the chicken first? You can if you want extra insurance against dryness, but honestly, with spatchcocking, it’s not necessary. If you do brine, reduce the salt in the seasoning rub. My quick tip? A simple 2-hour brine in buttermilk makes the meat incredibly tender.
Nutrition Information
Here’s the nutritional breakdown per serving (about 1/4 of the chicken) – keep in mind these values may vary slightly based on your exact ingredients and portion sizes:
- Calories: 320
- Protein: 35g
- Fat: 18g (4g saturated)
- Carbs: 1g
- Sodium: 450mg
Not bad for such a satisfying meal, right? And remember – most of that fat is from the chicken skin, which is where all that amazing flavor lives!
Okay, now it’s your turn – I can’t wait for you to experience the magic of spatchcock chicken in your own oven! Once you try this method, you’ll understand why it’s become my absolute go-to way to roast chicken. I’m telling you, that first bite of perfectly cooked, crispy-skinned goodness will make you wonder why you ever bothered with whole birds the old way.
When you make it (and you totally should tonight!), come back and let me know how it turned out. Was the skin as crackly as you hoped? Did your family go crazy for it like mine does? I’m always tweaking little things with this recipe, so if you discover any brilliant improvements, share them in the comments! Happy spatchcocking, my friend – may your chicken always be juicy and your skin forever crispy!
Print
Juicy Spatchcock Chicken Oven Recipe in Just 40 Minutes
- Total Time: 1 hour
- Yield: 4 servings 1x
- Diet: Low Lactose
Description
A simple and efficient way to cook a whole chicken by spatchcocking it and roasting in the oven for even cooking and crispy skin.
Ingredients
- 1 whole chicken (3–4 lbs)
- 2 tbsp olive oil
- 1 tsp salt
- 1 tsp black pepper
- 1 tsp garlic powder
- 1 tsp paprika
- 1 lemon, halved
- 4 sprigs fresh thyme or rosemary
Instructions
- Preheat oven to 425°F (220°C).
- Place chicken breast-side down on a cutting board.
- Use kitchen shears to cut along both sides of the backbone and remove it.
- Flip chicken over and press down firmly to flatten.
- Rub chicken with olive oil and season with salt, pepper, garlic powder, and paprika.
- Place lemon halves and herbs under the chicken.
- Roast for 40-50 minutes until internal temperature reaches 165°F (74°C).
- Rest for 10 minutes before carving.
Notes
- Pat chicken dry before seasoning for crispier skin.
- Use a meat thermometer for accurate doneness.
- Save the backbone for making stock.
- Prep Time: 15 minutes
- Cook Time: 45 minutes
- Category: Main Course
- Method: Roasting
- Cuisine: American
Nutrition
- Serving Size: 1/4 chicken
- Calories: 320
- Sugar: 0g
- Sodium: 450mg
- Fat: 18g
- Saturated Fat: 4g
- Unsaturated Fat: 12g
- Trans Fat: 0g
- Carbohydrates: 1g
- Fiber: 0g
- Protein: 35g
- Cholesterol: 110mg
Keywords: spatchcock chicken, roast chicken, oven chicken, easy chicken recipe

")
")
")
")